Thymeleaf 介紹
1.前言
SpringBoot提供了大量模板引擎的支持,如FreeMarker、Groovy、Thymeleaf、Velocity和Mustache等,Spring Boot推薦使用Thymeleaf作為模板引擎,因為Thymeleaf提供了完美的Spring MVC的支持。
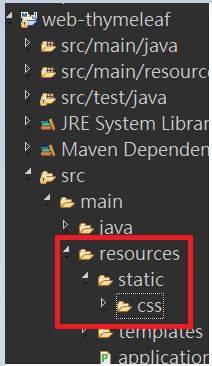
*如果需要引入js、css、images等資源,Thymeleaf默認讀取的是resources下的static目錄*
2.建立專案
2.1 建立 Spring Boot 專案
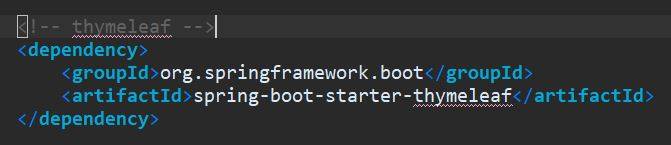
2.2 在建立專案時在 template engine 將 Thymeleaf 勾選起來,或是之後在pom.xml手動將dependency加上
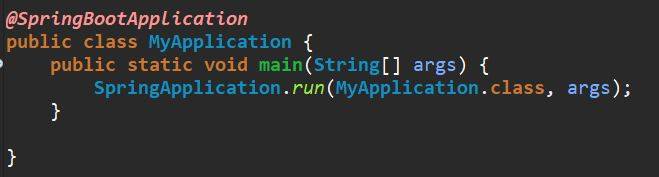
2-3 建立class並使用@SpringBootApplication進行註釋,在IDE中,運行此class以啟動整個Web
3-3 建立controller
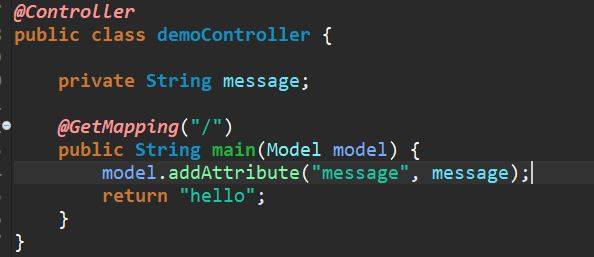
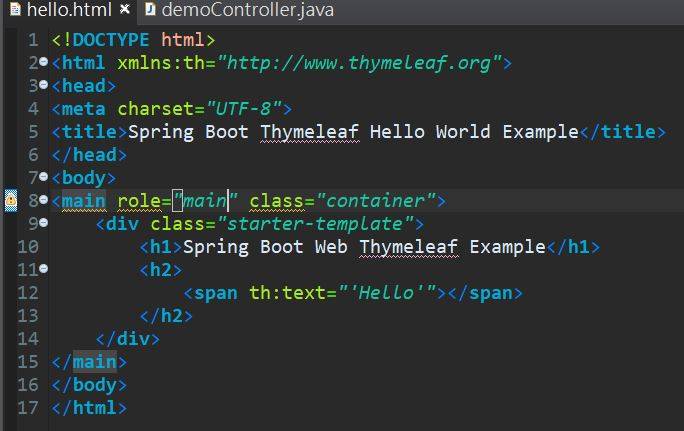
3-4 建立Thymeleaf頁面,須放在src/main/resources/templates/,Contoller Class return hello,所以html名稱要hello
3-5 建立springBoot application.properties,路徑為src/main/resources/application.properties
3.Thymeleaf功能(th開頭)
3-1 th:text:顯示文字,也可以用.properties設定要顯示的文字
ex.th:text="''"
![]()
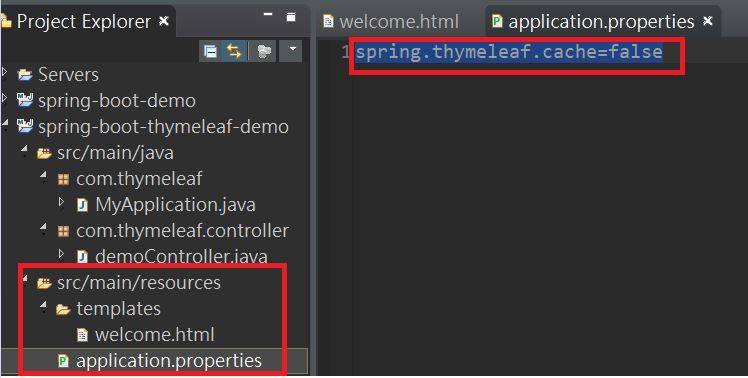
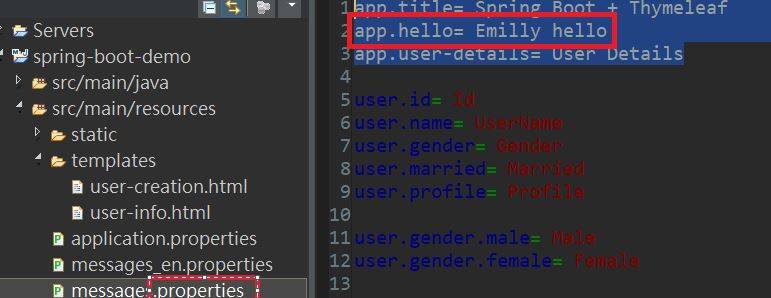
ex.th:text="#{ }"
![]()
.properties
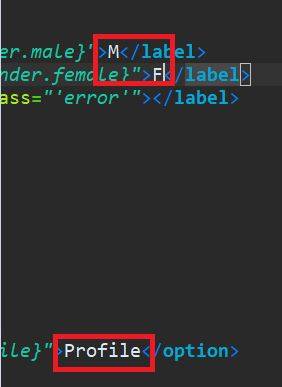
3-2 th:if:用來判斷表單驗證有沒有錯誤,如果有錯誤則顯示,無錯誤則不顯示
![]()
th:unless:與th:if相反,只有表達式中的條件不成立,才會顯示其內容
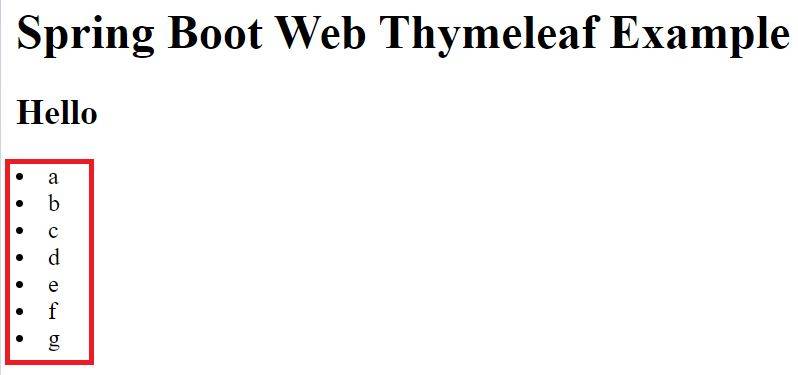
3-3 th:each:for循環
Controller層
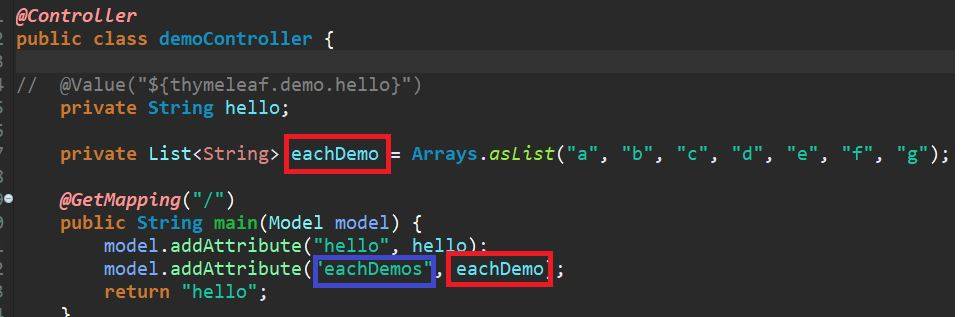
html層

呈現結果
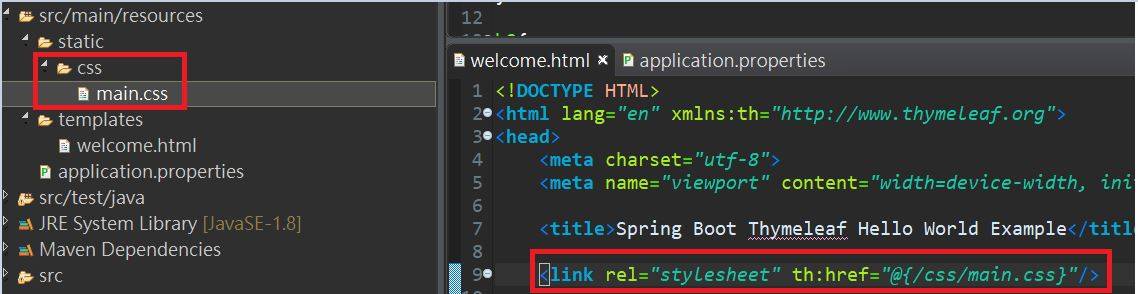
3-4 th:href:1.寫法為th:href="@{值}" 2.引入css語法如下
4.結論
相較於傳統開發前端技術,Thymeleaf幾乎都可以做到,且Thymeleaf不管在有網路或無網路環境下皆可執行,即可讓使用者查看靜態頁面效果,也可以讓程式設計師在伺服器查看帶數據的動態頁面效果。
以下例子可以看出,動態打開呈現的是後台傳過來的資訊,不再顯示標籤內的數據,這個就可以做到前後端分離,和jsp差不多,有使用springBoot的話也沒試過Thymeleaf的話,不妨試試看springBoot+Thymeleaf。
4-1 訪問local網頁

4-2 在資料夾中直接打開網頁,也就是靜態頁面
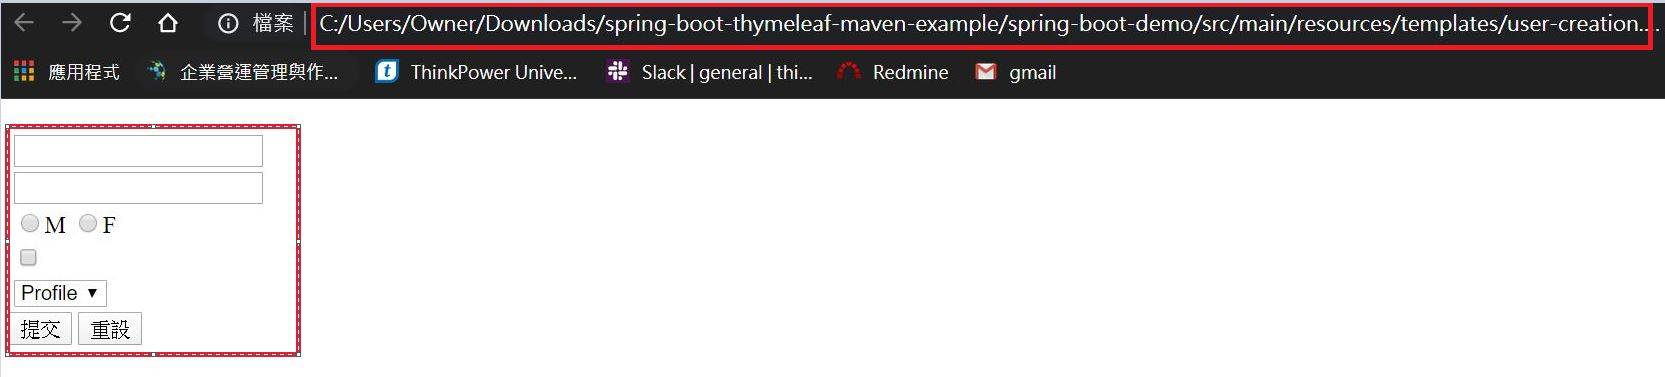
這邊會看到的是靜態頁面顯示出標籤中的內容