Practical Guide with React Testing Library and Jest

♠ Introduction
Nowadays, writting tests is super important for software development. It helps us to increase productivity which allow us to ship quality code faster. In this article will demonstrate how to use Jest & React Testing Library to write tests to test your component.
♠ Type of Tests
♦ End to End:
Spin up your application and simualting user behaviour.
Its kind of like a robot help to perform a task in your application
♦ Integration:
Verify that multiple units work together
♦ Unit:
Verify the functionality of a single function / component
♦ Static:
Catch typos and errors while writting code
♠ A Jest Test
const expected = true;
const actual = false;

test("it works", () => {
    expect(actual).toBe(expected);
});
test - Keyword of Jest runner. Jest will look for the test and execute the function into it.
expect - Assert condition. Expect the condition to be a certain value. Instead of toBe, jest have other helpful method when testing different kinds of DOM object.
♠ Jest Output
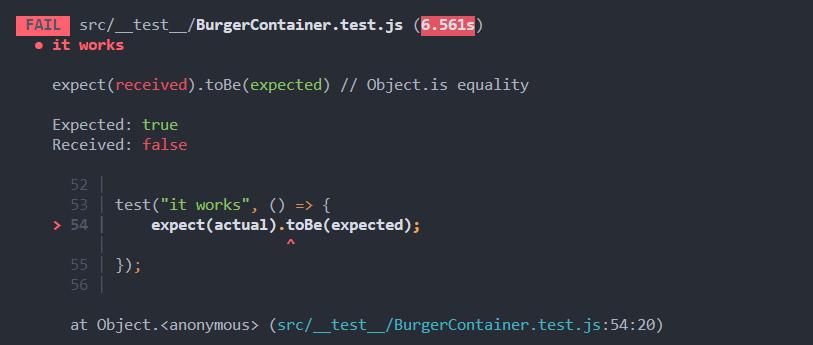
This is the Jest test output. In my opinion, the output is more helpful based on the exception given. Based on the output can determine that what are the expected return to be, and what is the actual result that received after running the test in the function.
♠ Principles of Tests
♦ Arrange
The render method renders a React element into the DOM and returns utility functions for testing the component.
const { getByText, queryAllByTestId, getByTestId, queryByText } = renderSubject({});
♦ Act
The fireEvent method allows you to fire events to simulate user actions.
fireEvent.click(getByTestId("more-button-meat"));
♦ Assert
Get the result as expected (Using Jest)
expect(queryAllByTestId("ingredient-meat").length).toBe(1);
♠ Getting Started to Writting Test
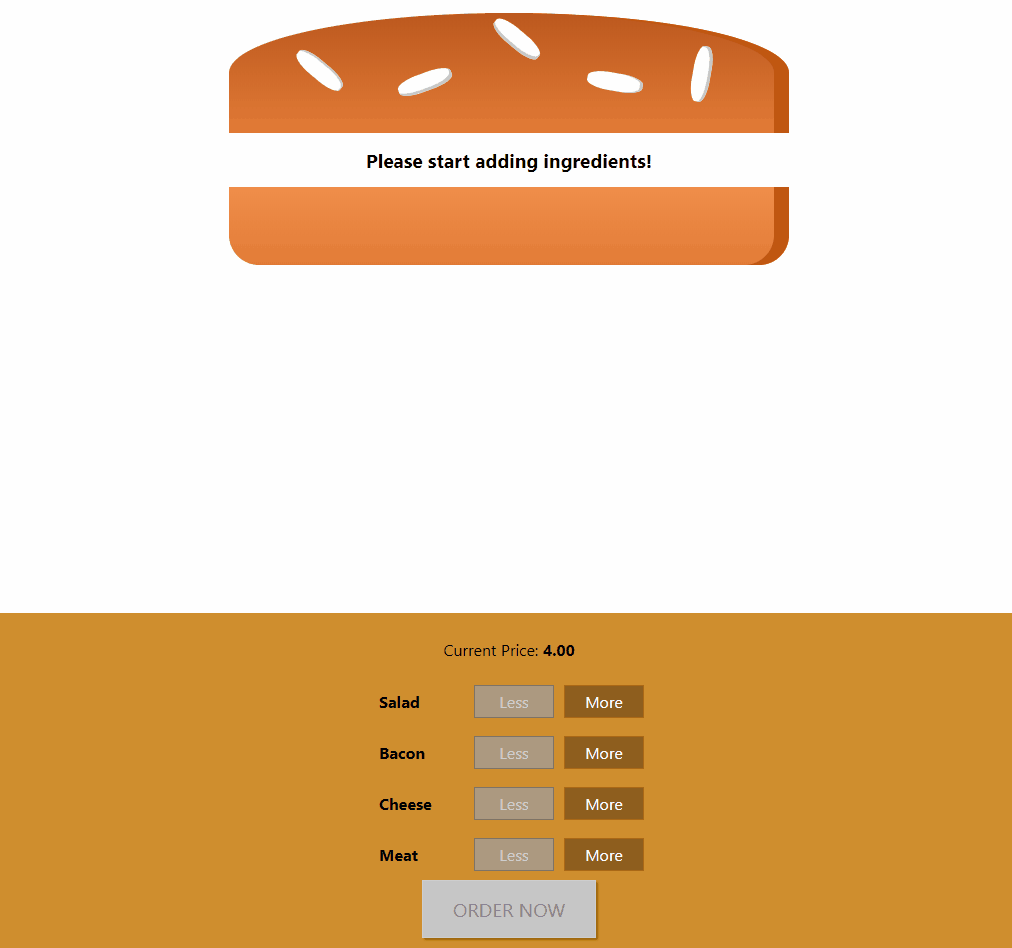
In this demonstration, i'll share my experience on how to write tests and what are the tests need to be tested. Let me take a sample project (Burger Builder) as an example for creating tests.
Burger Builder application allow user to create a burger by selecting the amount of ingredients of the burger. The price will be update each time the ingredients has been added or removed and order summary will be displayed once click on `Order` button.
With this simple flow of functionality, there are several test case we need to write and test, and now let's get started to setup react testing library in our application and write our tests.
♠ Install Testing Library Package
Install package by using npm install
npm install --save-dev @testing-library/react
♠ Create Test Folder
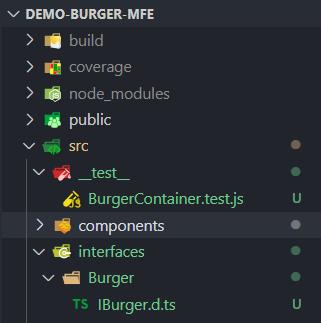
Create a test folder to include all the test file so that folder structure will be more tidy and clean.
In my example, I have create __test__ folder under src directory.
You can either create *.test.js file under the same component folder or create __test__ and create *.js inside that folder.
All files under __test__ and *.test.js will taken as test file, which is the default configuration of Jest.
♠ Example of Tests
Lets get started to write our first test. I'll create a test file named BurgerContainer.test.js under __test__ folder. Import testing-library package to use the functionality of it.
import { render } from "@testing-library/react";Below code are the example of writing render test. It's use to test whether the render function is rendered correctly.
import React from "react";
import { render } from "@testing-library/react";
import "@testing-library/jest-dom/extend-expect";
import BurgerContainer from "../components/Burger/BurgerContainer";

const mockIngredientsMaxCount = {
    salad: 3,
    bacon: 3,
    cheese: 3,
    meat: 3,
};

const mockIngredientsPrice = {
    salad: 5,
    bacon: 12,
    cheese: 7,
    meat: 15,
};

const mockSubmit = jest.fn();
const renderSubject = (props = {}) => {
    const defaultProps = {
        config: {
            ingredientPrice: mockIngredientsPrice,
            ingredientMaxCount: mockIngredientsMaxCount,
        },
        onSubmit: mockSubmit,
    };

    const renderResult = render(
        <BurgerContainer {...defaultProps} {...props} />
    );

    return { ...renderResult };
};

test("render burger container", () => {
    const { getByTestId } = renderSubject({});
    expect(getByTestId("burger-container")).toBeInTheDocument;
});
♦ Render Test
test("render burger container", () => {
    const { getByTestId } = renderSubject({});
    expect(getByTestId("burger-container")).toBeInTheDocument;
});
In this test, we need to validate our component is rendered as expected. getByTesttId is a DOM selector which will search for data-testid attribute in the component that you render.
const BurgerIngredients = () => {
return (
        <div data-testid="burger-container">...</div>
    );
}
♦ Burger Ingredient Test
As saw from the example, a message [Please start adding ingredients!] is shown between the burger. Once [More] button is click for specific ingredient, ingredient will be append between the burger and the message will not be shown.
test("append burger ingredient", () => {
    const { getByText } = renderSubject({});
    expect(getByText("Please start adding ingredients!")).toBeInTheDocument;
});
In this test, we expect that the text [Please start adding ingredients!] will be show once our components has been rendered.
import { render, fireEvent } from "@testing-library/react";
test("append burger ingredient", () => {
    const { getByText, queryAllByTestId, getByTestId, queryByText } = renderSubject({});
    expect(getByText("Please start adding ingredients!")).toBeInTheDocument;
    expect(queryAllByTestId("ingredient-meat").length).toBe(0);
    fireEvent.click(getByTestId("more-button-meat"));
    fireEvent.click(getByTestId("more-button-meat"));
    expect(queryAllByTestId("ingredient-meat").length).toBe(2);
    expect(queryByText("Please start adding ingredients!")).not.toBeInTheDocument;
});
[fireEvent] is a method / feature from testing-library. It allow to simulate user action such as onClick, onChange, keyPress and others. In this test is to simulate user click on [More] button under meat ingredient, expect count of [ingredient-meat] component should be increment. Thus, the message should be disappeared.
♠ Conclusion
In conclusion, we need to know what are the components we need to test, which end-to-end flow / scenerio / unit need to be tested in order to write a test. Moreover this article used functionality of React Testing Library + Jest.
♠ Reference
♦ https://testing-library.com/docs/react-testing-library/intro
♦ https://jestjs.io/docs/en/getting-started