實用的Cache套件--EHCache
實用的Cache套件--EHCache
| 簡介 |
本文將藉由實例,說明如何在 Spring Boot 專案整合 EHCache,如何使用 Cache Annotation 以及注意事項,如何注入 CacheManager 介面和操作 Cache 介面彌補 Annotation 的不足。 |
| 作者 |
羅國榮 |
前言
Spring Boot整合EHCache
列出整合步驟如下:
整合步驟說明
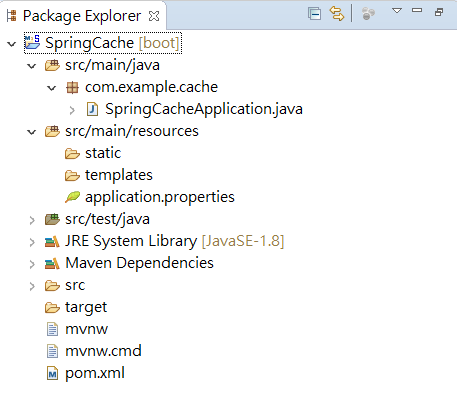
1. 新建Spring Boot (Maven) Project
2. 編寫pom.xml加入EHCache相關依賴
在 pom.xml 加入依賴,不需要在 <dependency/> 內指定 <version/> ,因 Spring Boot 會自動下載與 Spring (版本)最適合的套件。
		<dependency>
			<groupId>javax.cache</groupId>
			<artifactId>cache-api</artifactId>
		</dependency>
		<dependency>
			<groupId>org.ehcache</groupId>
			<artifactId>ehcache</artifactId>
		</dependency>
3. 編寫Spring Boot Application類別及打開Cache機制
package com.example.cache;

import org.springframework.boot.SpringApplication;
import org.springframework.boot.autoconfigure.SpringBootApplication;
import org.springframework.cache.annotation.EnableCaching;

@SpringBootApplication
@EnableCaching
public class SpringCacheApplication {

	public static void main(String[] args) {
		SpringApplication.run(SpringCacheApplication.class, args);
	}
}
在類別名稱上方添加「@EnableCaching」,就可以打開 Cache 機制。
4. 配置application.properties
spring.datasource.url=jdbc:mysql://localhost:3306/test?useUnicode=true&characterEncoding=utf-8&autoReconnect=true&useSSL=false
spring.datasource.username=!@#$
spring.datasource.password=%^&*
spring.datasource.driver-class-name=com.mysql.jdbc.Driver

spring.jpa.database=MYSQL
spring.jpa.properties.hibernate.show_sql=true

spring.cache.jcache.config=classpath:ehcache.xml
重點放在「spring.cache.jcache.config=classpath:ehcache.xml」這行,指定Cache的設定檔為ehcache.xml。
5. 編寫ehcache.xml設定檔
<?xml version="1.0" encoding="UTF-8"?>
<config xmlns:xsi="http://www.w3.org/2001/XMLSchema-instance"
	xmlns="http://www.ehcache.org/v3"
	xmlns:jsr107="http://www.ehcache.org/v3/jsr107"
	xsi:schemaLocation="http://www.ehcache.org/v3
	                        http://www.ehcache.org/schema/ehcache-core-3.2.xsd
	                        http://www.ehcache.org/v3/jsr107
	                        http://www.ehcache.org/schema/ehcache-107-ext-3.2.xsd">

	<persistence directory="java.io.tmpdir" />

	<cache-template name="default">
		<resources>
			<heap unit="entries">100</heap>
			<offheap unit="MB">128</offheap>
		</resources>
	</cache-template>

	<cache alias="Users" uses-template="default">
		<expiry>
			<ttl unit="seconds">30</ttl>
		</expiry>
	</cache>

	<cache alias="Orders" uses-template="default">
		<expiry>
			<ttl unit="seconds">600</ttl>
		</expiry>
	</cache>

</config>
在src\main\resources目錄下,增加 ehcache.xml 設定檔。
設定檔內定義了一個"default"樣板(cache-template),該樣板可以在 Heap 記憶體區緩存100個物件,在 Heap 記憶體區外則可緩存 128MB 大小的資料。該"default"樣板可以被覆寫,延伸地加入其他參數。
設定檔內也定義了二個 Cache,分別命名為 "Users" 和 "Orders" :
"Users" Cache 的緩存有效時間設定為30秒;當資料放入 "Users" Cache 區,超過30秒該資料會失效,不再有 Cache 效用。(緩存有效時間應依據實際的情況設定,在此是為了觀察 Cache 失效才設定很短的時間)
"Orders" Cache 的緩存有效時間設定為600秒;當資料放入 "Orders" Cache 區,超過600秒該資料會失效,不再有 Cache 效用。(此例,緩存有效時間的設定比較接近實際的應用)
Hint:
緩存有效時間是非常有用的設定,可以更有效率的使用 Cache 區,不會導致資料一旦放入 Cache 區,就一直佔用而不釋出空間。
6. 編寫User Bean
package com.example.cache;

import java.io.Serializable;

import javax.persistence.Column;
import javax.persistence.Entity;
import javax.persistence.GeneratedValue;
import javax.persistence.GenerationType;
import javax.persistence.Id;
import javax.persistence.Table;

@Entity
@Table(name = "system_user")
public class User implements Serializable {

	private static final long serialVersionUID = 4244312981614344972L;

	@Id
	@GeneratedValue(strategy = GenerationType.IDENTITY)
	@Column(name = "id")
	private Integer id;

	@Column(name = "name")
	private String name;

	@Column(name = "age")
	private Integer age;


	//getters and setters

}Hint:
一個類別的物件要想序列化成功,必須滿足兩個條件:
1. 該類別必須實作 java.io.Serializable 介面。
2. 該類別的所有屬性必須是可序列化的。如果有一個屬性不是可序列化的,則該屬性必須注明是短暫(transient)的。例如: public transient int SSN;
Hint:
7. 編寫User Repository
package com.example.cache;

import org.springframework.data.jpa.repository.JpaRepository;
import org.springframework.stereotype.Repository;

@Repository
public interface UserRepository extends JpaRepository<User, Integer> {

}
UserRepository 繼承 JpaRepository 介面,很容易的就獲得 CRUD 功能。
8. 編寫User Service
package com.example.cache;

import java.util.List;

import org.springframework.beans.factory.annotation.Autowired;
import org.springframework.cache.Cache;
import org.springframework.cache.CacheManager;
import org.springframework.cache.annotation.CacheConfig;
import org.springframework.cache.annotation.CacheEvict;
import org.springframework.cache.annotation.CachePut;
import org.springframework.cache.annotation.Cacheable;
import org.springframework.stereotype.Service;

@CacheConfig(cacheNames = "Users")
@Service
public class UserService {

	@Autowired
	private UserRepository userRepository;

	@Autowired
	private CacheManager cacheManager;

	/**
	 * 新增用户
	 */
	@CachePut(key = "#user.id")
	public User insertUser(User user) {
		System.out.println("\n----------正在執行insertUser()----------");
		user = this.userRepository.save(user);
		return user;
	}

	/**
	 * 查詢用户
	 */
	public List<User> findAll() {
		System.out.println("\n----------正在執行findAll()----------");
		return this.userRepository.findAll();
	}

	/**
	 * 經由id查詢單個用户
	 */
	@Cacheable(key = "#id")
	public User findUserById(Integer id) {
		System.out.println("\n----------正在執行findUserById()----------");
		User user = this.userRepository.findOne(id);
		return user;
	}

	/**
	 * 修改單個用户
	 */
	@CachePut(key = "#user.id")
	public User updateUser(User user) {
		System.out.println("\n----------正在執行updateUser()----------");
		return this.userRepository.save(user);
	}

	/**
	 * 經由id刪除單個用户
	 */
	@CacheEvict(key = "#id")
	public void deleteUserById(Integer id) {
		System.out.println("\n----------正在執行deleteUserById()----------");
		this.userRepository.delete(id);
	}

	/**
	 *  刪除單個用户
	 * @param user
	 */
	@CacheEvict(key = "#user.id")
	public void deleteUser(User user) {
		System.out.println("\n----------正在執行deleteUser()----------");
		this.userRepository.delete(user);
	}

	/**
	 *  刪除多個用户
	 * @param user
	 */
	public void deleteUsers(List<User> users) {
		System.out.println("\n----------正在執行deleteUsers()----------");

		// 透過cacheManager移除快取物件
		Cache cache = cacheManager.getCache("Users");
 		for (User user : users) {
			cache.evict(user.getId());
		}

		this.userRepository.delete(users);
	}

}
UserService 是一個重要的類別,需要分解各個重點部分進行說明。
- @CacheConfig
- @CachePut
- @Cacheable
- @CacheEvict
@CacheConfig(cacheNames = "Users")
@Service
public class UserService {@CachePut(key = "#user.id")
public User insertUser(User user) {
user = this.userRepository.save(user);
return user;
}@Cacheable(key = "#id")
public User findUserById(Integer id) {
User user = this.userRepository.findOne(id);
return user;
}
@CacheEvict(key = "#user.id")
public void deleteUser(User user) {
    this.userRepository.delete(user);
}
善用上述的四個註解,就可以很容易地使用 Cache 機制,而不用直接操作 Cache 機制相關的物件。但是如果碰到使用註解卻無法處理某些需求時,仍然需要藉助 Cache 機制相關的物件來處理,底下就來談談如何注入 CacheManager 介面和操作Cache介面彌補Annotation的不足。
(1) 注入 CacheManager 介面
@Autowired
private CacheManager cacheManager;
/**
 *  刪除多個用户
 * @param user
 */
public void deleteUsers(List<User> users) {
    // 透過cacheManager移除快取物件
    Cache cache = cacheManager.getCache("Users");
    for (User user : users) {
        cache.evict(user.getId());
    }

    this.userRepository.delete(users);
}
上例的情境:刪除多筆資料的同時也驅除多筆緩存資料。單是使用 @CacheEvict 註解不容易完成需求。但是借助 CacheManager 介面和 Cache 介面就很容易。
Cache cache = cacheManager.getCache("Users"); // 取出名稱為 Users 的 Cache 區
cache.evict(user.getId()); // 驅除 key 為 user.getId() 的緩存資料
Hint:
public User updateUser(Integer id) {
	User user = this.findUserById(id);
	return this.userRepository.save(user);
}9. 編寫User Controller
package com.example.cache;

import java.util.ArrayList;
import java.util.List;

import org.springframework.beans.factory.annotation.Autowired;
import org.springframework.web.bind.annotation.PathVariable;
import org.springframework.web.bind.annotation.RequestBody;
import org.springframework.web.bind.annotation.RequestMapping;
import org.springframework.web.bind.annotation.RequestMethod;
import org.springframework.web.bind.annotation.RestController;

@RestController
@RequestMapping(value = "/user")
public class UserController {

	@Autowired
	private UserService userService;

	/**
	 * 新增User
	 *
	 * @param user
	 * @return
	 */
	@RequestMapping(value = "/post", method = RequestMethod.POST)
	public User saveUser(@RequestBody User user) {
		return userService.insertUser(user);
	}

	/**
	 * 查詢所有User
	 *
	 * @return
	 */
	@RequestMapping(value = "/findAll", method = RequestMethod.GET)
	public List<User> findAll() {
		return userService.findAll();
	}

	/**
	 * 使用ID查詢User
	 *
	 * @param id
	 * @return
	 */
	@RequestMapping(value = "/get/{id}", method = RequestMethod.GET)
	public User getUser(@PathVariable Integer id) {
		return userService.findUserById(id);
	}

	/**
	 * 更新使用者
	 *
	 * @param id
	 * @param user
	 * @return
	 */
	@RequestMapping(value = "/put/{id}/{name}/{age}", method = RequestMethod.PUT)
	public User putUser(@PathVariable Integer id, @PathVariable String name, @PathVariable Integer age) {
		User user = new User();
		user.setId(id);
		user.setName(name);
		user.setAge(age);

		return userService.updateUser(user);
	}

	/**
	 * 使用ID刪除User
	 *
	 * @param id
	 * @return
	 */
	@RequestMapping(value = "/delete/{id}", method = RequestMethod.DELETE)
	public String deleteUser(@PathVariable Integer id) {
		userService.deleteUserById(id);

		return "deleteUserById is finish.";
	}

	/**
	 * 刪除User
	 *
	 * @param user
	 * @return
	 */
	@RequestMapping(value = "/delete", method = RequestMethod.DELETE)
	public String deleteUser(@RequestBody User user) {
		userService.deleteUser(user);

		return "deleteUser is finish.";
	}

	/**
	 * 使用ID刪除多個User
	 *
	 * @param id1
	 * @param id2
	 * @return
	 */
	@RequestMapping(value = "/delete/{id1}/{id2}", method = RequestMethod.DELETE)
	public String deleteUser(@PathVariable Integer id1, @PathVariable Integer id2) {
		User user1 = userService.findUserById(id1);
		User user2 = userService.findUserById(id2);

		List<User> users = new ArrayList<>();
		users.add(user1);
		users.add(user2);

		userService.deleteUsers(users);

		return "deleteUsers is finish.";
	}

}
使用 @RestController 註解,申明方法(method)具有 RESTful 特性,編寫方法時按照 RESTful 特性就可以。
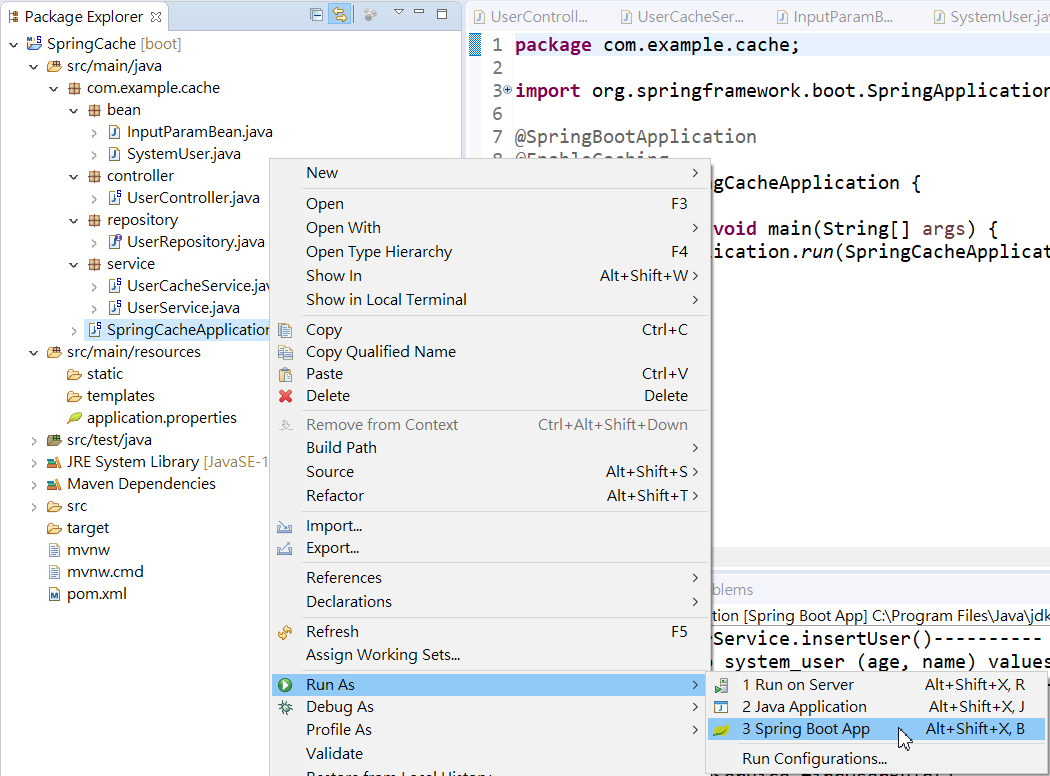
10. 運行專案
2018-12-26 04:29:50.450  INFO 6732 --- [           main] o.t.o.p.UpfrontAllocatingPageSource      : Allocating 128MB in chunks
2018-12-26 04:29:50.564  INFO 6732 --- [           main] org.ehcache.core.EhcacheManager          : Cache 'Orders' created in EhcacheManager.
2018-12-26 04:29:50.569  INFO 6732 --- [           main] o.t.o.p.UpfrontAllocatingPageSource      : Allocating 128MB in chunks
2018-12-26 04:29:50.673  INFO 6732 --- [           main] org.ehcache.core.EhcacheManager          : Cache 'Users' created in EhcacheManager.
2018-12-26 04:29:50.689  INFO 6732 --- [           main] org.ehcache.jsr107.Eh107CacheManager     : Registering Ehcache MBean javax.cache:type=CacheStatistics,CacheManager=file./D./workspace-sts-3.9.5.RELEASE/SpringCache/target/classes/ehcache.xml,Cache=Orders
2018-12-26 04:29:50.692  INFO 6732 --- [           main] org.ehcache.jsr107.Eh107CacheManager     : Registering Ehcache MBean javax.cache:type=CacheStatistics,CacheManager=file./D./workspace-sts-3.9.5.RELEASE/SpringCache/target/classes/ehcache.xml,Cache=Users
開始測試
用 Postman 調用 RESTful API,在 Console 區觀察出 Cache 機制是否產生效用?
(1) http://localhost:8080/user/findAll
<<Postman>>
[
    {
        "id": 1,
        "name": "user1",
        "age": 21
    },

    {
        "id": 2,
        "name": "User2",
        "age": 22
    }
]

<<Console>>
----------正在執行findAll()----------
Hibernate: select user0_.id as id1_0_, user0_.age as age2_0_, user0_.name as name3_0_ from system_user user0_
<<Postman>>
[
    {
        "id": 1,
        "name": "user1",
        "age": 21
    }
]

<<Console>>
----------正在執行findUserById()----------
Hibernate: select user0_.id as id1_0_0_, user0_.age as age2_0_0_, user0_.name as name3_0_0_ from system_user user0_ where user0_.id=?
(3) 再次調用 http://localhost:8080/user/get/1
<<Postman>>
[
    {
        "id": 1,
        "name": "user1",
        "age": 21
    }
]

<<Console>>


//緩存有效,Console 沒有任何輸出,表示是從 Cache 區將資料取出
(4) 等待 30 秒,再次調用 http://localhost:8080/user/get/1
<<Postman>>
[
    {
        "id": 1,
        "name": "user1",
        "age": 21
    }
]

<<Console>>
----------正在執行findUserById()----------
Hibernate: select user0_.id as id1_0_0_, user0_.age as age2_0_0_, user0_.name as name3_0_0_ from system_user user0_ where user0_.id=?

// 等待30秒,緩存已經失效,再次從資料庫取出資料
結語
本文說明至此告一個段落,希望能夠讓大家更了解 Spring Cache 的使用。