淺談Spring Boot 3與2的差異(二)
前言
在2022年11月24日 Spring Boot 版本大升級到3.0.0,是 Spring Boot 近幾年來算是滿大的調整,因此本文主要來聊聊相較於 2 新增及修改的功能簡單介紹。
官方建議要從舊版本升級的不要直接升級成 3 ,而是先從 2.X.X 升級到目前的 2.7.6 再升級到 3 ,會比較容易更新。
接續 淺談Spring Boot 3與2的差異(一)。
Http Interfaces
在 Spring Boot 3 之前 Spring Framework 使用 REST 通常都應用 WebClient 和 RestTemplate 做搭配,現在則可以使用 Http Interfaces 讓整個程式碼變得更加簡單,也更容易使用
• 在 interface 的方法掛上 @HttpExchange
public interface JsonPlaceholderService {


    // 這是其中一個 @HttpExchange

    @GetExchange("/posts")

    List<Post> loadPosts();


}
• 在 interface 上掛上共同 @HttpExchange
@HttpExchange(url = "XXX/OO")

public interface JsonPlaceholderService {


    @GetExchange("/posts")

    List<Post> loadPosts();


    @GetExchange("/posts/{id}")

    Post getIdPost(Integer id);


}
再使用 Webclient 做響應
//HTTP exchanges

WebClient client = WebClient.builder().baseUrl("https://jsonplaceholder.typicode.com").build();

HttpServiceProxyFactory factory = HttpServiceProxyFactory.builder(WebClientAdapter.forClient(client)).build();

JsonPlaceholderService jps = factory.createClient(JsonPlaceholderService.class);
則 jps 即可使用 Http exchange 的方法
jps.loadPosts();

jps.getIdPost(2);
Problem Details for HTTP APIs
原先若 API 查詢不到 id 設定回傳原始錯誤的話會長以下圖式
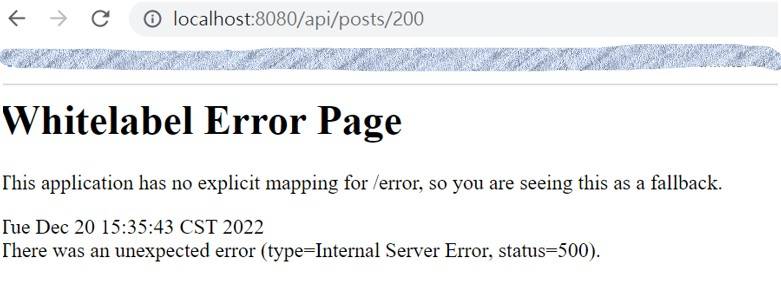
現在可以用 ProblemDetail 來進行自己想取得的錯誤訊息進行包裝
@RestControllerAdvice

public class ExceptionHandlerAdvice {


    @ExceptionHandler(PostNotFoundException.class)

    public ProblemDetail handlePostNotFoundException(PostNotFoundException e) throws URISyntaxException {

        ProblemDetail problemDetail = ProblemDetail.forStatusAndDetail(HttpStatus.NOT_FOUND,e.getMessage());

        problemDetail.setProperty("postId",e.getId());

        problemDetail.setType(new URI("http://localhost:8080/problems/post-not-found"));

        return problemDetail;

    }


}
畫面就會變成 Json 格式的如下:

♦以上的範例是直接從 github 範例 下載做練習及研究,有興趣可以看看喔
→接下來要來看看 JDK 17 提供的新東西
Multiline Strings
原先在使用多行字串的時候是以下圖示
String text = "Hello," +

                "How are " +

                "you";
現在只需要使用 """ 就可以表現多行字串了
String a = """

          Hello,

          ok bye bye

         """;
Records
Records 是一個比較不一樣的 class,他是一種配置屬性,但他跟原本配置的 class 又減少了大量的程式碼撰寫
原先的配置 class , 需要自己聲明 getter、setter .... 等,或是使用 lomok ,但 Reocords 直接全部省略都不需要寫
且 Records 是把參數寫在 () 裡面
public record Customer (

                        String name,

                        String email,

                        Integer age) {


}
且可以直接將參數拿來驗證
public record Customer(

        String name,

        String email,

        Integer age) {


    public Customer {

        if (name.isBlank()) {

            throw new java.lang.IllegalArgumentException(

                    String.format("%f cannot be null", name));

        }

    }

}要注意的是,Records 在使用的時候也不是用 getXX() 和 setOO() 的方式,如下
// 如同 setOO() 方法

Customer customer = new Customer("apple", "ss.gamil.com", 33);

// 如同 getXX() 方法

String newName = customer.name();

String newEmail = customer.email();

Integer newAge = customer.age();
Switch Expressions
在 Java SE 12 的時候先引進了 Switch Expressions 方法,在 Java SE 13 的時候指定值的部分將原先的 break 移除掉改用 yield 使用,用法有點像 return 的感覺
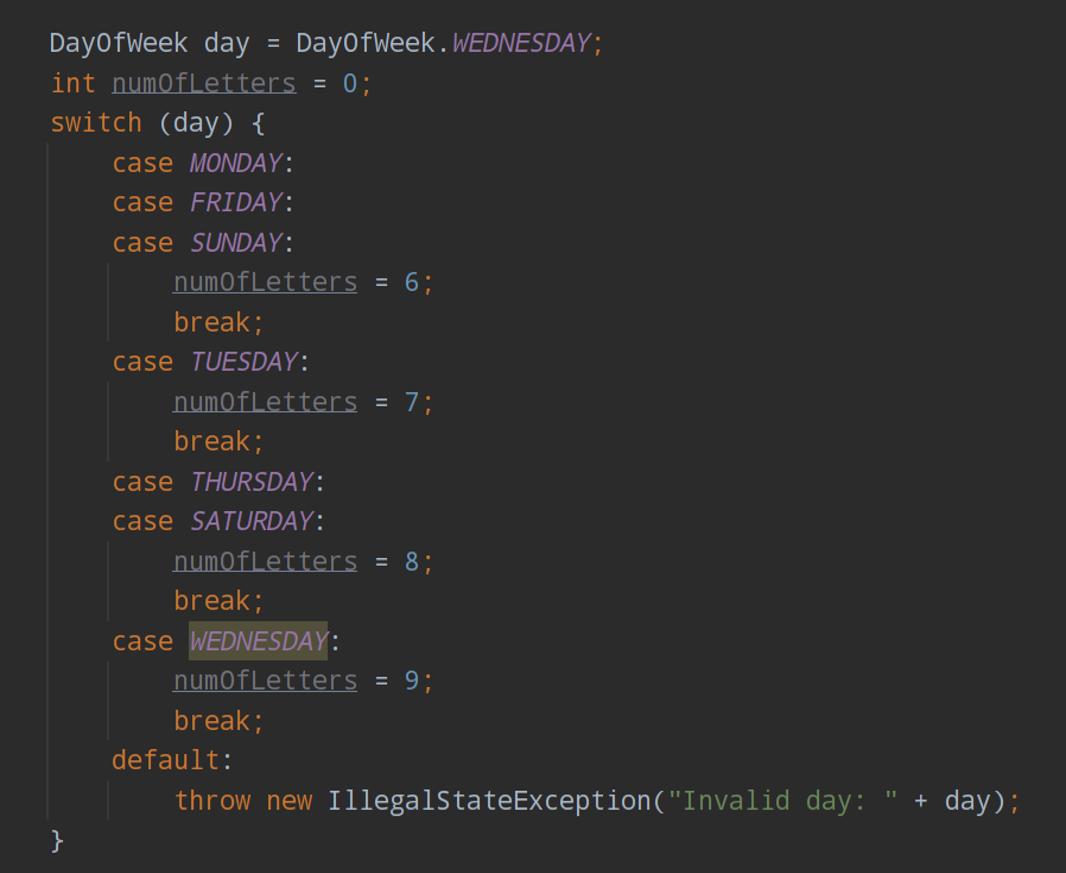
範例:每天的英文單字為幾個英文單字組成
原來的switch case 用法
Switch Expressions
       DayOfWeek day = DayOfWeek.FRIDAY;

        int numOfLetters = switch (day) {

            case MONDAY, FRIDAY, SUNDAY -> 6;

            case TUESDAY                -> 7;

            case THURSDAY, SATURDAY     -> {

                System.out.println(8);

                yield 8;

            }

            case WEDNESDAY              -> 9;

            default -> throw new Exception("exception");

        };
Pattern Matching for Instanceof
Instanceof 是一個二元運算子,確定兩個 Object 之間的關係,一直到 JDK 14 更新了使用方法
原先判斷表達:判斷成立後需要自行轉換型態
if (animal instanceof Cat) {

    Cat cat = (Cat) animal;

    cat.meow();

   // other cat operations

} else if (animal instanceof Dog) {

    Dog dog = (Dog) animal;

    dog.woof();

    // other dog operations

}
更新後的使用:判斷成立後直接進行轉換使用
if (animal instanceof Cat cat) {

    cat.meow();

} else if(animal instanceof Dog dog) {

    dog.woof();

}
可以明顯發現整個程式碼大大減少,將原先需要轉換型態的部分省略了,會在於判斷成立之後直接幫忙轉換,就可以直接拿來使用
Sealed Classes and Interfaces
Sealed Classes 是可以限定繼承的子項目,以確保不會被其他不相關的子項目繼承

要繼承此父項目的子項目也必須使用 non-sealed 或是 final,不然會編譯錯誤

若是其他未被同意的子項目繼承,則也會編譯錯誤

參考文獻
- 範例
- https://spring.io/blog/2022/05/24/preparing-for-spring-boot-3-0
- https://docs.spring.io/spring-boot/docs/3.0.0-SNAPSHOT/reference/html/native-image.html#native-image
- https://docs.spring.io/spring-boot/docs/3.0.0/reference/html/actuator.html#actuator.observability
- https://docs.spring.io/spring-framework/docs/6.0.0-RC2/reference/html/integration.html#rest-client-access
- https://docs.oracle.com/en/java/javase/13/language/switch-expressions.html
- https://www.baeldung.com/java-pattern-matching-instanceof
- https://www.youtube.com/watch?v=-mwpoE0x0JQ