初探 IOS CoreML
.前言:
在 WWDC 2017 中,Apple 發表了新框架(Framework) Core ML 。藉由 Core ML,可以為 App 增加機器學習(Machine Learning)的能力。而最棒的是你不需要深入的了解關於神經網絡(Neural Network)以及機器學習(Machine Learning)的相關知識。接下來我將會介紹 Apple 開發者網站上提供的 Core ML 模型來製作範例 App。
.什麼是機器學習:
機器學習是透過從過往的資料和經驗中學習並找到其運行規則,最後達到人工智慧的方法。機器學習包含透過樣本訓練機器辨識出運作模式,而不是用特定的規則來編程。這些樣本可以在資料中找到。換句話說,機器學習是一種弱人工智慧(narrow AI),它從資料中得到複雜的函數(或樣本)來學習以創造演算法(或一組規則),並利用它來做預測。
Apple 官方簡介:https://developer.apple.com/machine-learning/
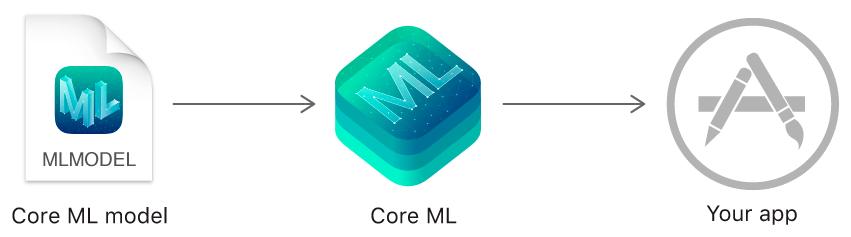
.什麼是Core ML:
Core ML 是在2017年 WWDC 中發表的全新機器學習框架,藉著 Core ML,你可以將機器學習整合進自己的 App 之中。 而機器學習是給予電腦可以在不明確撰寫程式的情況下學習能力的應用。而一個完成訓練的模型便是指將資料經由演算法結合後的成果。
Core ML 3:https://developer.apple.com/machine-learning/core-ml/
.Core ML Models:
在Apple 官方提供的Models 分為:
Image:FCRN-DepthPrediction、MNIST、UpdatableDrawingClassifier、MobileNetV2、
Resnet50、SqueezeNet、DeeplabV3、YOLOv3、YOLOv3-Tiny
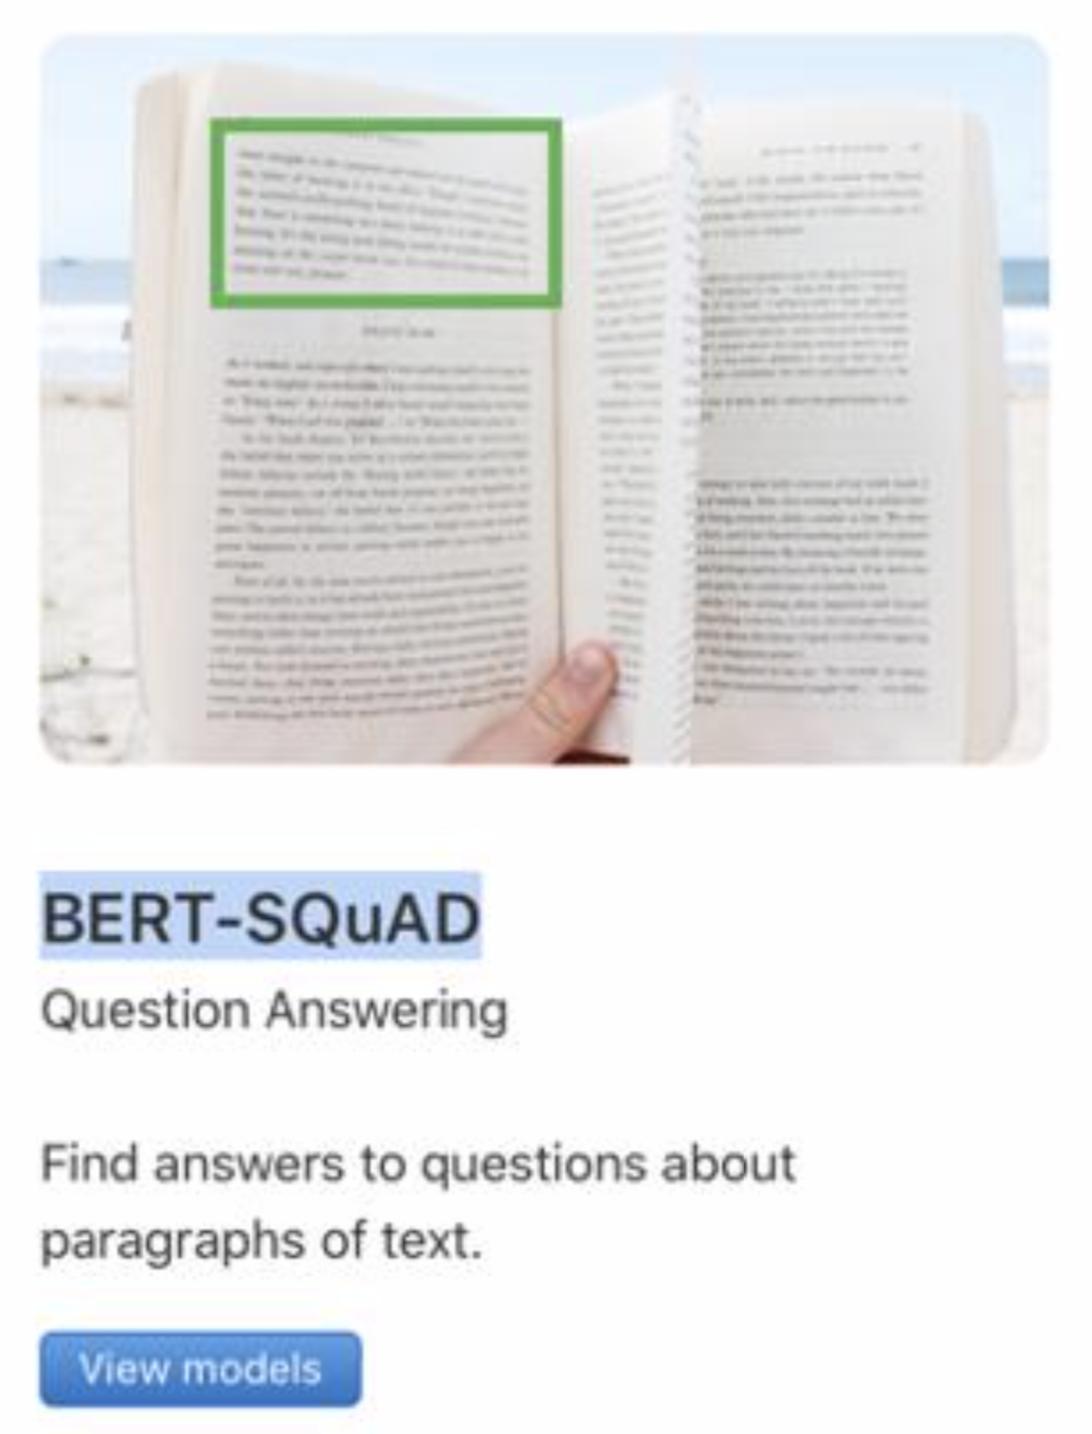
Text:BERT-SQuAD
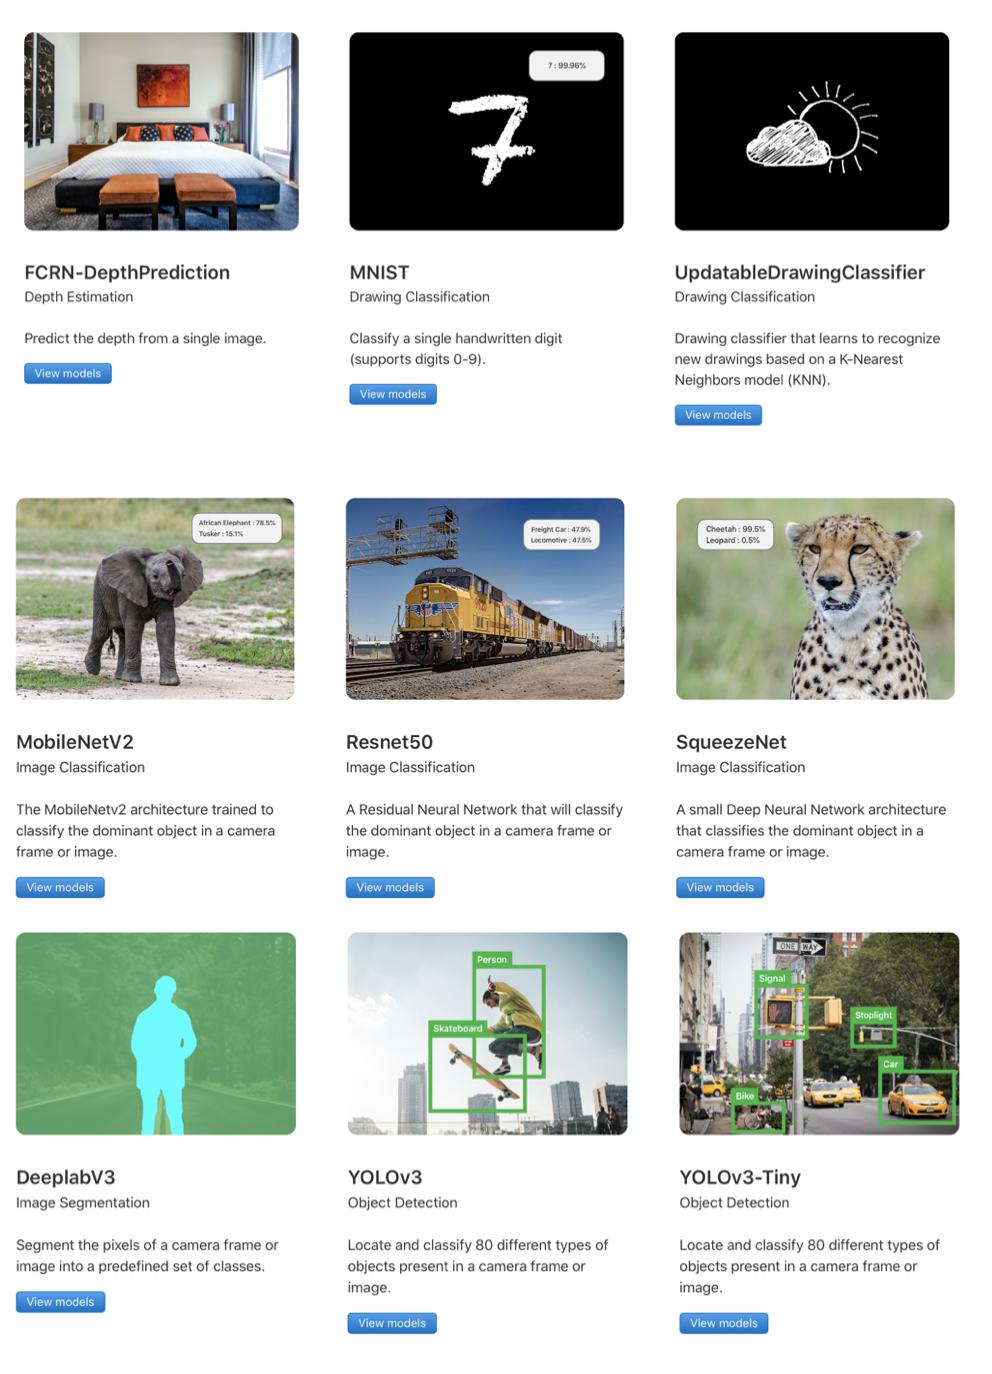
這次選用的是SqueezeNet Model
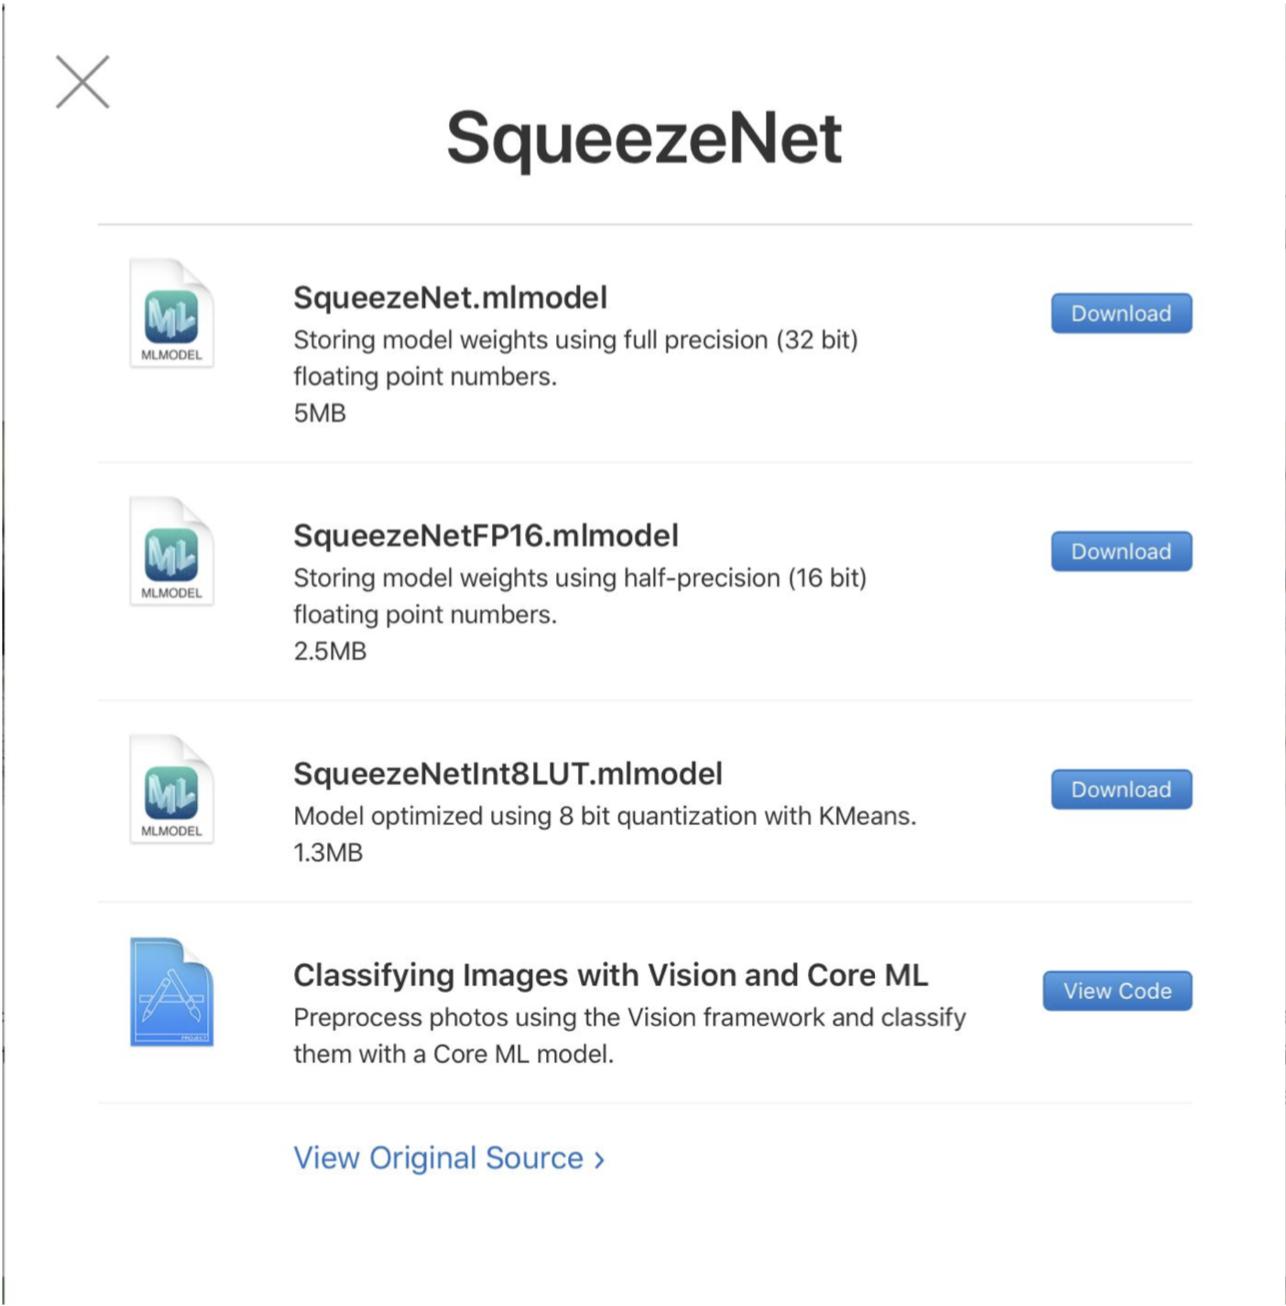
下載Model 並加入專案中
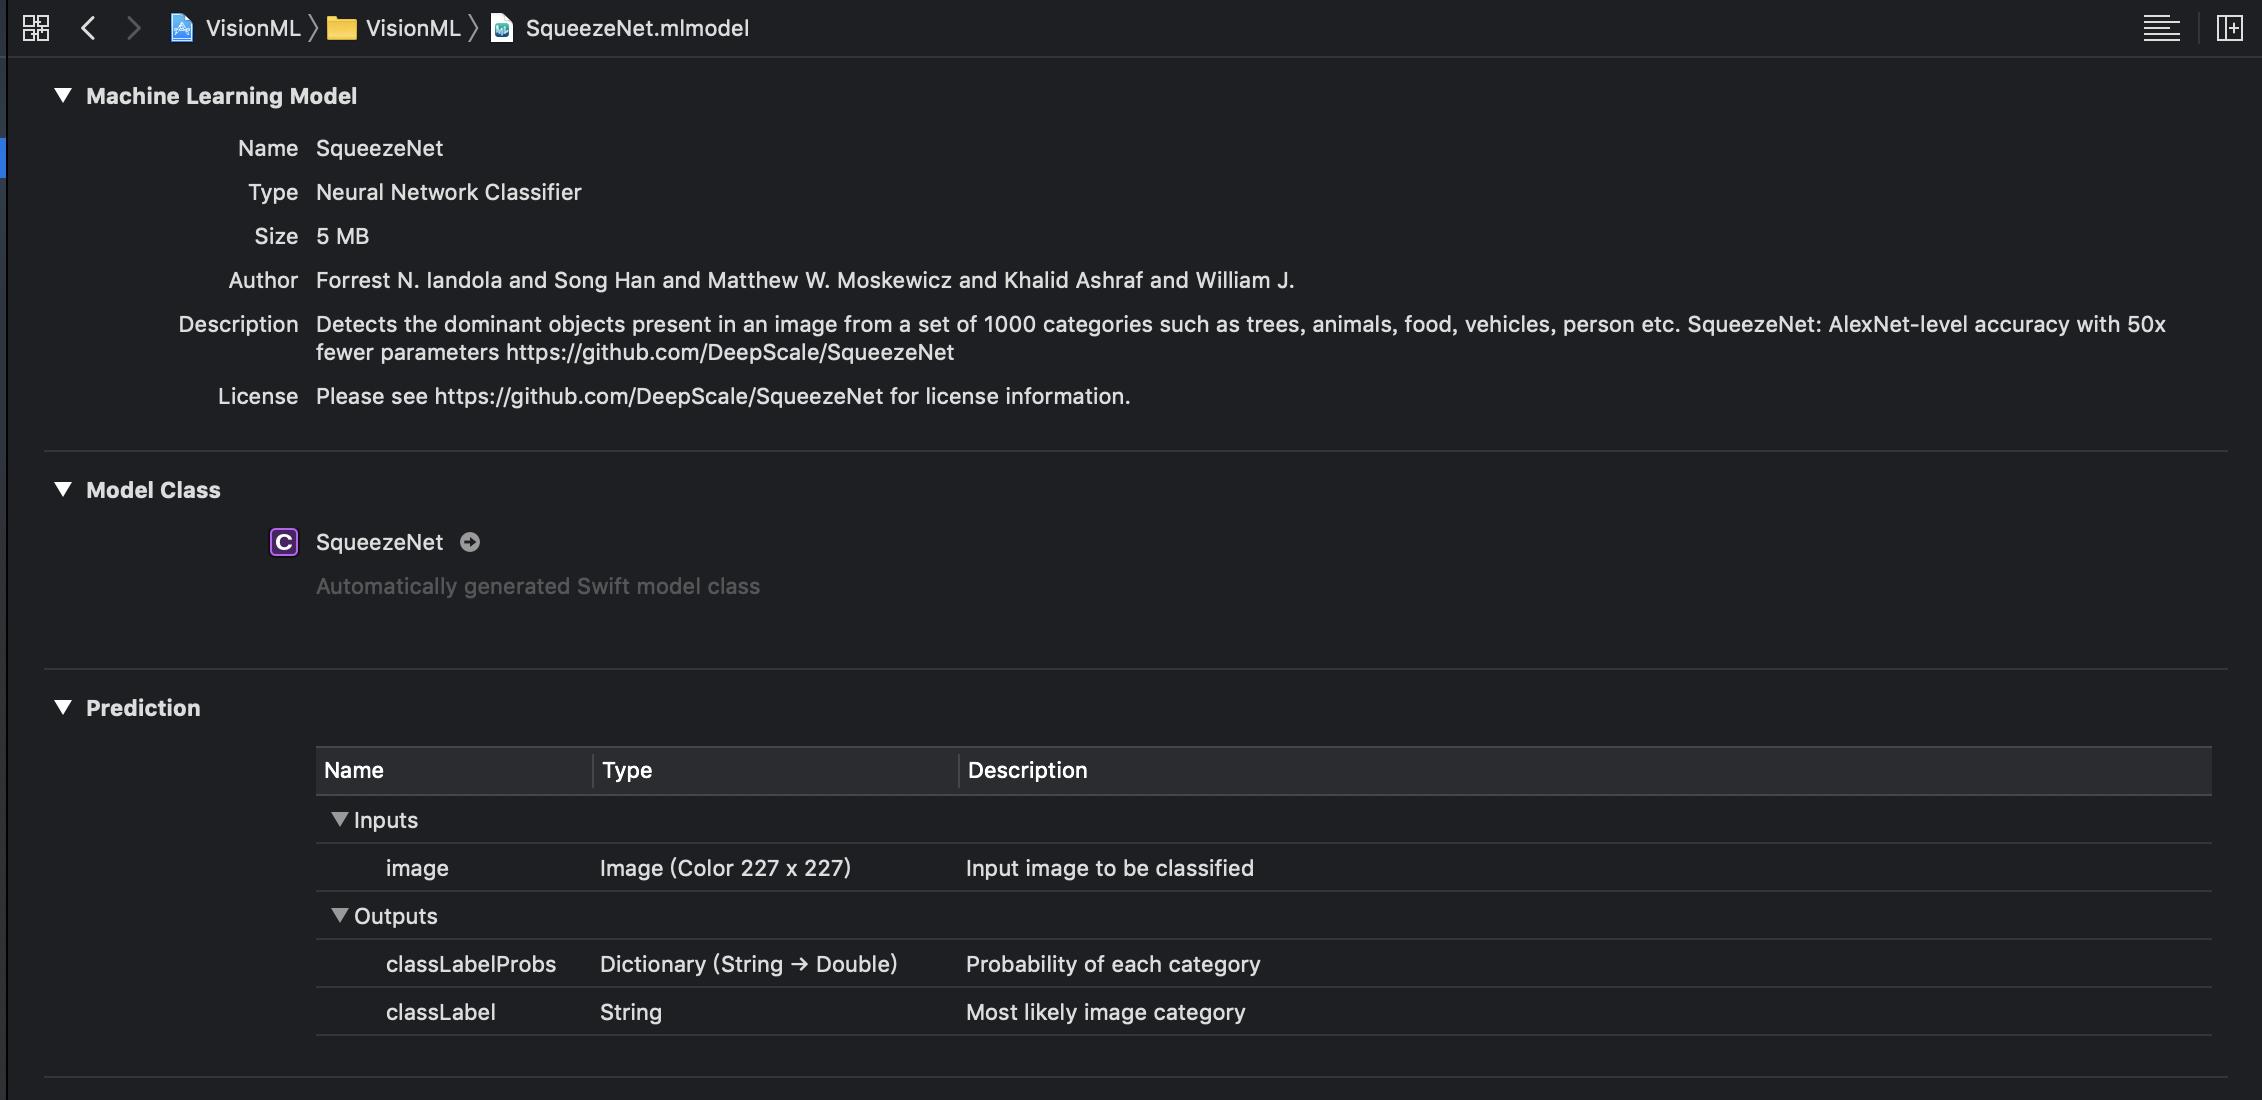
與Core ML溝通的橋樑是Vision Framework,換句話說Vision 會將圖片轉換成正確的input類型,也會將model轉換成自己的results類型
.什麼是Vision Framework:
Vision Framework是Apple 於 IOS 11發表的Framework,可以在 App 執行識別人臉範圍及臉部特徵(微笑、皺眉、左眼眉毛等等)、條碼偵測、分類出圖像中的場景、物件偵測及追蹤以及視距偵測。
在影像處理功能,Apple 其實已經有Core Image和AVFundation這兩個Framework,而 Vision 的準確度(Accuracy)是最好的,同時也支援較多的平台。不過 Vision 需要較多的處理時間以及電源消耗。
Vision Framework: Building on Core ML :https://developer.apple.com/videos/play/wwdc2017/506/

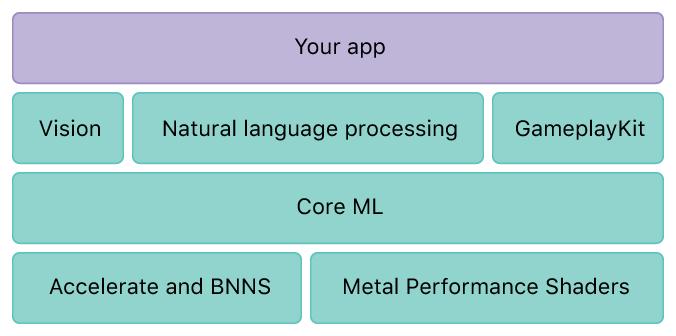
如架構圖所示,Core ML 提供三個應用領域的框架支援,包含用於高效能圖片、影片分析的 Vision,用於協助自然語言處理的 Fundation 以及讓遊戲開發商可以在遊戲中導入人工智慧的 GameplayKit 等三大應用框架。
而 Core ML 的底層也建構於 Accelerate -一個針對大型矩陣、數位訊號、影像及大數運算的框架,以及 BNNS (Basic Nural Network Subroutine)-用於實作及執行類神經網路相關功能的程式集。
加入所需元件:UIImageView、UIButton、UITextView
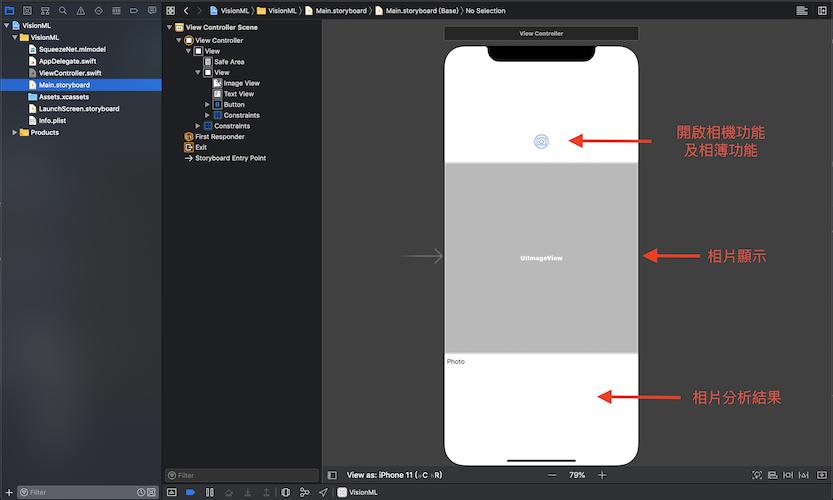
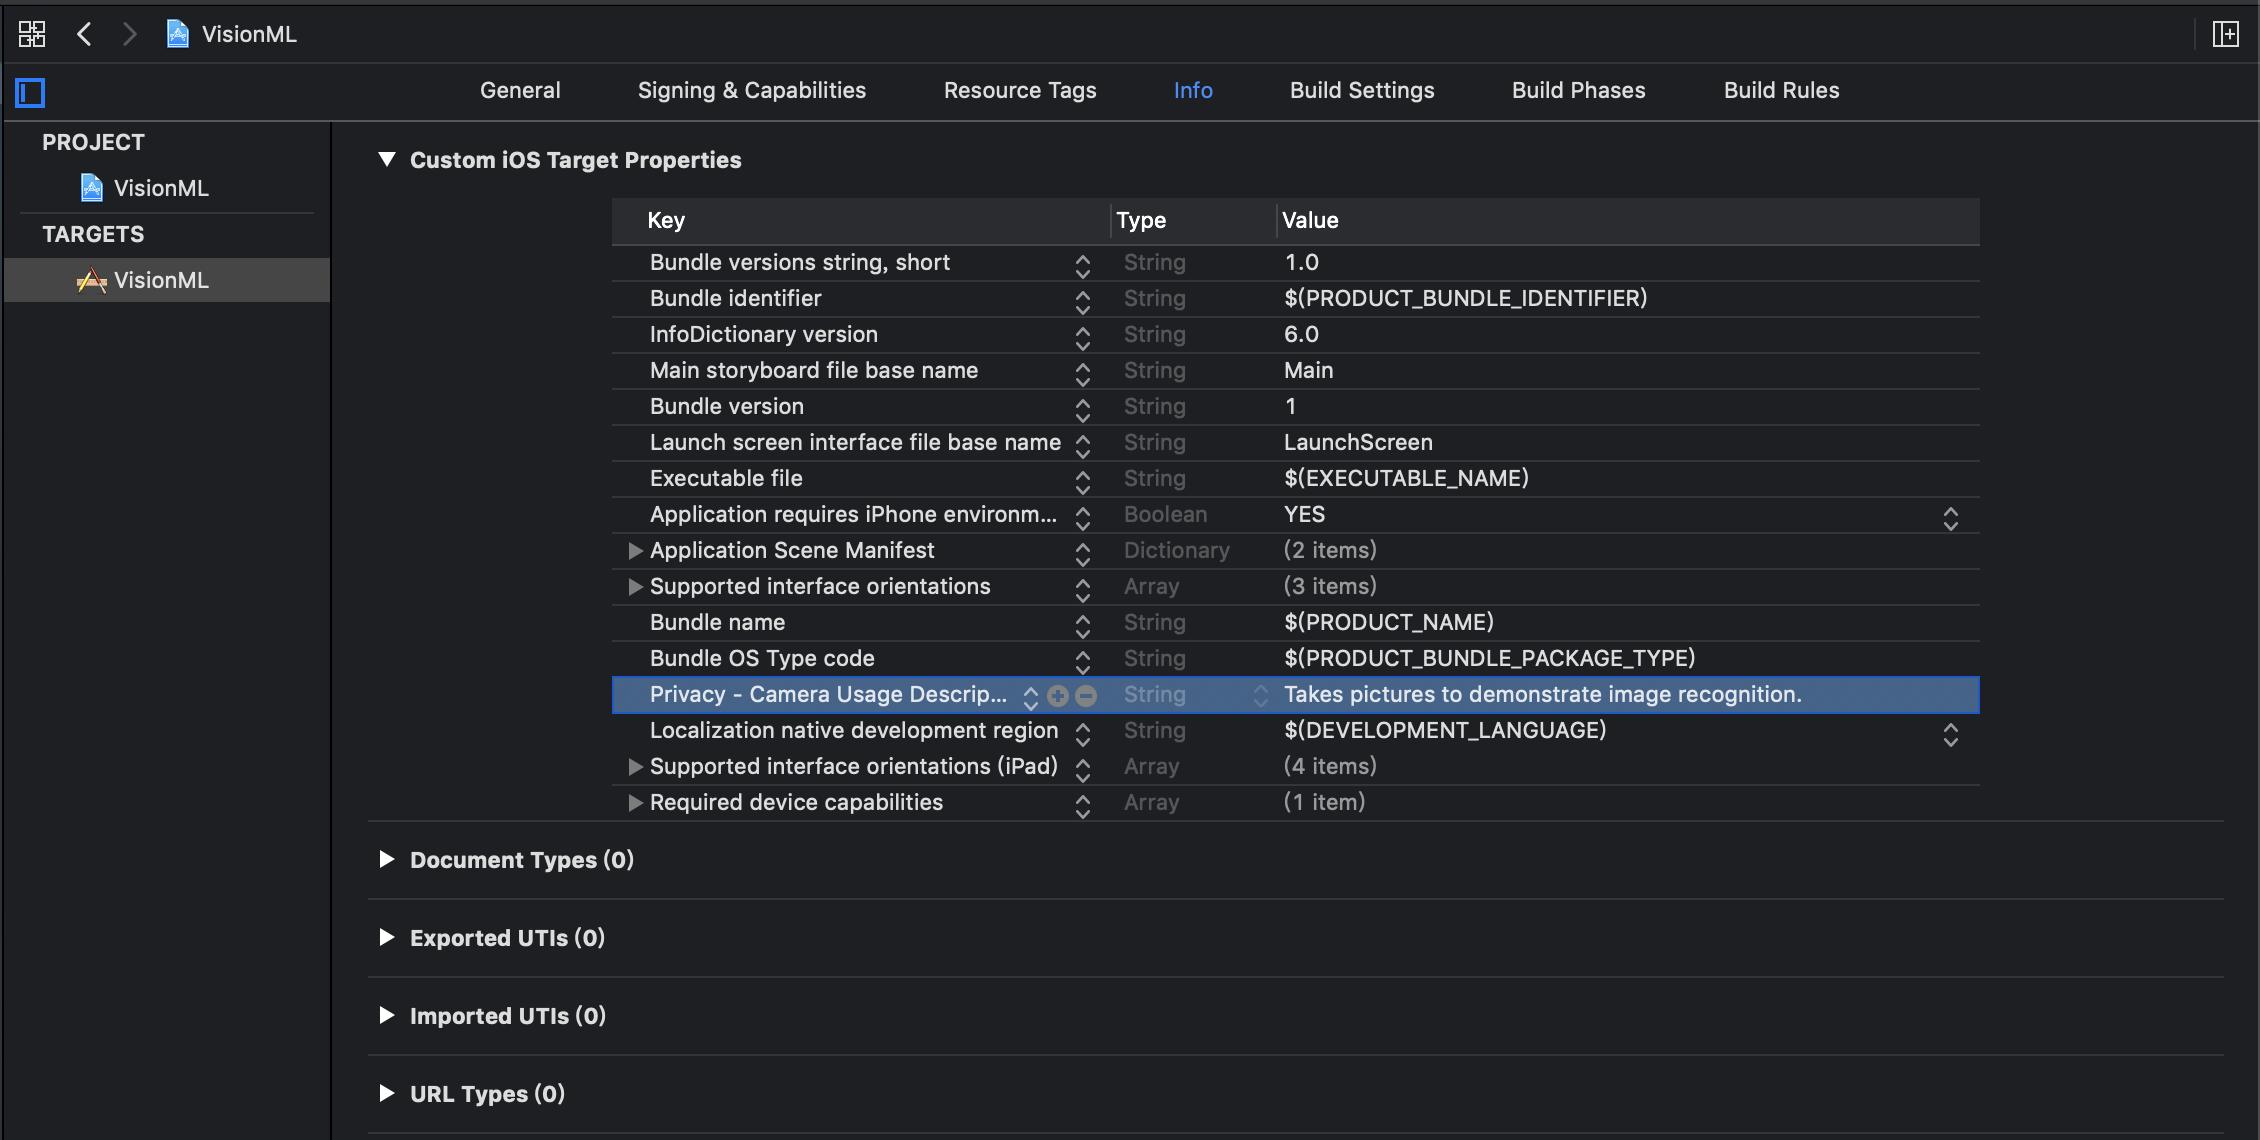
要求使用者權限設定
開啟相機或相簿功能
    @IBAction func takePhotoBtnPressed(_ sender: Any) {
        self.takePicture()
    }
    func takePicture() {
        guard UIImagePickerController.isSourceTypeAvailable(.camera) else {
            presentPhotoPicker(sourceType: .photoLibrary)
            return
        }

        let photoSourcePicker = UIAlertController()
        let takePhoto = UIAlertAction(title: "Take Photo", style: .default) { [unowned self] _ in
            self.presentPhotoPicker(sourceType: .camera)
        }
        let choosePhoto = UIAlertAction(title: "Choose Photo", style: .default) { [unowned self] _ in
            self.presentPhotoPicker(sourceType: .photoLibrary)
        }

        photoSourcePicker.addAction(takePhoto)
        photoSourcePicker.addAction(choosePhoto)
        photoSourcePicker.addAction(UIAlertAction(title: "Cancel", style: .cancel, handler: nil))

        present(photoSourcePicker, animated: true)
    }
    func presentPhotoPicker(sourceType: UIImagePickerController.SourceType) {
        let picker = UIImagePickerController()
        picker.delegate = self
        picker.sourceType = sourceType
        present(picker, animated: true)
    }
}
extension ViewController: UIImagePickerControllerDelegate, UINavigationControllerDelegate {
    func imagePickerController(_ picker: UIImagePickerController, didFinishPickingMediaWithInfo info: [UIImagePickerController.InfoKey: Any]) {
        picker.dismiss(animated: true)

        let image = info[UIImagePickerController.InfoKey.originalImage] as! UIImage
        imageView.image = image
        updateClassifications(for: image)
    }
}
將選到的相片交由SqueezeNet Model解析
lazy var classificationRequest: VNCoreMLRequest = {
        do {
            let model = try VNCoreMLModel(for: SqueezeNet().model)

            let request = VNCoreMLRequest(model: model, completionHandler: { [weak self] request, error in
                self?.processClassifications(for: request, error: error)
            })
            request.imageCropAndScaleOption = .centerCrop
            return request
        } catch {
            fatalError("Failed to load Vision ML model: \(error)")
        }
    }()

func updateClassifications(for image: UIImage) {
        textView.text = "Classifying..."

        let orientation = CGImagePropertyOrientation(rawValue: UInt32(image.imageOrientation.rawValue))
        guard let ciImage = CIImage(image: image) else { fatalError("Unable to create \(CIImage.self) from \(image).") }

        DispatchQueue.global(qos: .userInitiated).async {
            let handler = VNImageRequestHandler(ciImage: ciImage, orientation: orientation!)
            do {
                try handler.perform([self.classificationRequest])
            } catch {
                print("Failed to perform classification.\n\(error.localizedDescription)")
            }
        }
    }
整理分析結果,根據數值高低,取前兩項較高者顯示
func processClassifications(for request: VNRequest, error: Error?) {
        DispatchQueue.main.async {
            guard let results = request.results else {
                self.textView.text = "Unable to classify image.\n\(error!.localizedDescription)"
                return
            }
            let classifications = results as! [VNClassificationObservation]

            if classifications.isEmpty {
                self.textView.text = "Nothing recognized."
            } else {
                let topClassifications = classifications.prefix(2)
                let descriptions = topClassifications.map { classification in
                   return String(format: "  (%.2f) %@", classification.confidence, classification.identifier)
                }
                self.textView.text = "Classification:\n" + descriptions.joined(separator: "\n")
            }
        }
    }
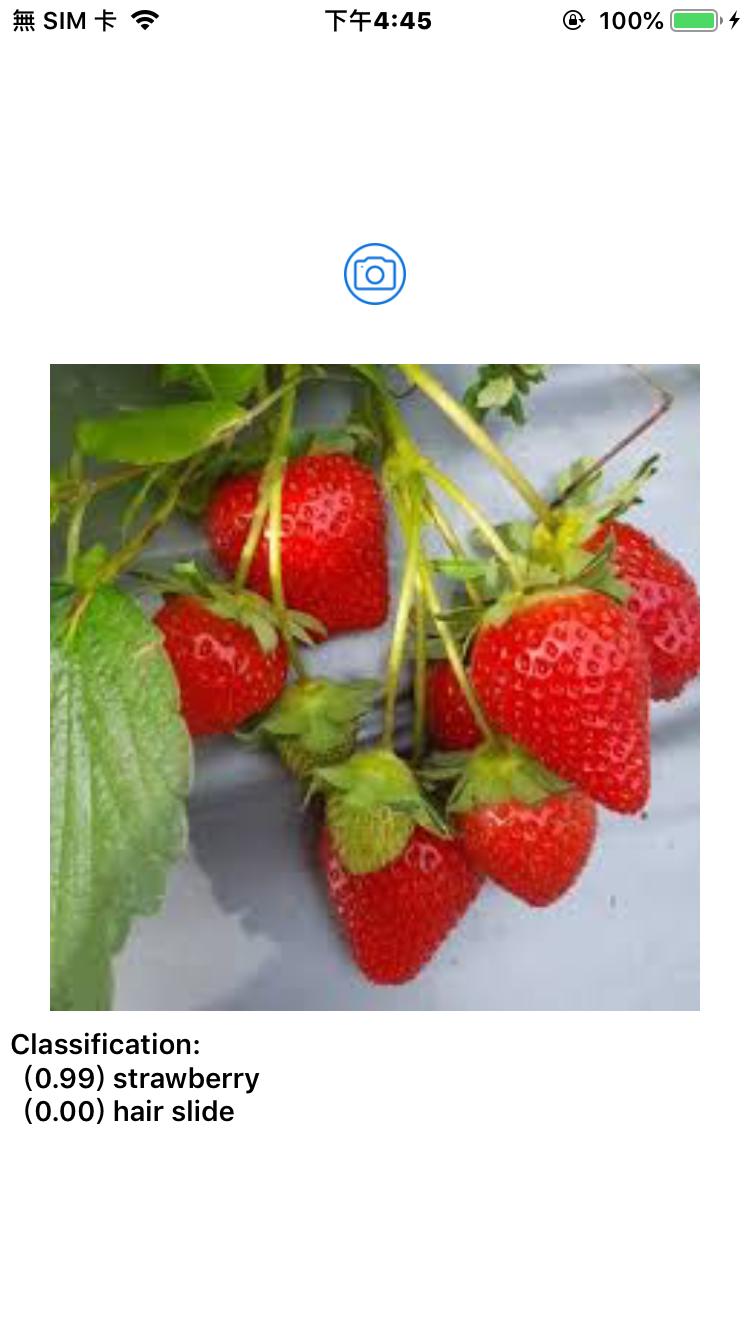
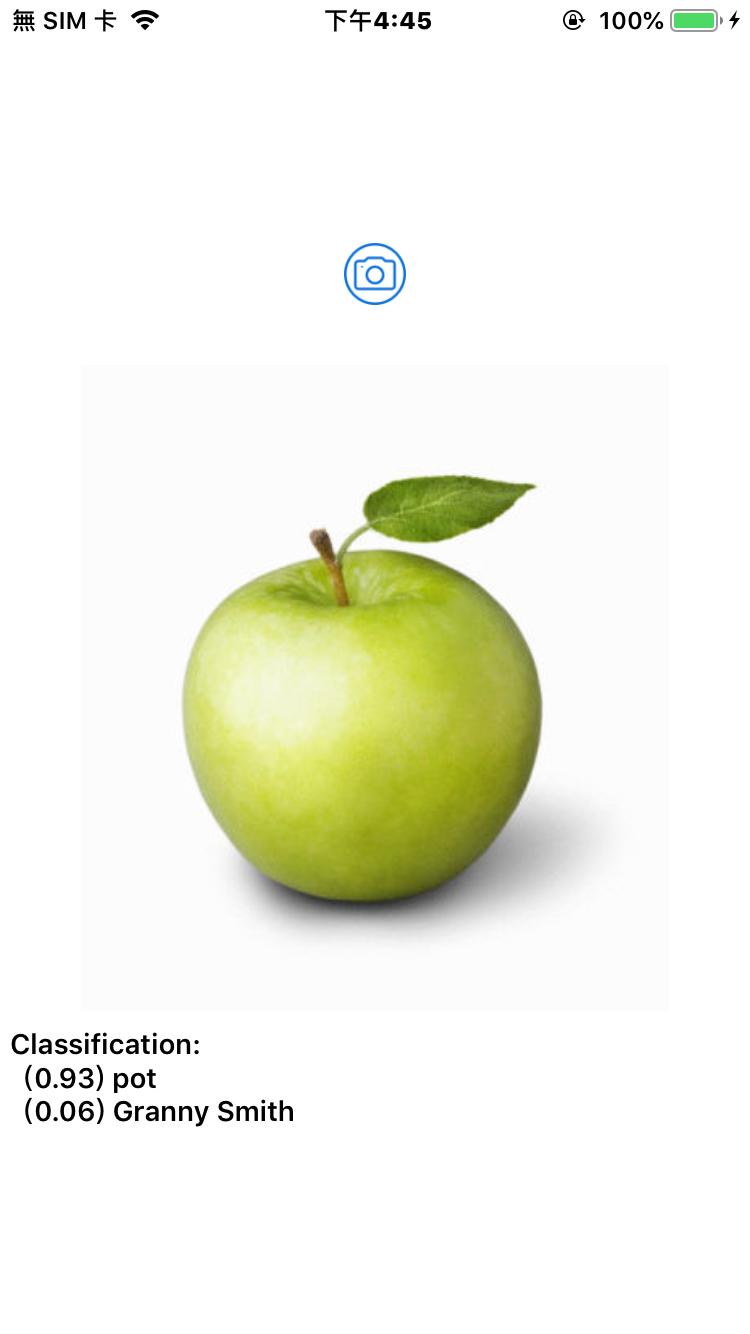
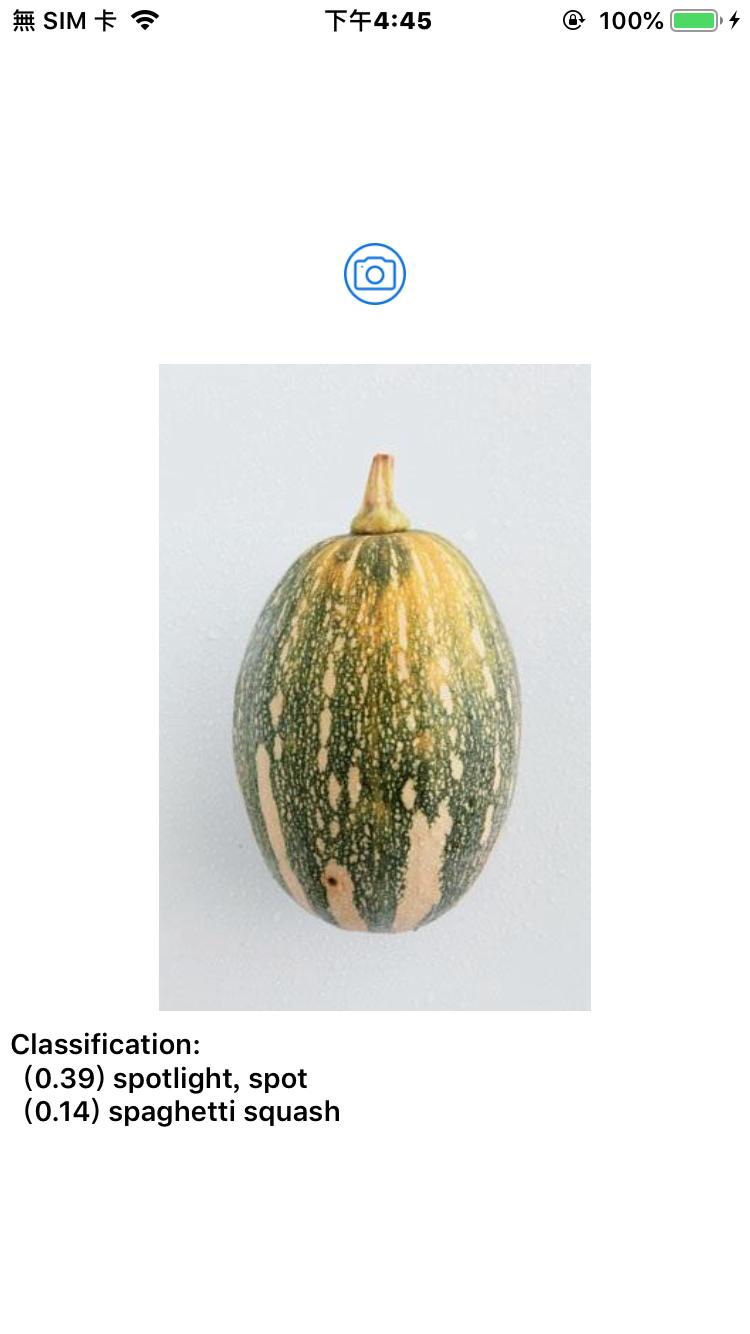
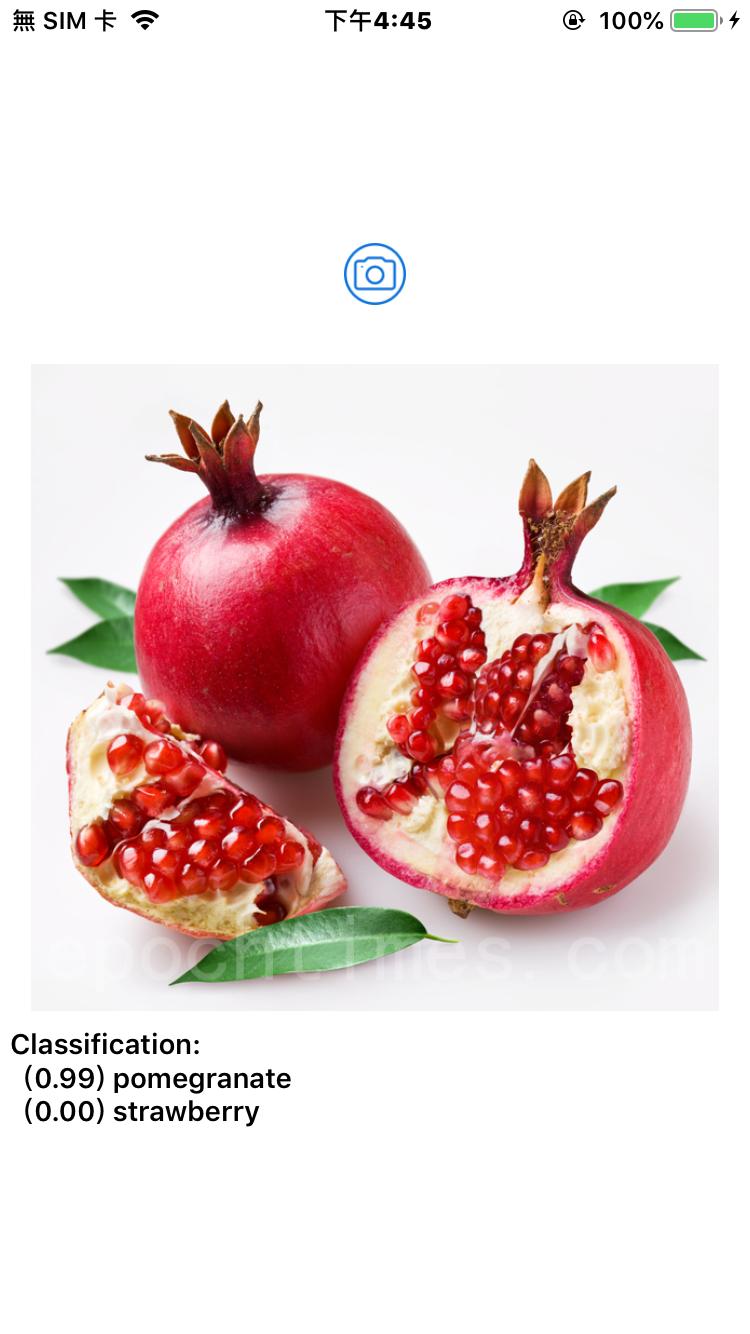
結果:
.結論:在2019年 WWDC 發表的最新版Core ML 3.0,可讓手機App使用先進的模型,來呈現更好的視覺理解、自然語言和語音體驗。更重要的是,開發者能透過「模型個人化」功能,在裝置上更新機器學習模型。
參考來源:
https://developer.apple.com/machine-learning/
https://developer.apple.com/machine-learning/core-ml/
https://developer.apple.com/machine-learning/resources/
https://developer.apple.com/documentation/coreml