Swift實作Facebook、Google、Apple ID第三方登入功能
現今APP的用途很廣泛,無論是生活還是娛樂用,很多APP採用了會員系統,讓使用者必須使用一組帳號密碼來做登入,使用者方面可以記錄自己的喜好,而開發者也能保存使用者的資料。但我們都知道要多記住一組帳密其實是很麻煩的事情,如果可以選擇使用Facebook、Google,或是iOS使用者必備的Apple帳號來作為會員登入,相信對諸多使用者來說都是很方便的,而開發者也能夠藉此取得更多資訊,真是一舉數得可喜可賀(?)。
這篇文章將會以這三個平台為例子,介紹開發者如何串接第三方登入,以及可以從中得到哪些使用者資料。
一、使用Facebook作為第三方登入平台
以下會介紹詳細的使用步驟,亦可直接參閱官方說明文件:
https://developers.facebook.com/docs/facebook-login/ios
我們先建立一個XCODE專案,接著至FB的開發者平台(https://developers.facebook.com/)
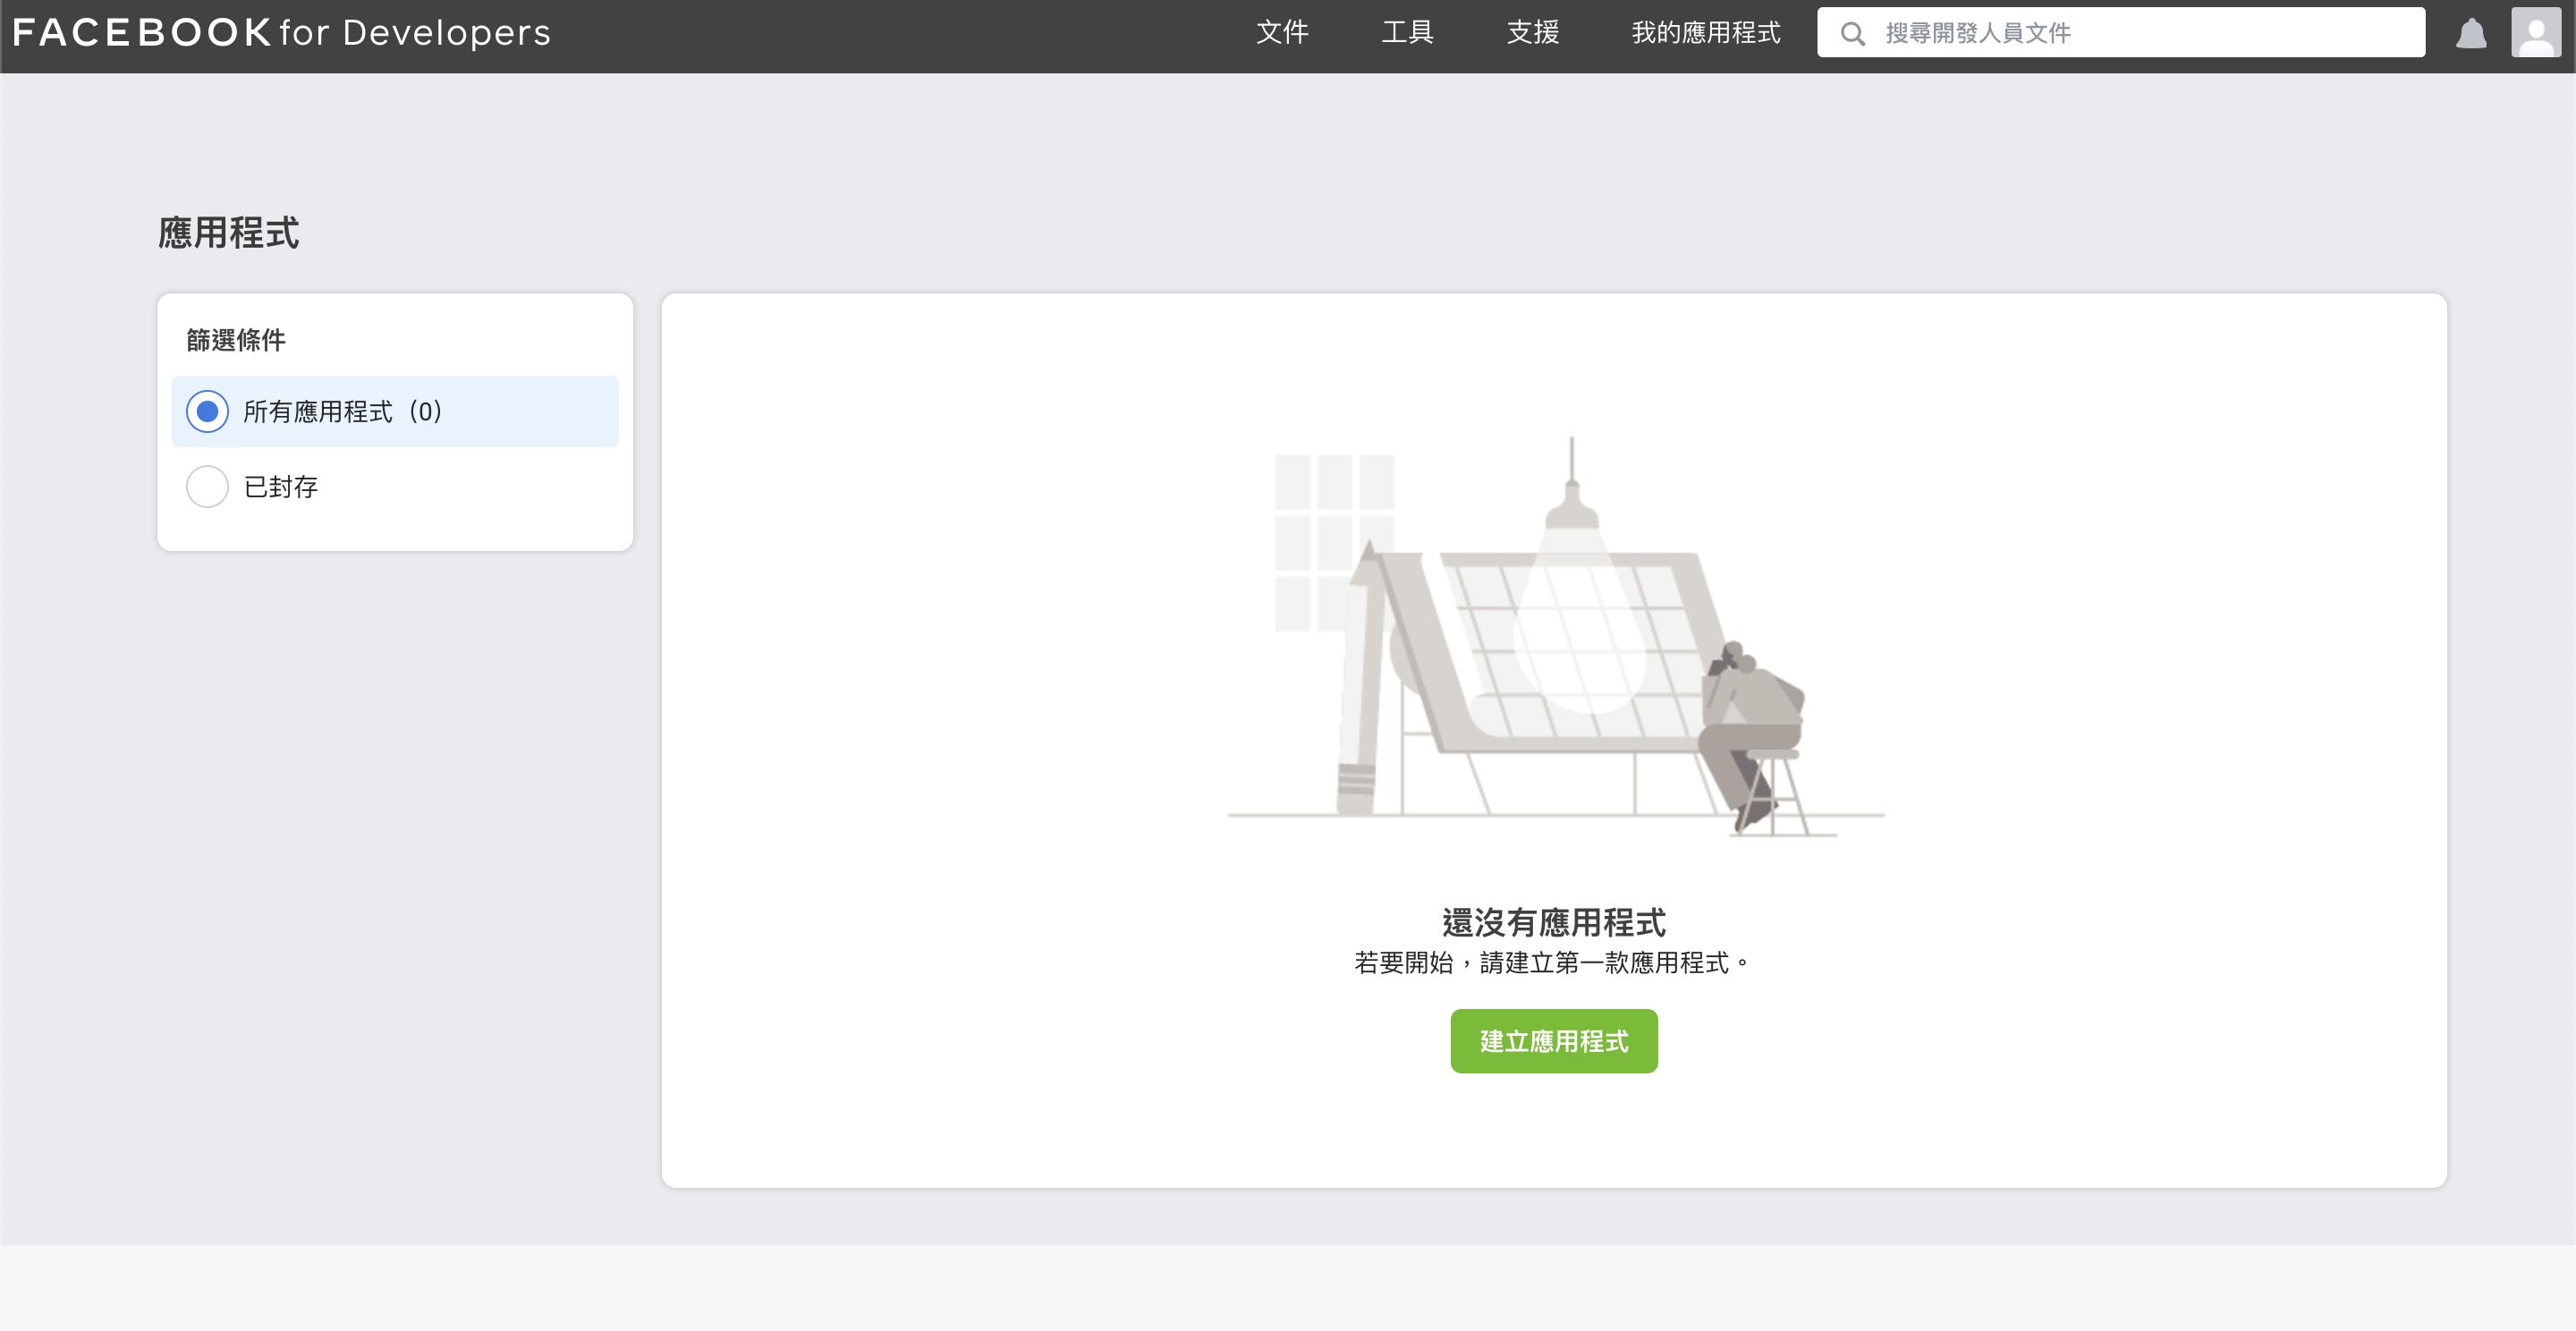
在註冊為開發者後,進入開發者首頁,點擊右上「我的應用程式」,並建立一個應用程式。
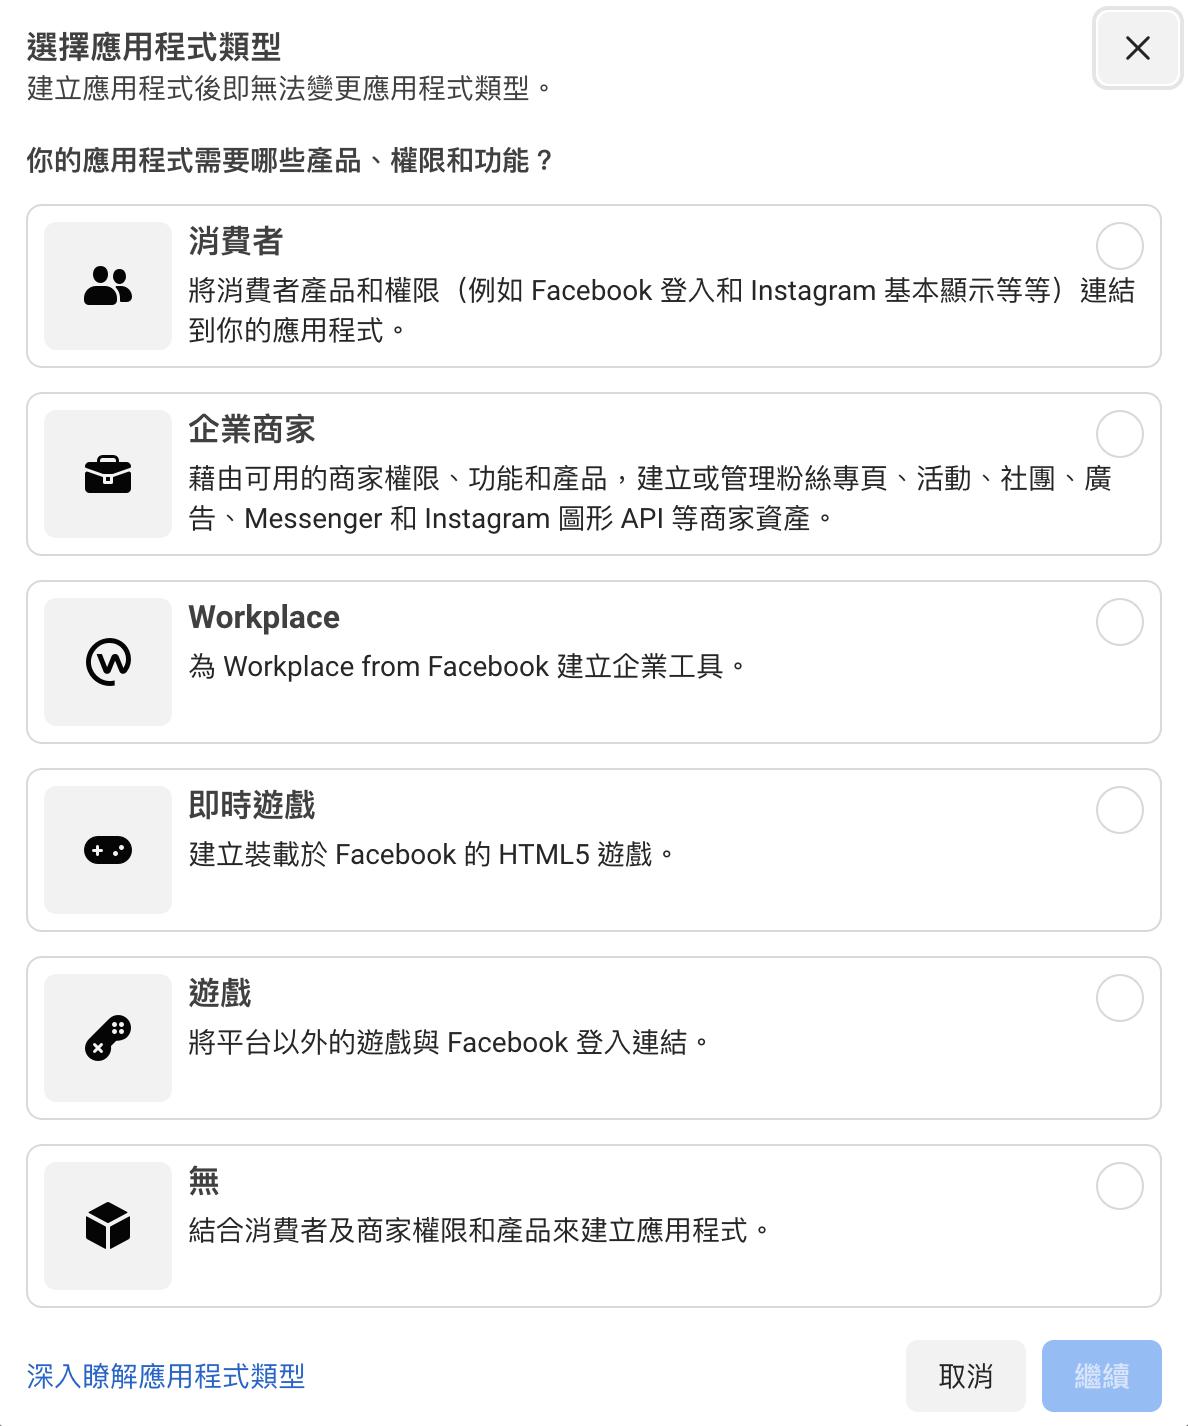
選擇消費者。
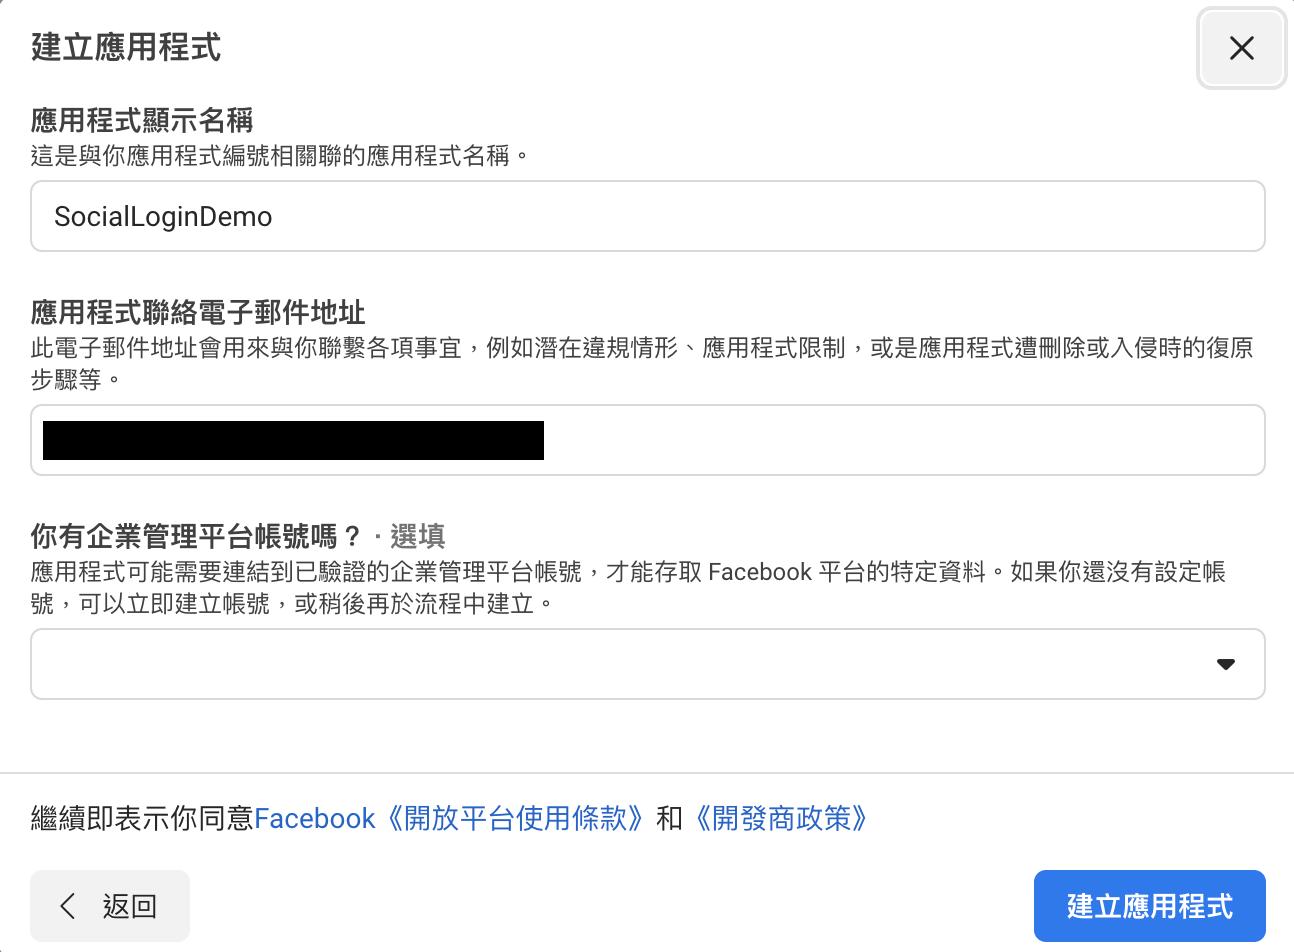
填入應用程式顯示名稱,注意不能直接使用FB、Facebook等包含官方名稱的文字,然後點擊建立應用程式。
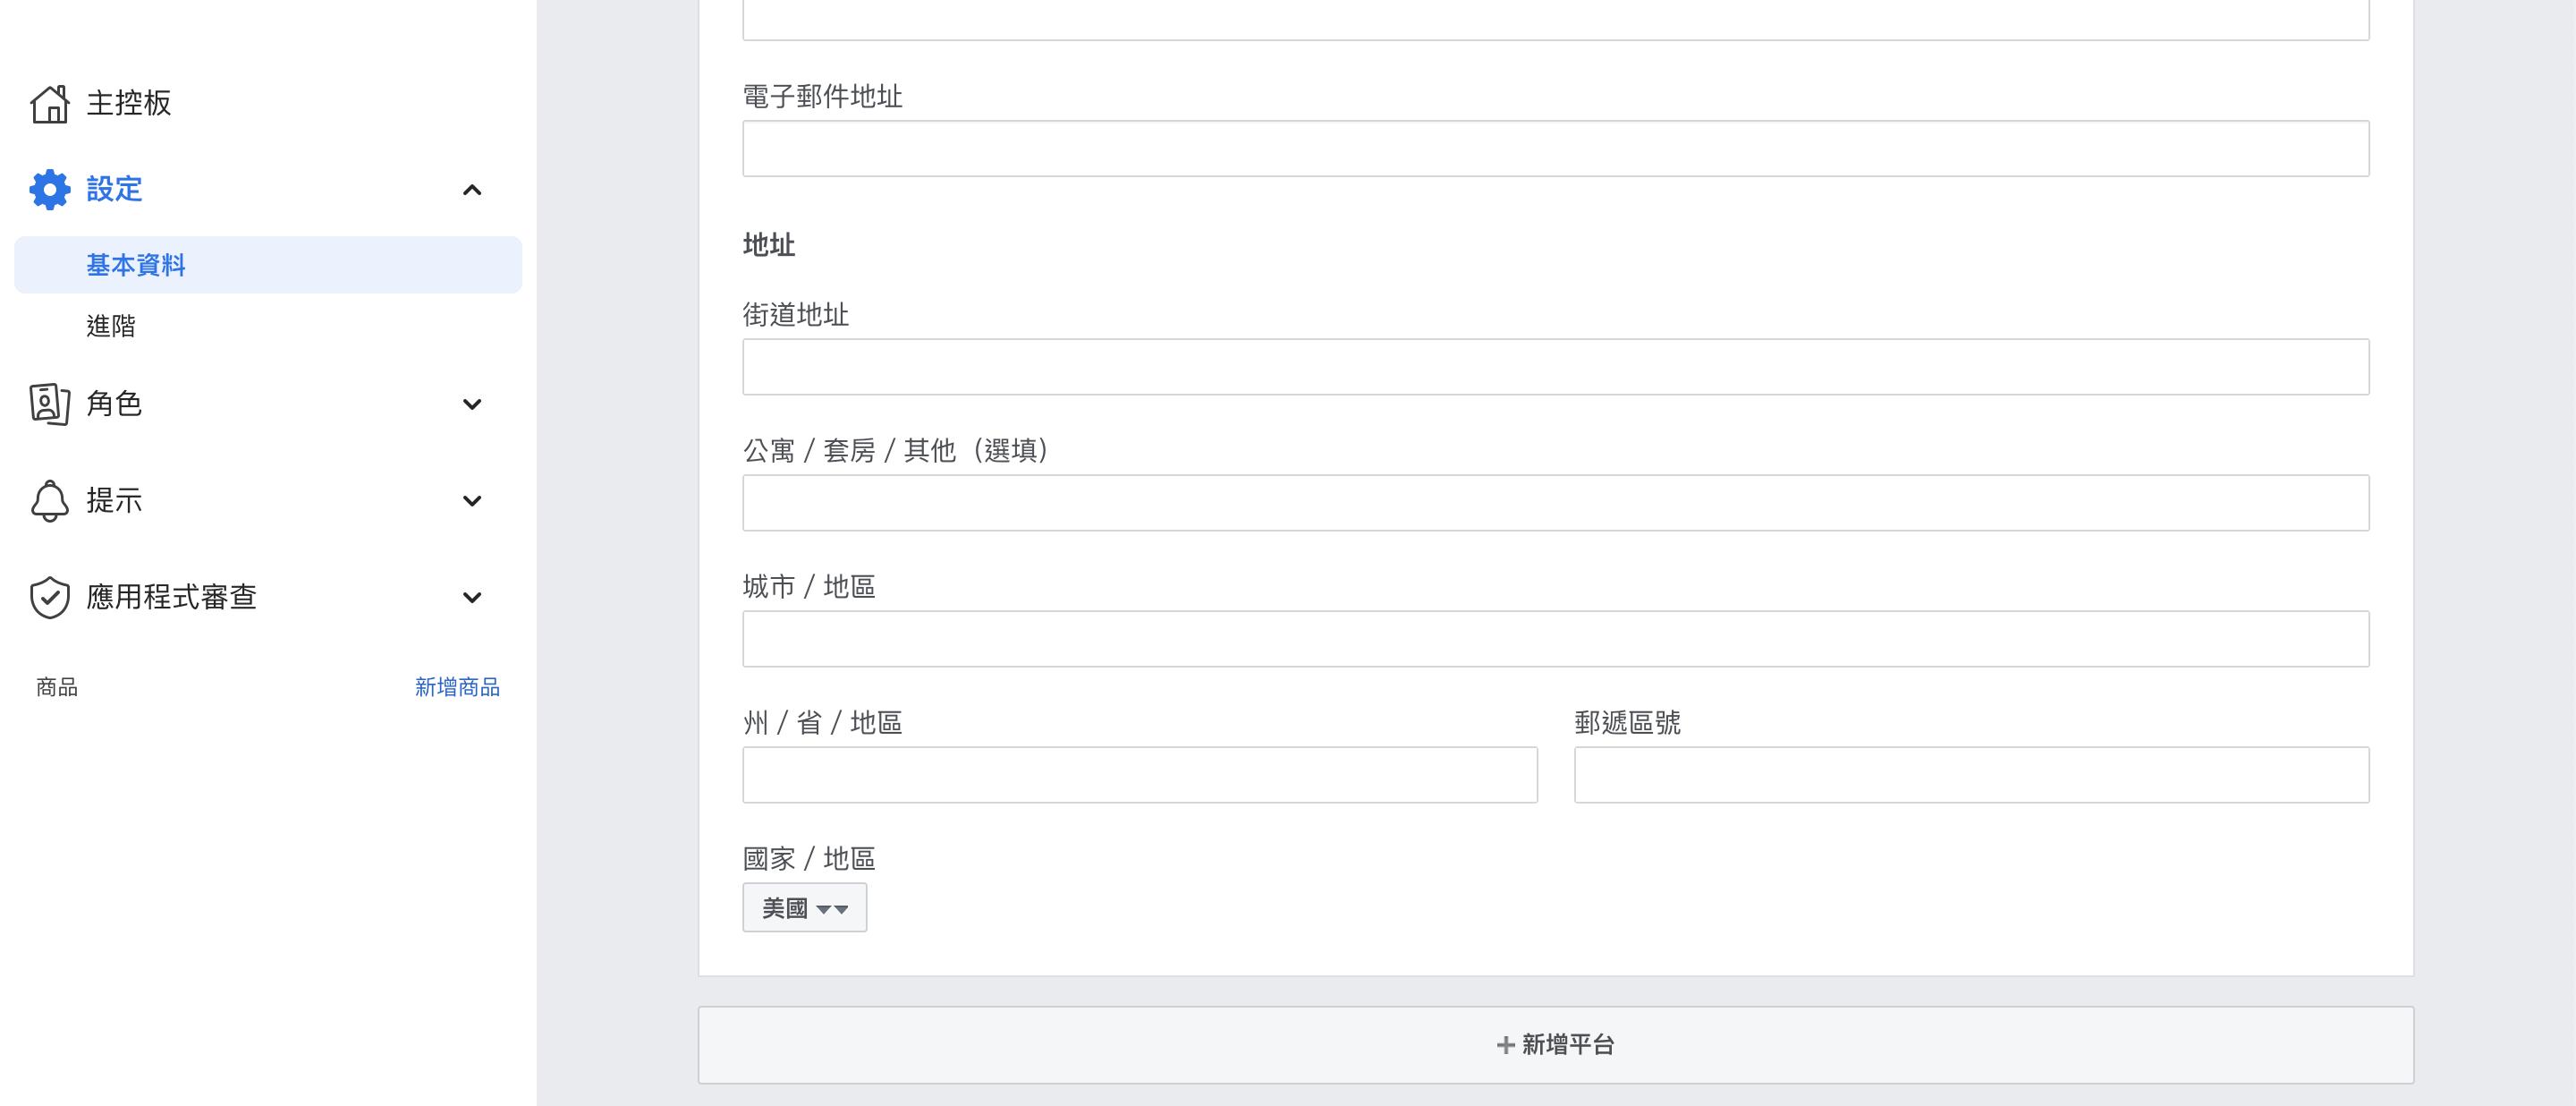
之後在左邊的側邊欄選取設定>基本資料,拉到最底下新增平台。
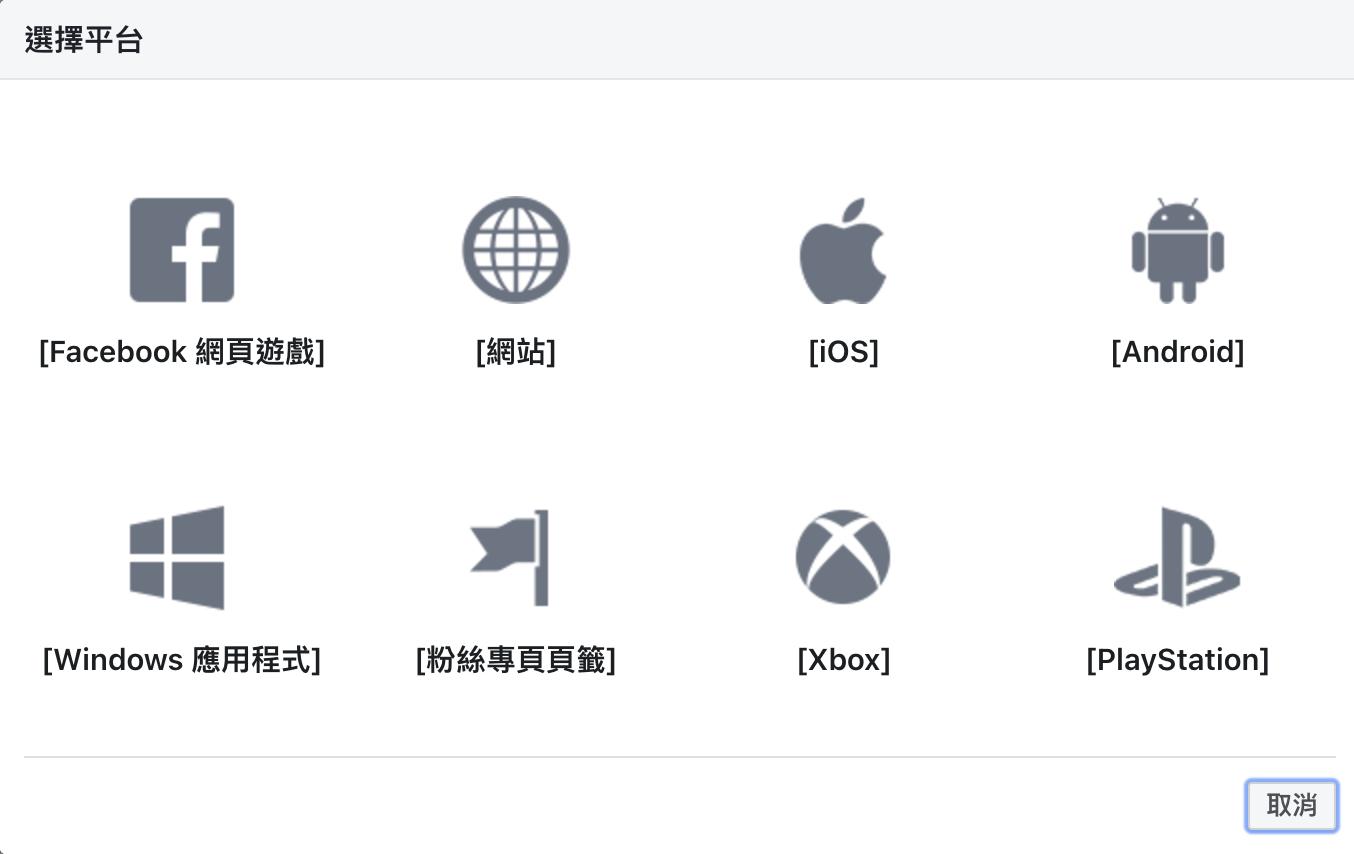
選擇iOS。
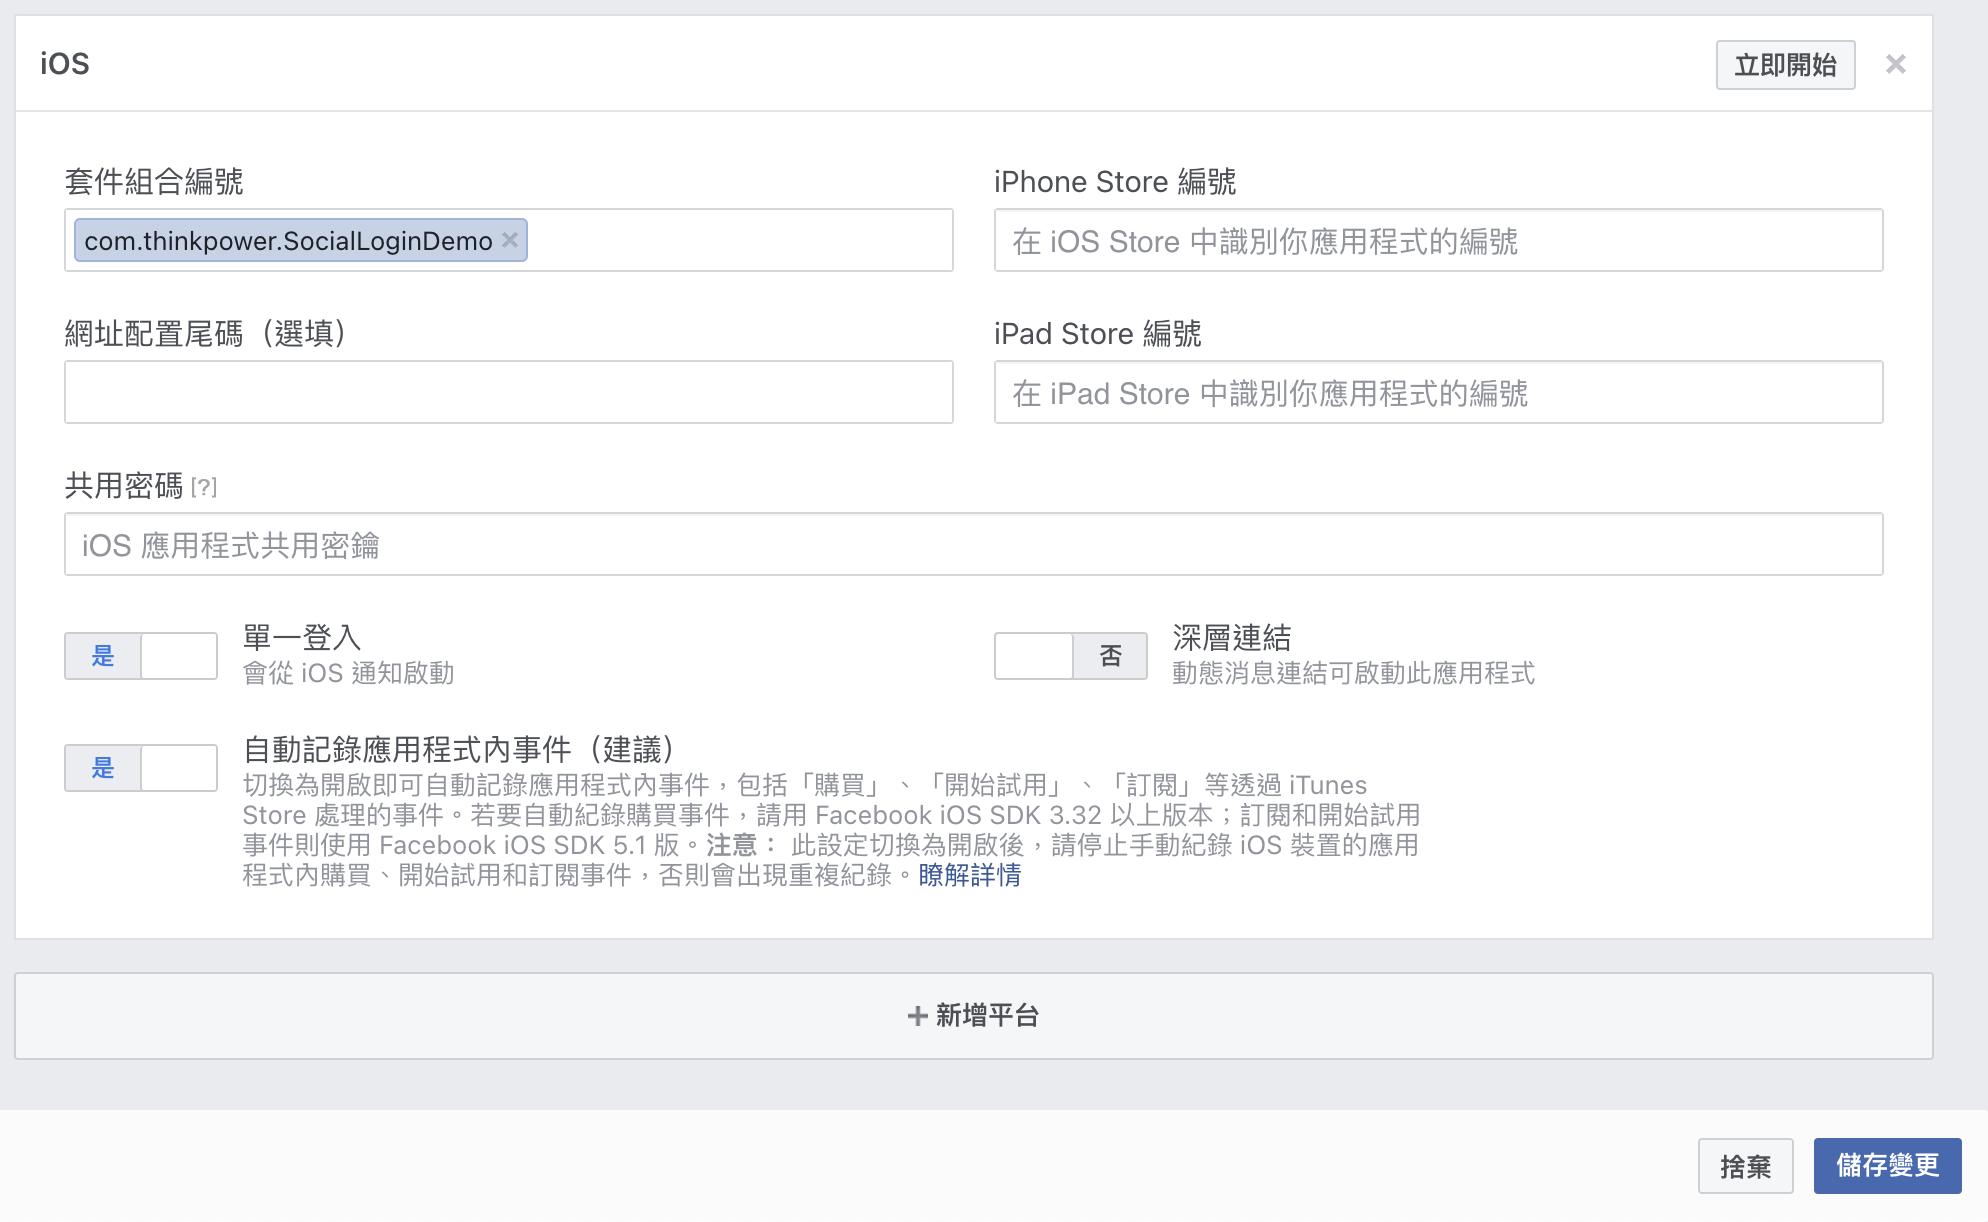
套件組和編號即為專案中的Bundle ID,以及記得把單一登入改為「是」,然後點擊右下方的「儲存變更」。
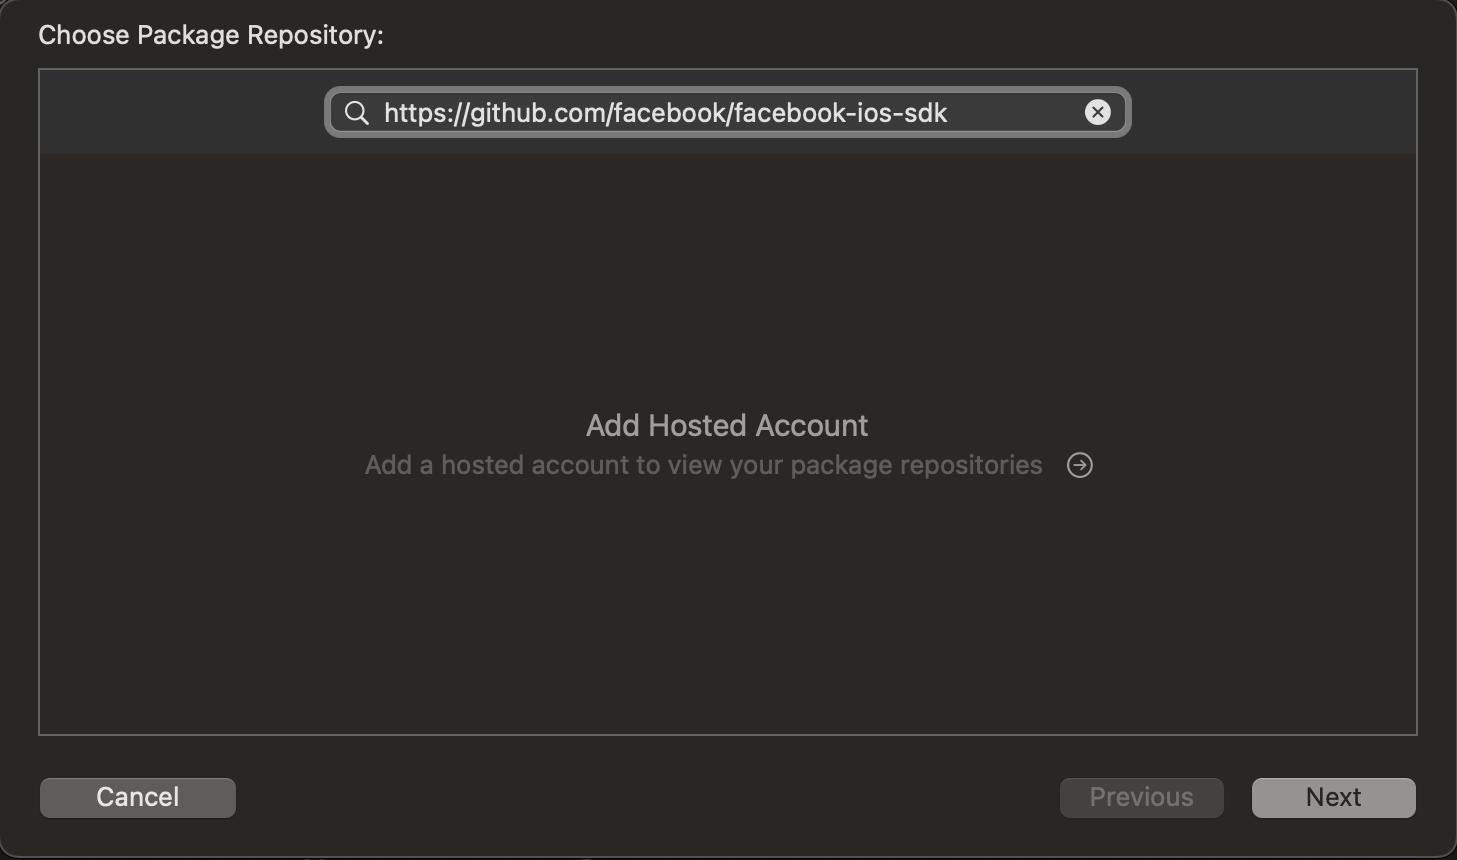
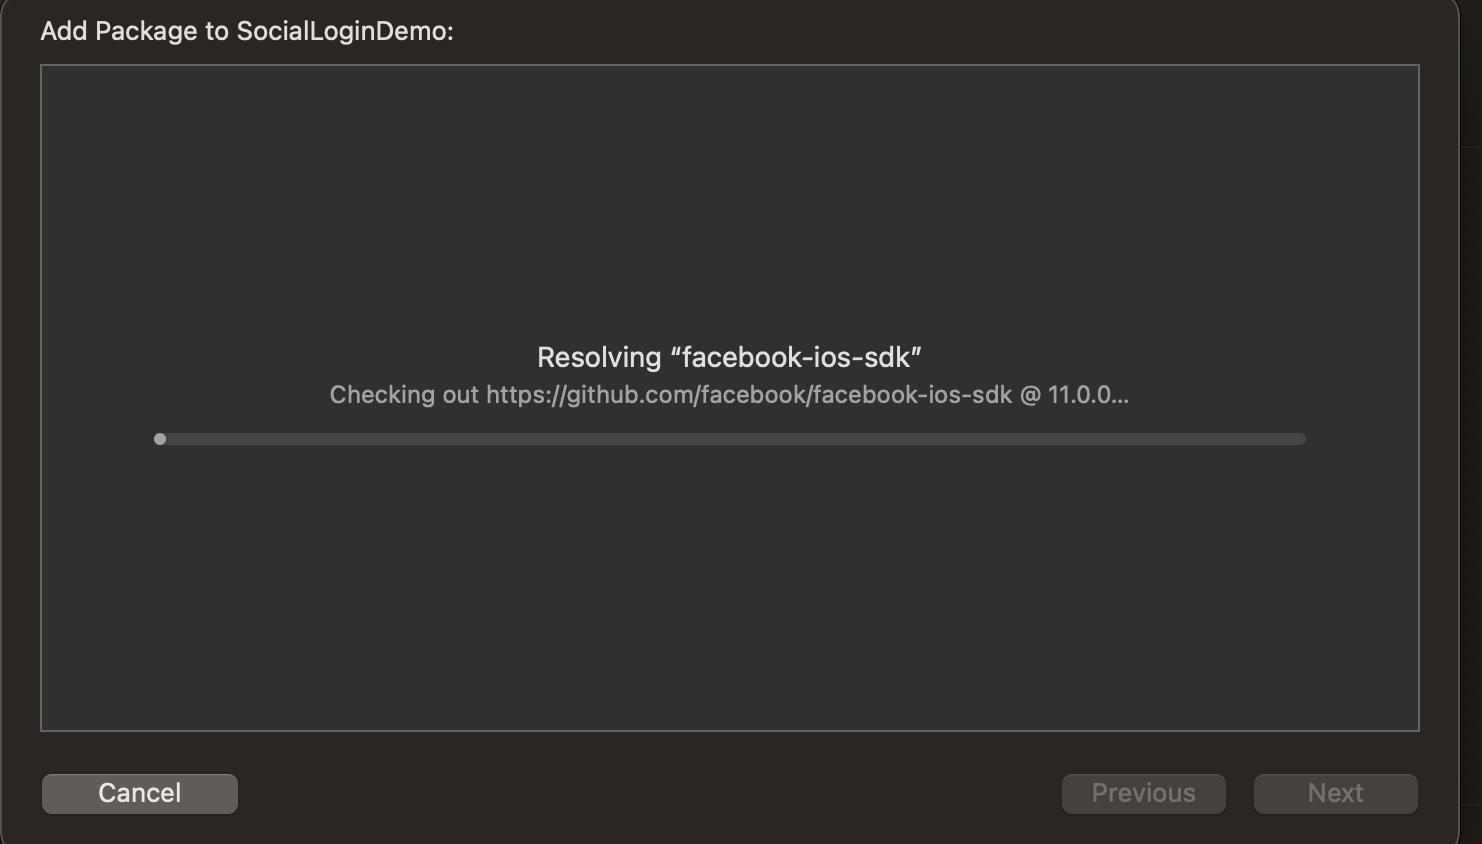
接著回到XCODE專案裡。跟著官方文件在 File> Swift Packages> Add Package Dependency中,輸入框填入:https://github.com/facebook/facebook-ios-sdk
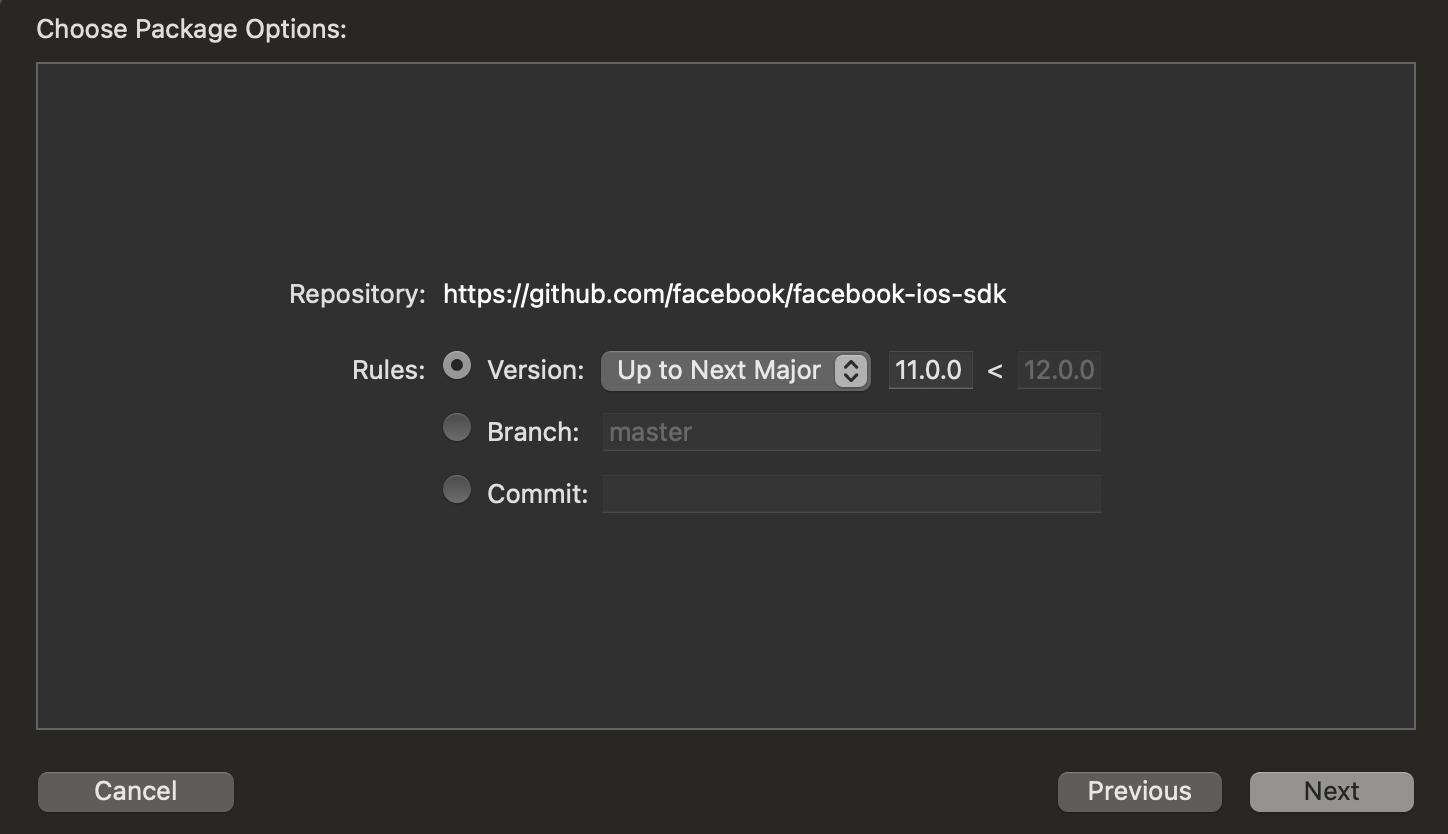
預設已為Up to Next Major。
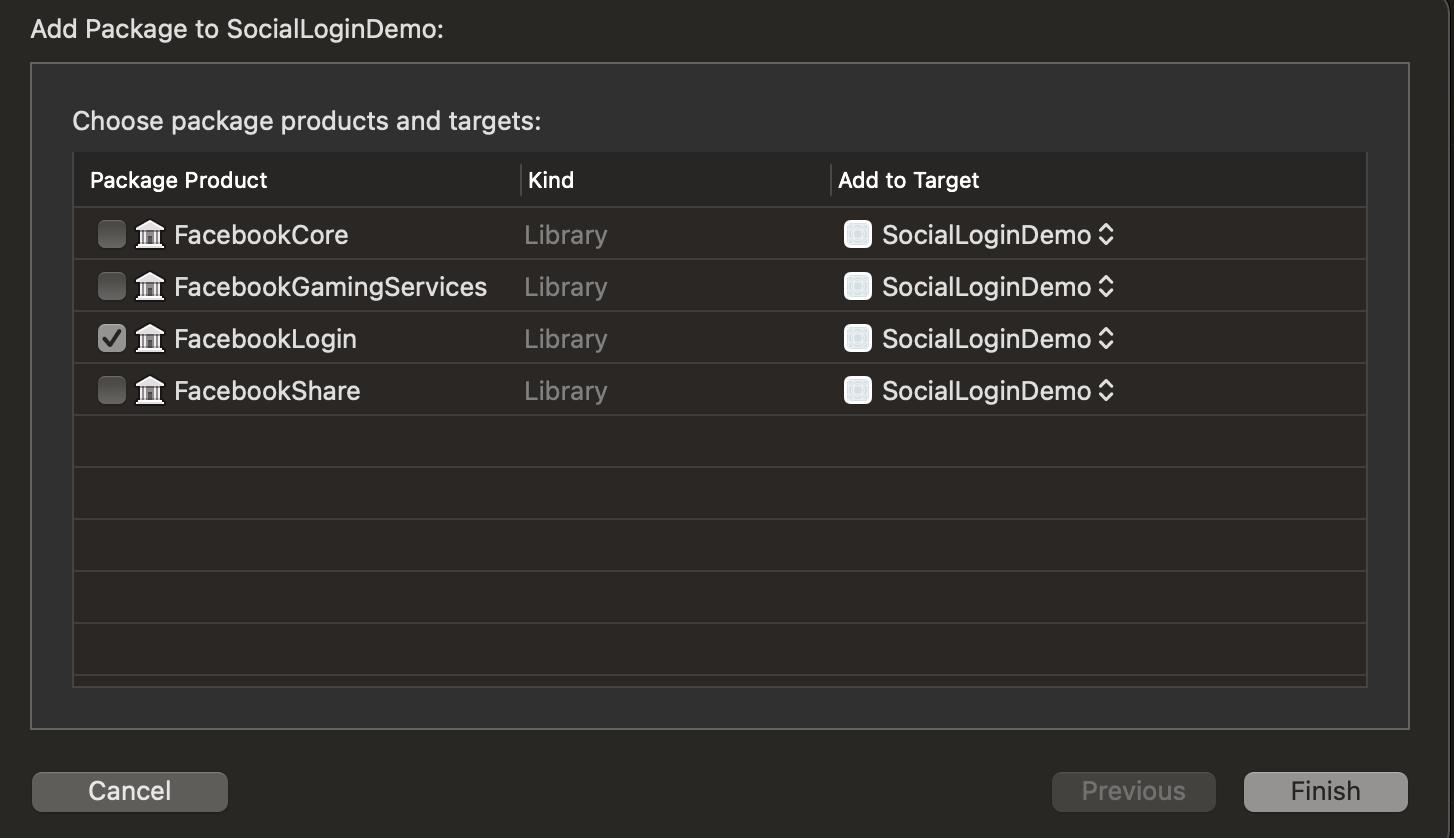
選擇FacebookLogin後,點擊Finish,接著就可以看到左邊多了一欄。
 接著我們設定專案,按照說明,在專案的Info.plist選擇以原始碼開啟(右鍵>Open As>Source Code),在<dict>...</dict>中貼上代碼。
<key>CFBundleURLTypes</key>
<array>
    <dict>
        <key>CFBundleURLSchemes</key>
        <array>
            <string>fb2963XXXXXXXXXXX</string>
        </array>
    </dict>
</array>
<key>FacebookAppID</key>
<string>2963XXXXXXXXXXX</string>
<key>FacebookDisplayName</key>
<string>SocialLoginDemo</string>
<key>LSApplicationQueriesSchemes</key>
<array>
    <string>fbapi</string>
    <string>fbapi20130214</string>
    <string>fbapi20130410</string>
    <string>fbapi20130702</string>
    <string>fbapi20131010</string>
    <string>fbapi20131219</string>
    <string>fbapi20140410</string>
    <string>fbapi20140116</string>
    <string>fbapi20150313</string>
    <string>fbapi20150629</string>
    <string>fbapi20160328</string>
    <string>fbauth</string>
    <string>fb-messenger-share-api</string>
    <string>fbauth2</string>
    <string>fbshareextension</string>
</array>
2963開頭的那串數字請換成自己的應用程式編號,在FB的開發者頁面上方可以找到。

SocialLoginDemo也要換成自己在FB建立的應用程式名稱(非XCODE專案名稱)。
再來到AppDelegate.swift裡,把裡面的程式碼直接改為下面這段:
import UIKit
import FacebookLogin

@UIApplicationMain
class AppDelegate: UIResponder, UIApplicationDelegate {

    func application(_ application: UIApplication, didFinishLaunchingWithOptions launchOptions: [UIApplication.LaunchOptionsKey: Any]?) -> Bool {
        ApplicationDelegate.shared.application(application, didFinishLaunchingWithOptions: launchOptions)
        return true
    }

    func application(_ app:UIApplication, open url:URL, options: [UIApplication.OpenURLOptionsKey :Any] = [:]) -> Bool {
        ApplicationDelegate.shared.application(app, open: url, sourceApplication: options[UIApplication.OpenURLOptionsKey.sourceApplication] as? String, annotation: options[UIApplication.OpenURLOptionsKey.annotation])
    }

}
這段的作用,讓我借用一下官方文件說明:
『此程式碼會在應用程式啟動時初始化 SDK,並在執行「登入」或「分享」動作時,讓 SDK 處理原生 Facebook 應用程式的結果。』
另外在SceneDelegate.swift中,先import FBSDKCoreKit後,加入以下程式碼:
func scene(_ scene:UIScene, openURLContexts URLContexts:Set<UIOpenURLContext>) {
        guard let url = URLContexts.first?.url else { return }
        ApplicationDelegate.shared.application( UIApplication.shared, open: url, sourceApplication: nil, annotation: [UIApplication.OpenURLOptionsKey.annotation] )
    }
這段程式碼將處理開啟網址的功能。
再來是置入按鈕的部分,官方有提供按鈕的圖示,如果要直接使用的話,在ViewController裡,先import FacebookLogin,並在viewDidLoad裡放進程式碼:
let loginButton = FBLoginButton()
loginButton.center = view.convert(CGPoint(x: view.center.x, y: 300), from: self.view)
view.addSubview(loginButton)
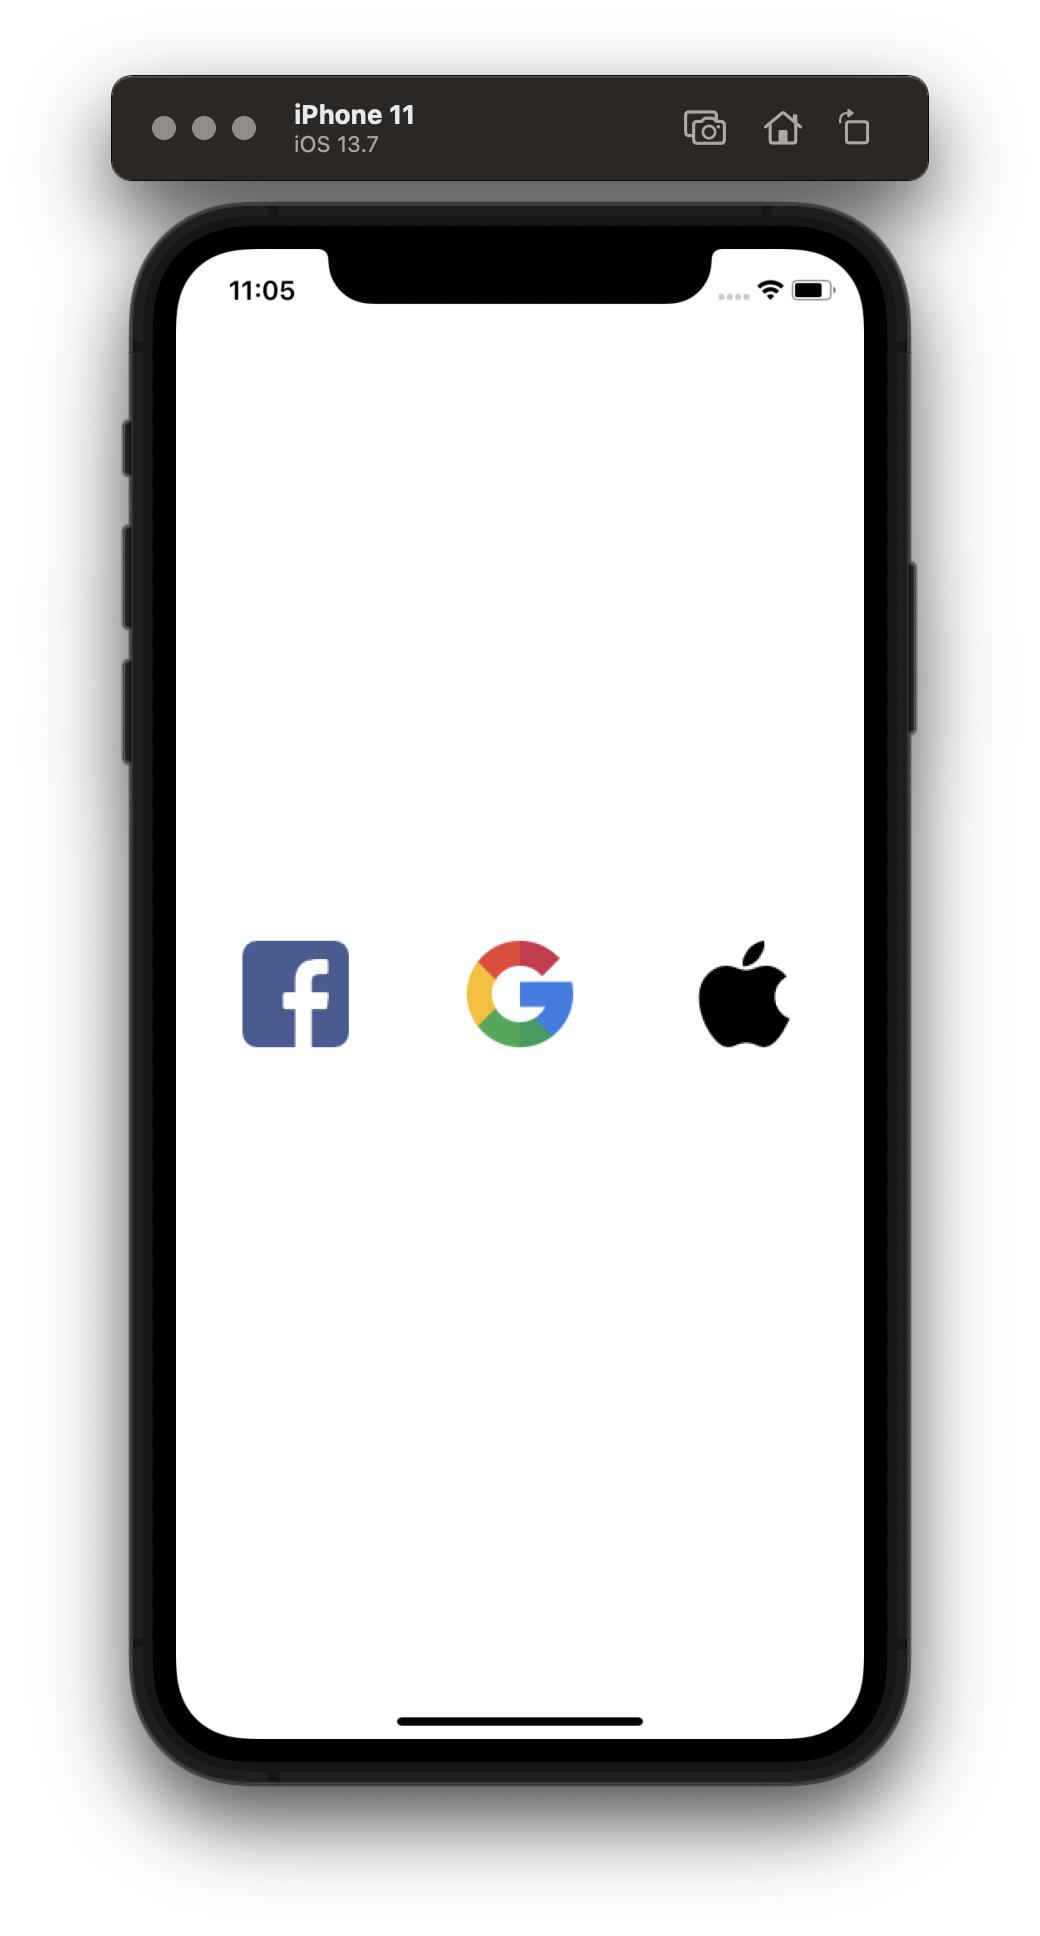
不過我這次自己做了三個按鈕。
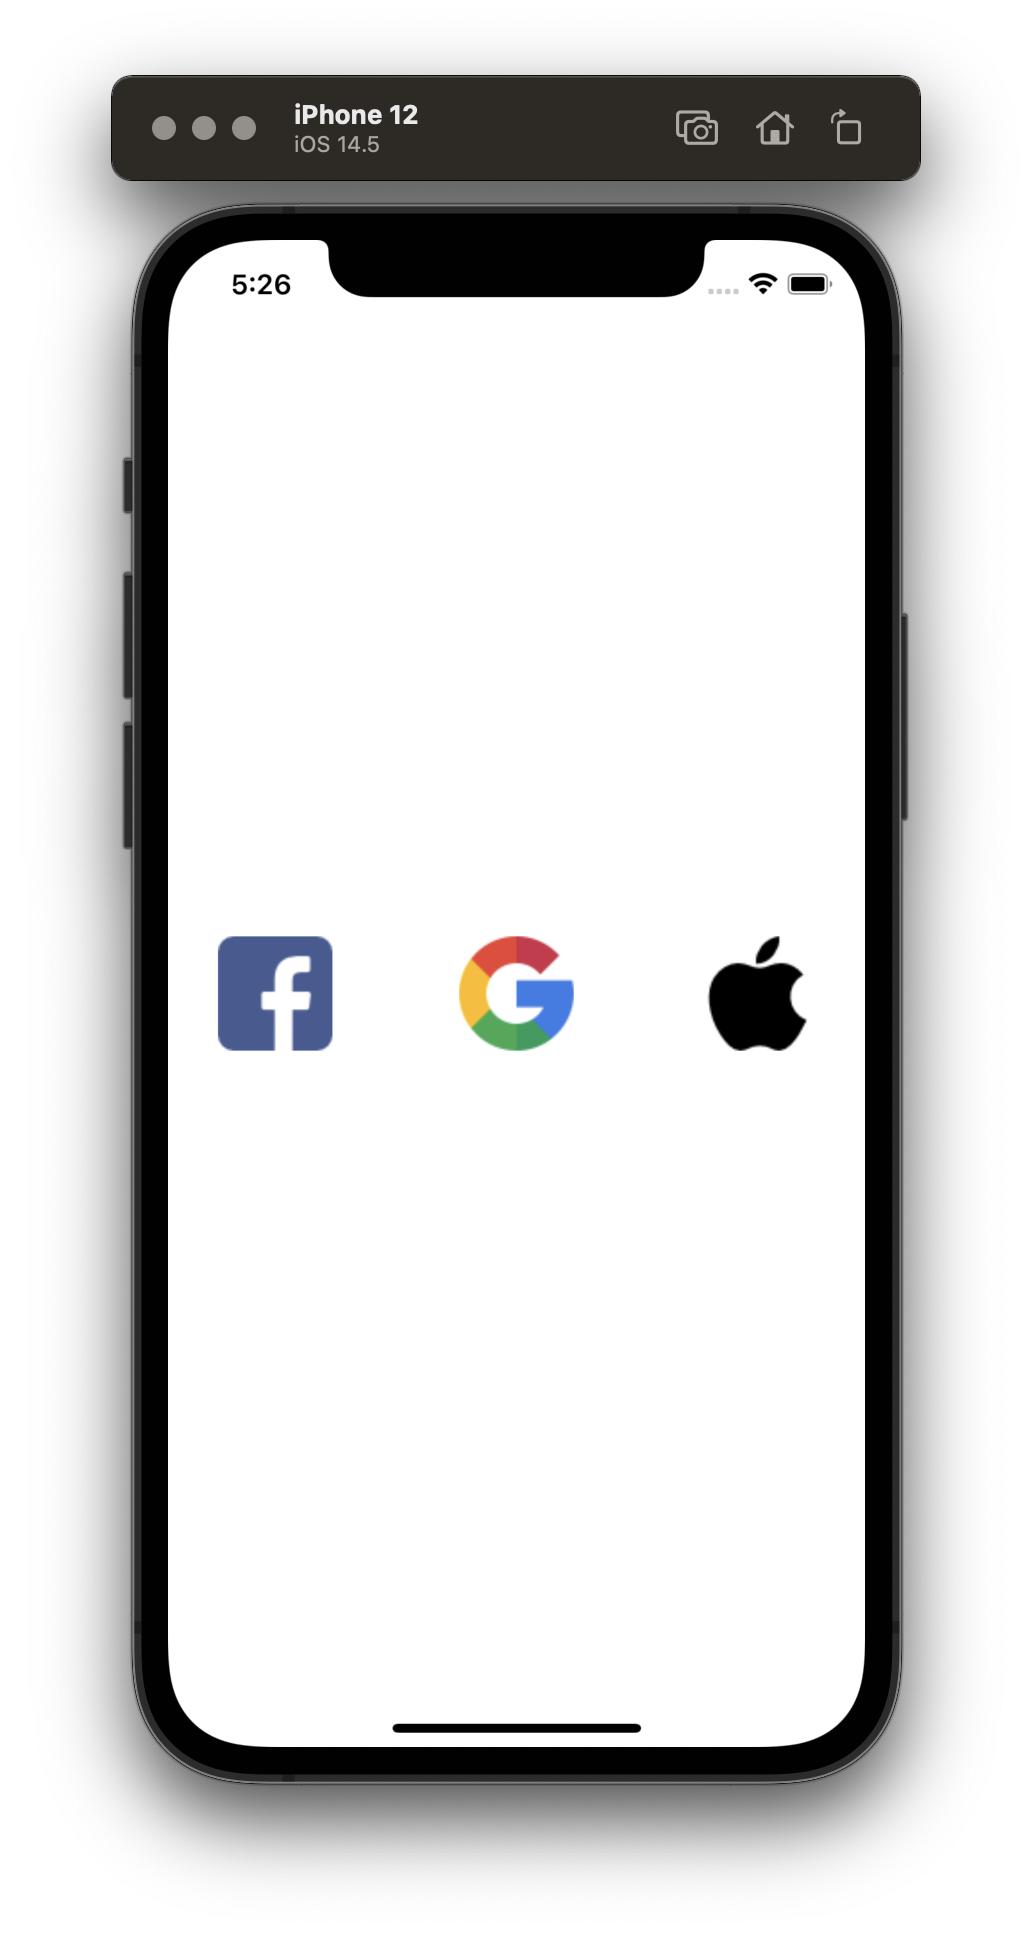
所以我在按鈕裡放入:
let loginManager = LoginManager()

loginManager.logIn(permissions: [.publicProfile, .email], viewController : nil) { loginResult in
    switch loginResult {
    case .failed(let error):
         print(error)
    case .cancelled:
         print("-------User cancelled login")
    case .success(granted: _, declined: _, token: _):
         print("-------Logged in")
        }
 }
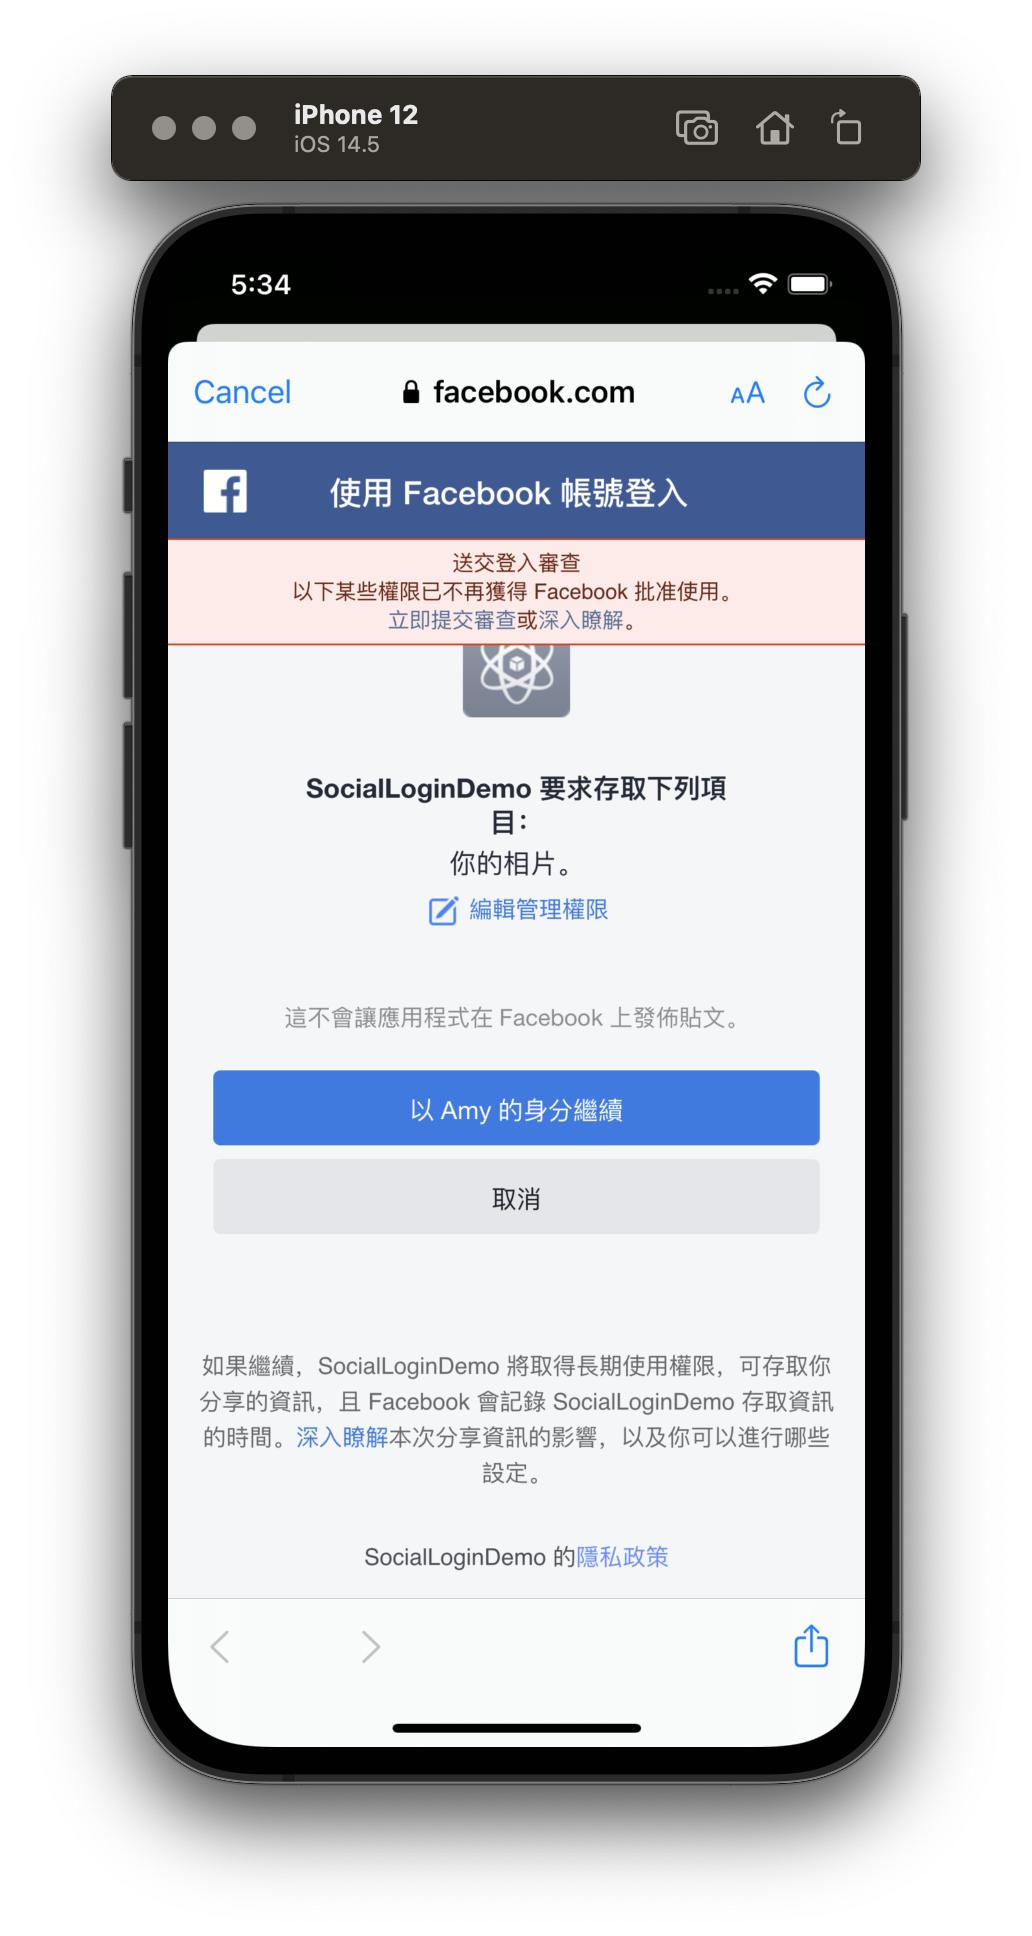
點擊按鈕即會出現:
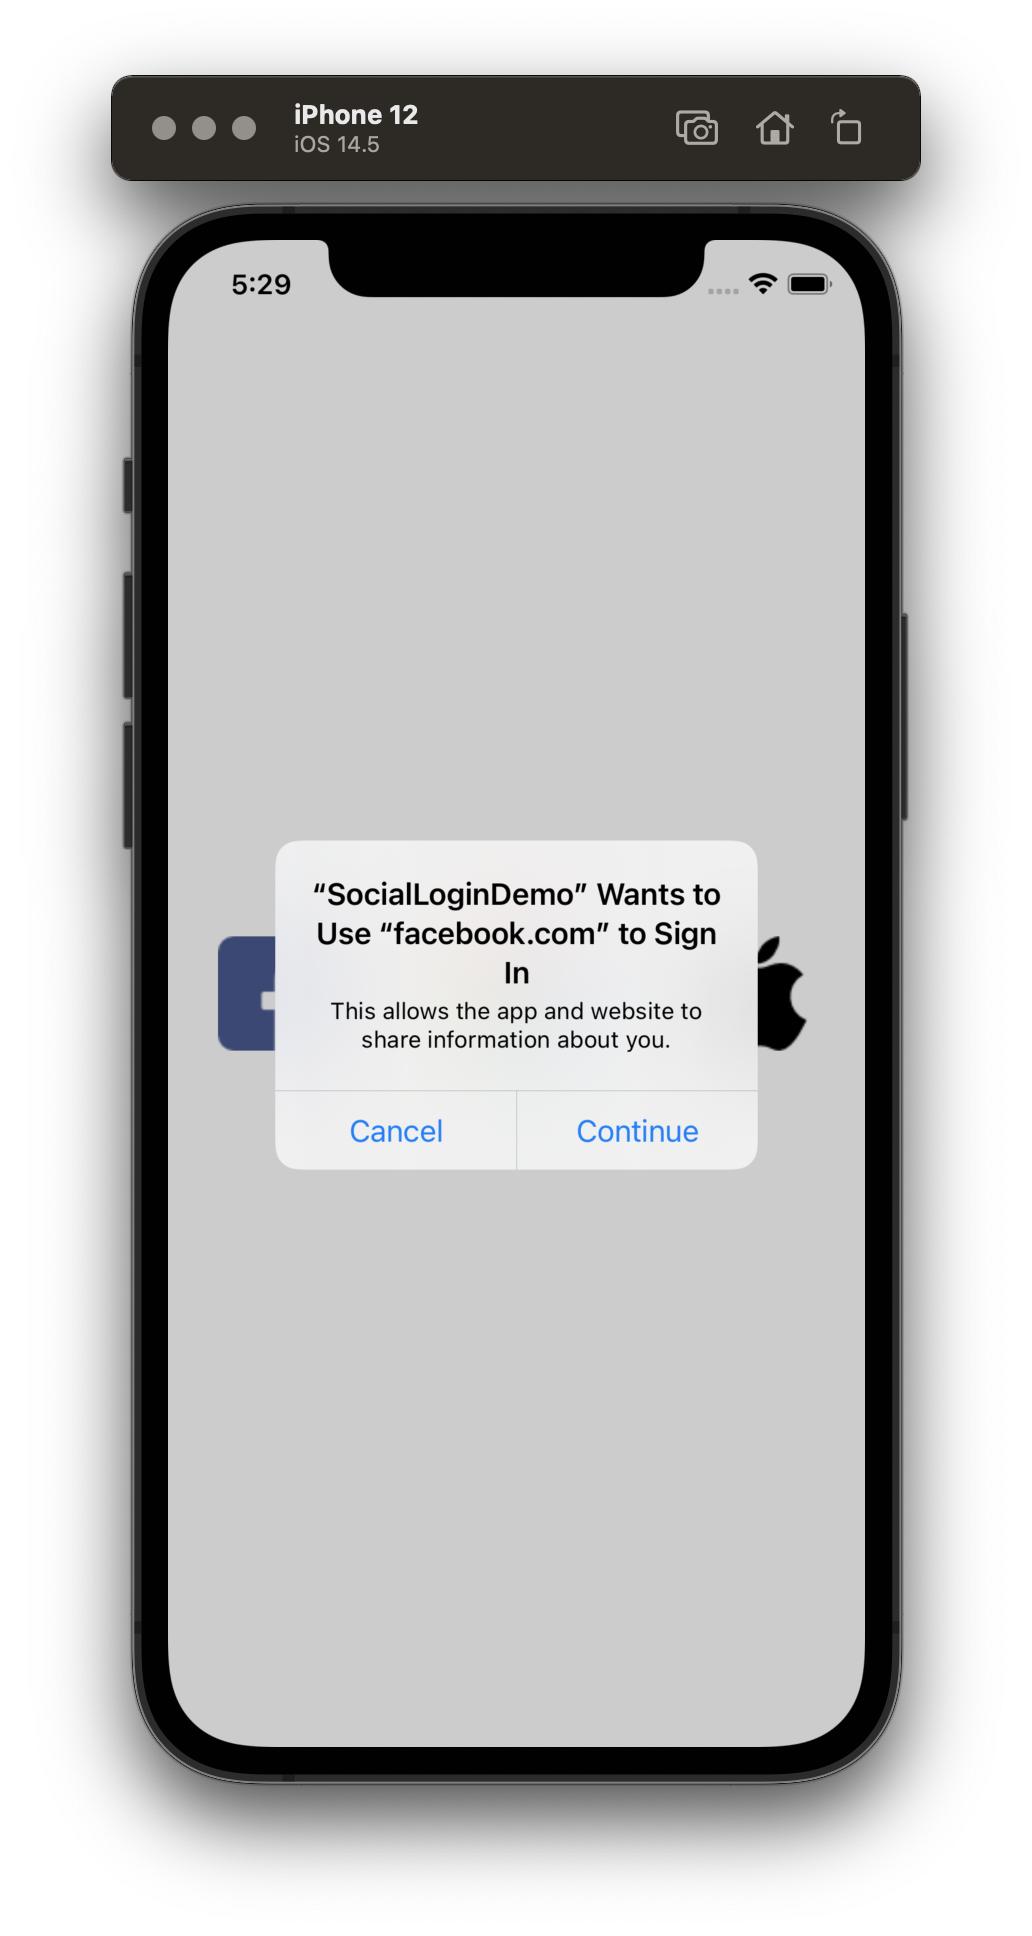
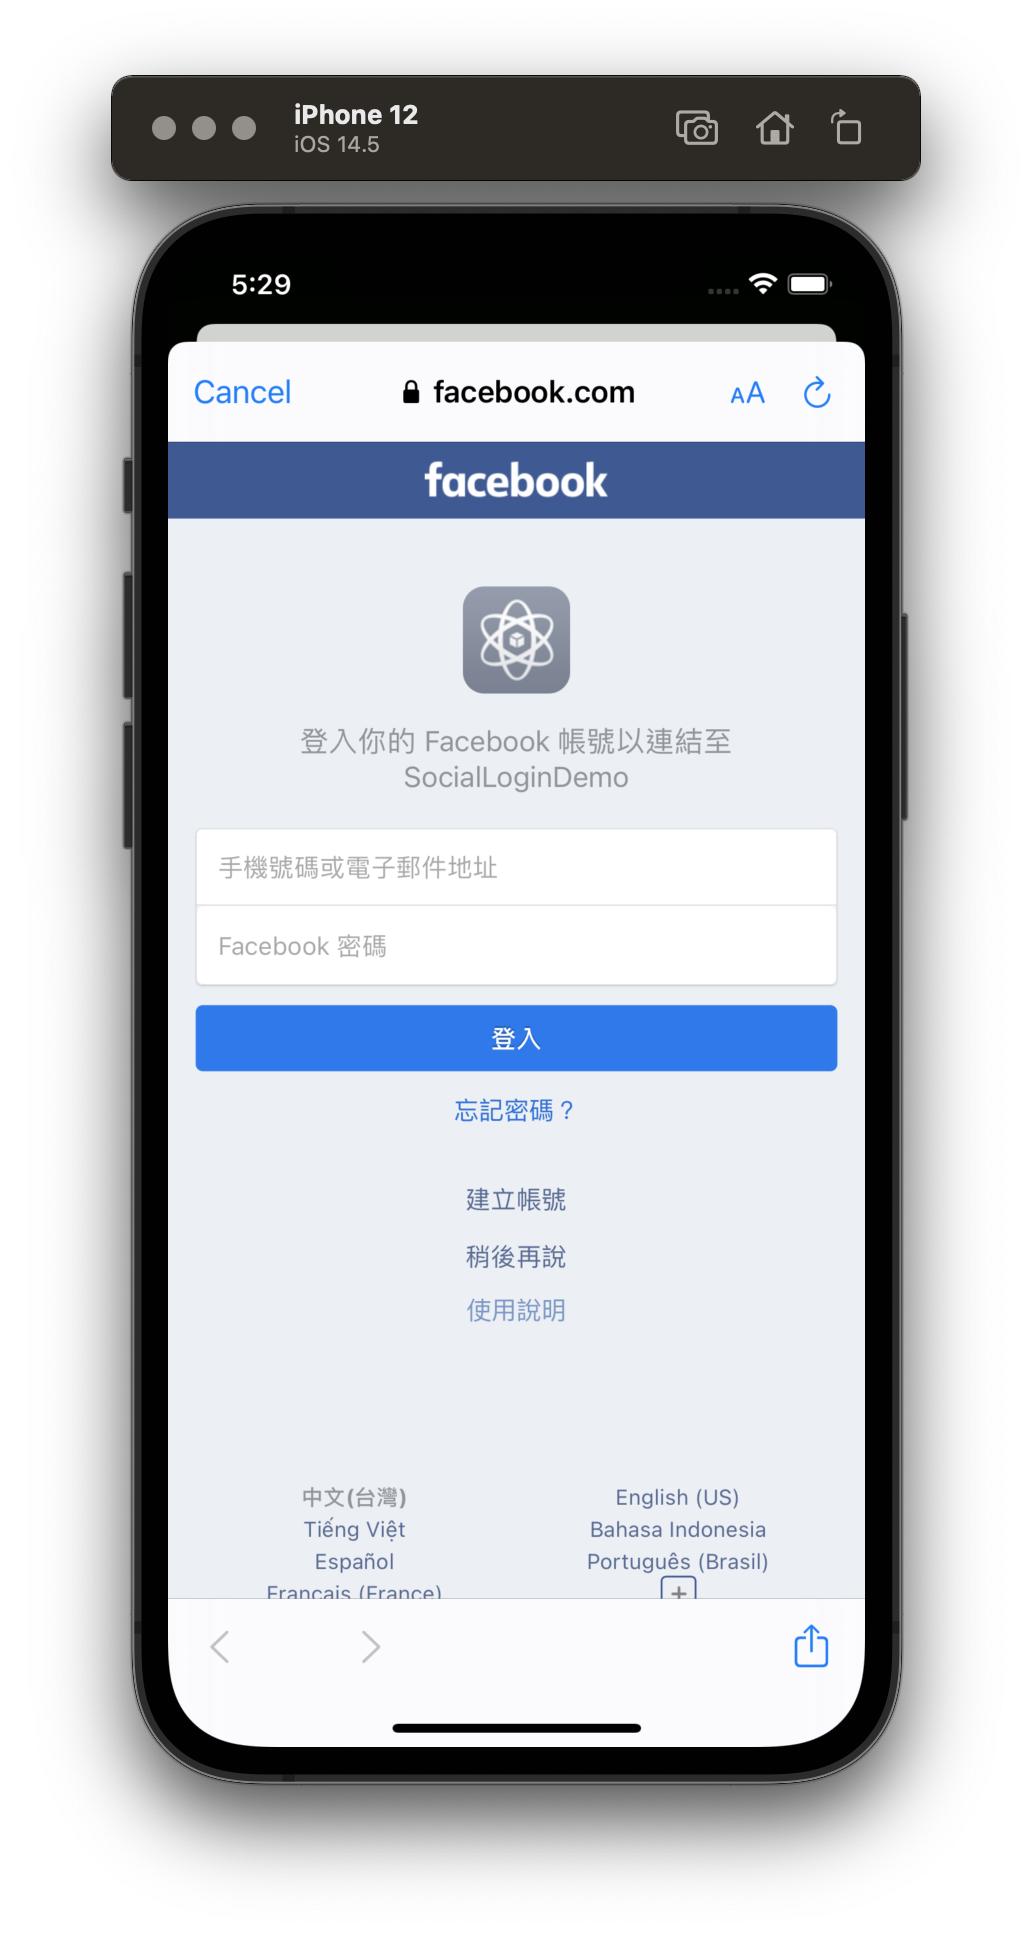
在登入帳號後,會提醒使用者這個APP要求的權限,即為程式碼中permissions: [.publicProfile, .email]的部分,隨著要求權限的不同也會有不同提醒。
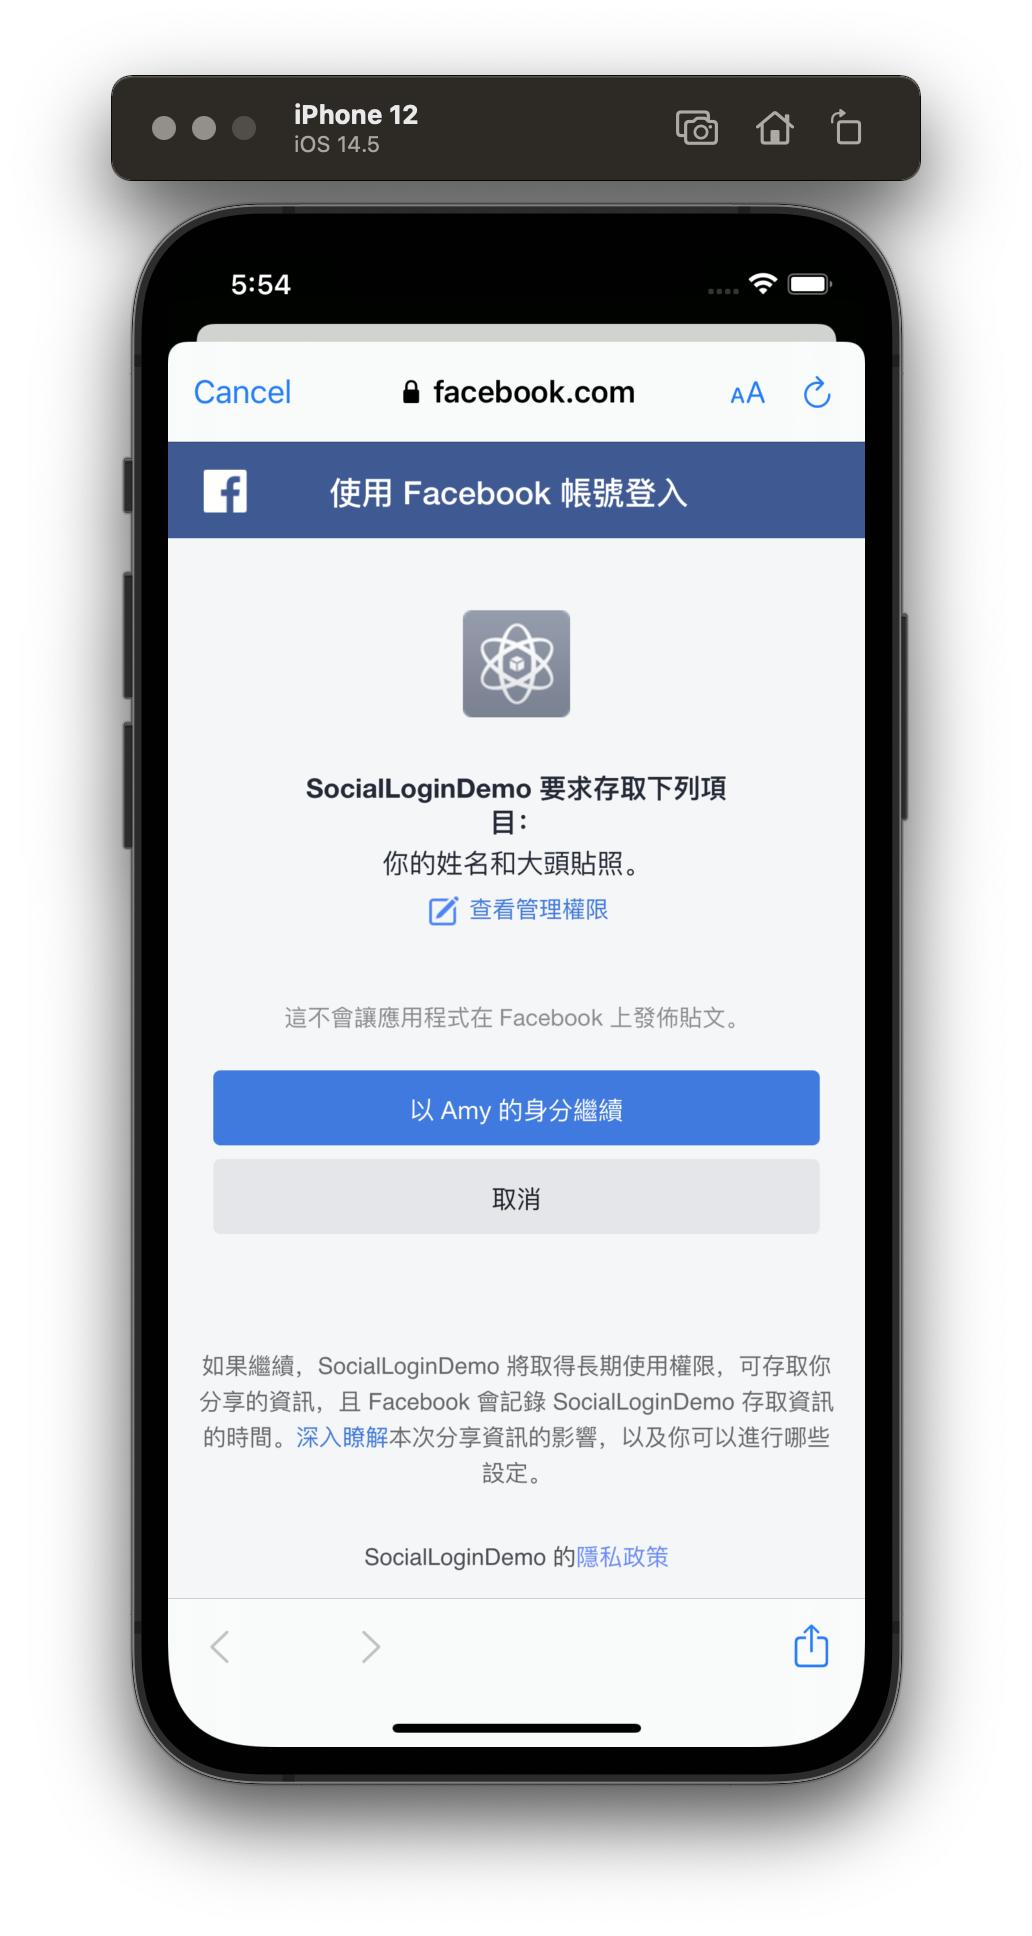
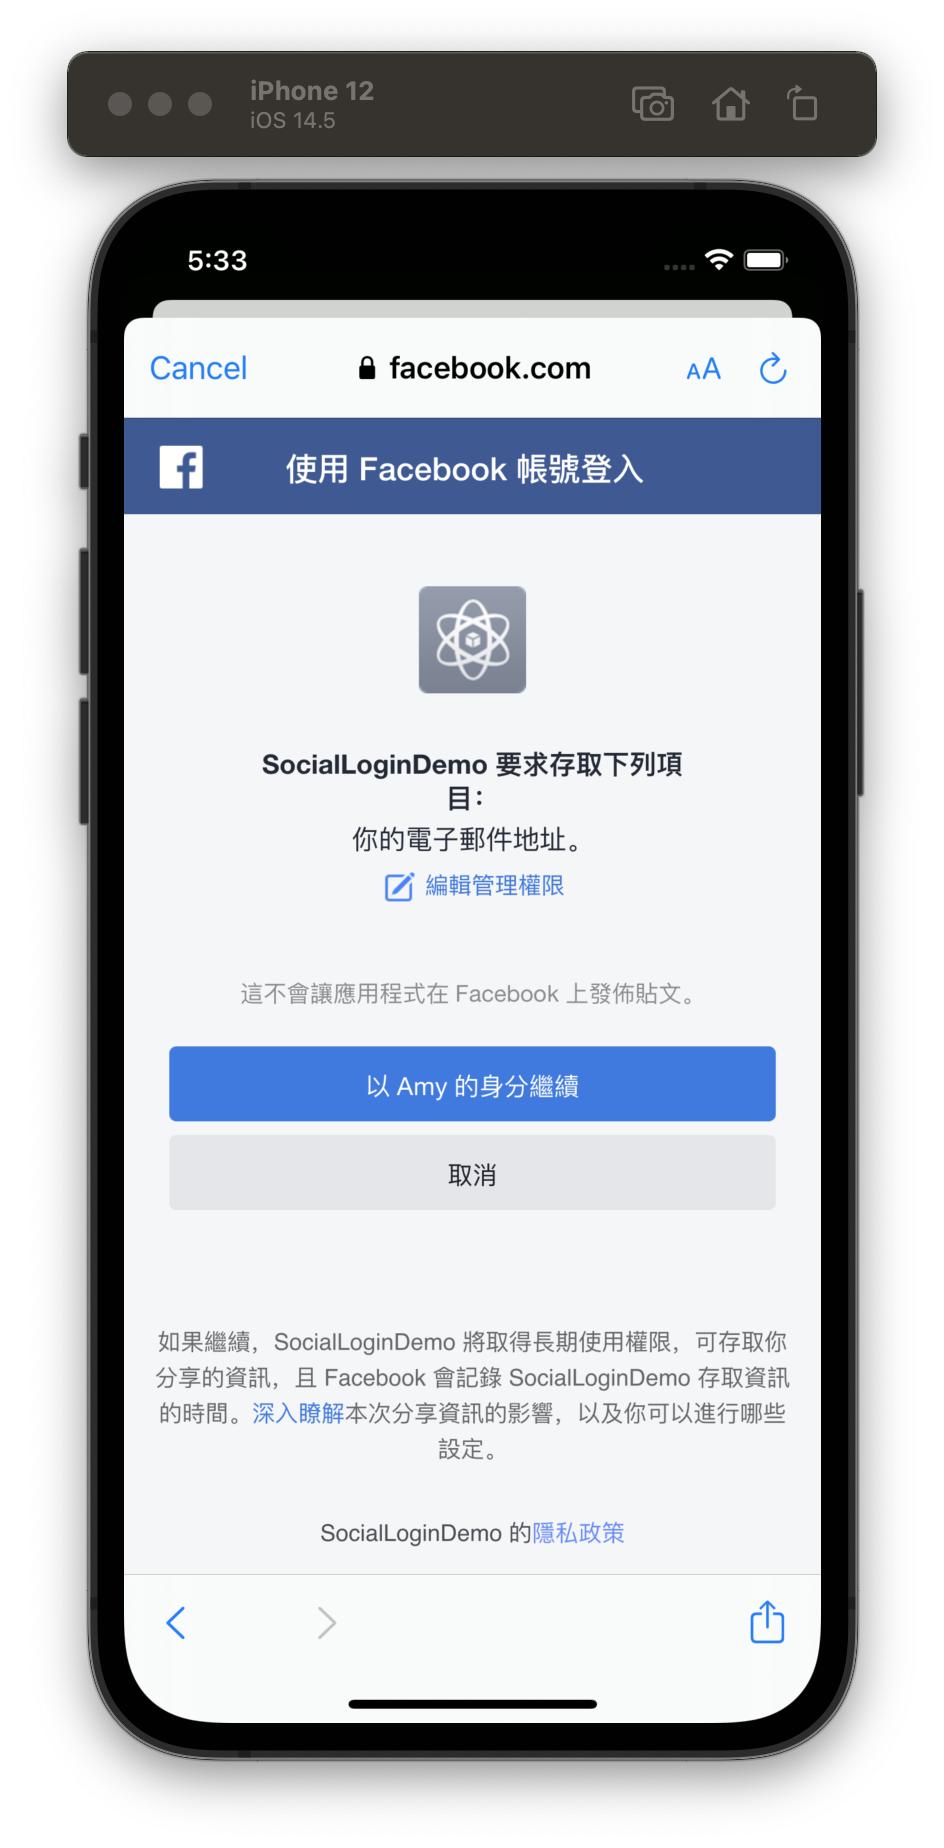
需注意的地方是,目前可以直接取得的使用者資料只有公開檔案與電子信箱這兩種,其餘都需要經由FB官方審查,開發者可從使用者的帳號裡獲得的資訊可以參考官方網頁:
https://developers.facebook.com/docs/permissions/reference
如果程式碼中有尚未審查的權限,會出現像這樣的警告。
FB的登入審查相關請見官方文件:
https://developers.facebook.com/docs/facebook-login/permissions/review
官方會檢驗APP中是否真的需要使用到這些涉及隱私的權限,文件中有較詳細的說明可以參考。
此外,我們需要檢查使用者的登入狀態,可以從AccessToken.current
是否有值來確認登入狀態,並且取得userID,例如加上這樣的程式碼:
if let accessToken = AccessToken.current {

    print("-----------userID: \(accessToken.userID)")
    print("-----------tokenString: \(accessToken.tokenString)")
    } else {
            print("not login")
    }
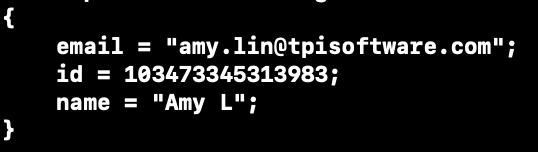
因此我現在可以從log裡看到這樣的結果:

以及再加上這幾行,這樣就能看到已登入的使用者資訊:
let request = GraphRequest.init(graphPath: "me", parameters: ["fields":"name, email"]).start { connection, result, error in
   let result = result as! NSDictionary
   print(result)
}
log印出結果:
如果需要登出的話,在登出的地方加上loginManager.logout()就可以了,這樣就完成使用Facebook第三方登入的功能啦,這邊僅列出最基本的流程,其餘的操作請至FB的開發者平台研究囉。
二、使用Google作為第三方登入平台
FB的部分結束了,接著來實作Google的第三方登入,他的官方文件在這邊:https://developers.google.com/identity/sign-in/ios/start-integrating
下面也會每個步驟逐一截圖說明。
取得Google Sign-in SDK的方式,官方建議使用CocoaPods安裝(pod 'GoogleSignIn')
,雖然也可以直接下載,不過我這邊就照著建議的方式吧,使用CocoaPods的過程就先省略了,網路上有很多的教學。
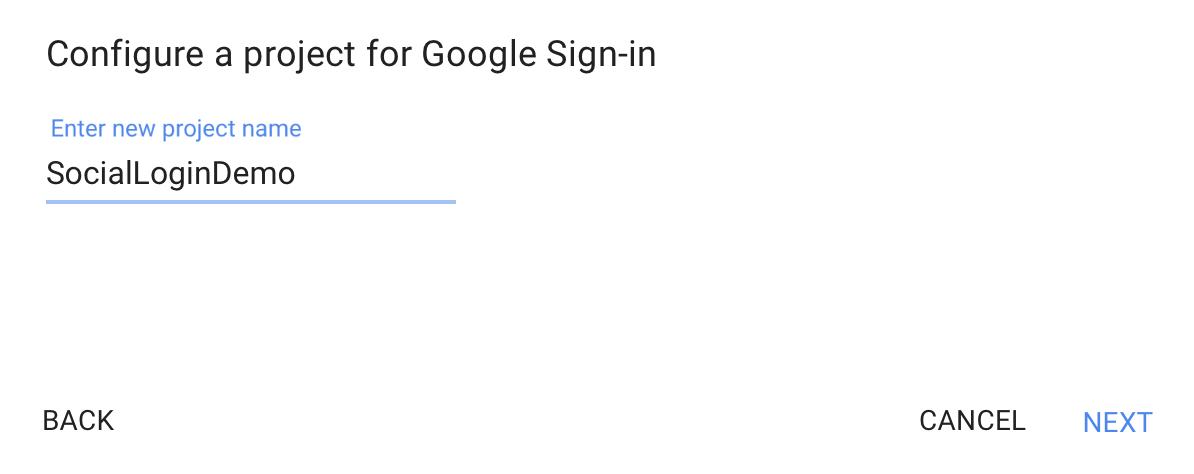
安裝完後,改開.xcworkspace結尾的檔案,按照說明我們需要取得OAuth客戶端ID。
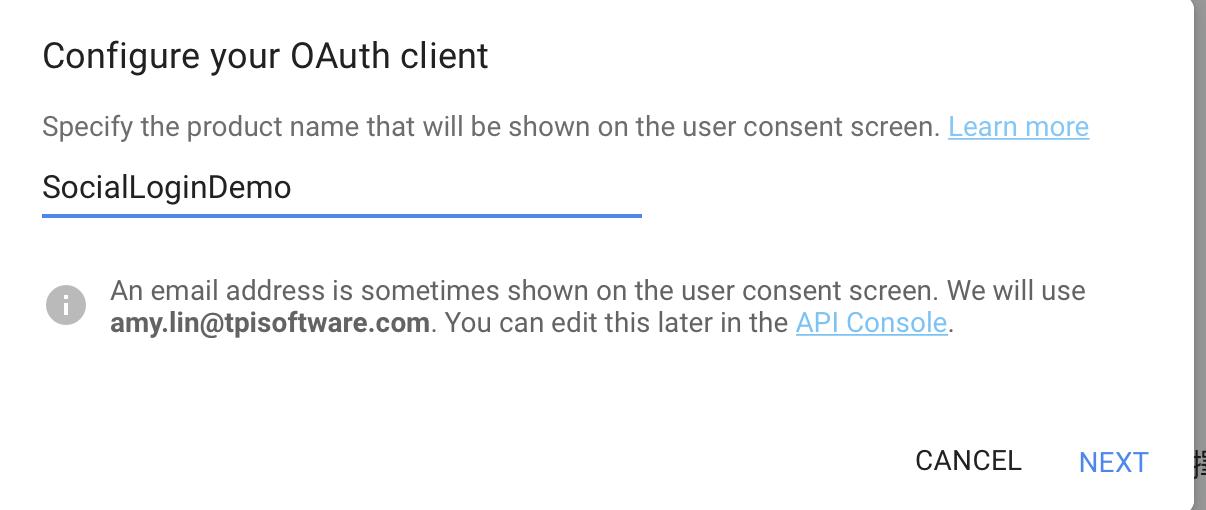
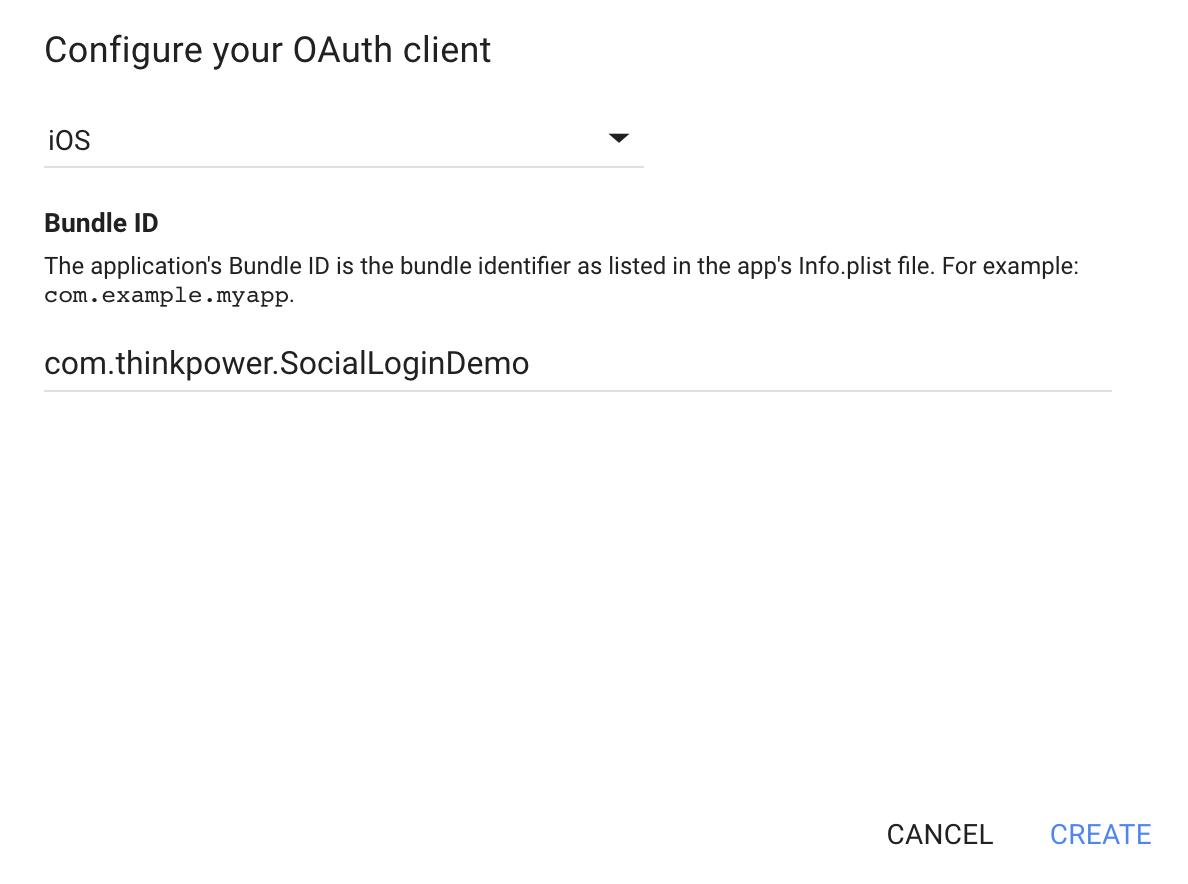
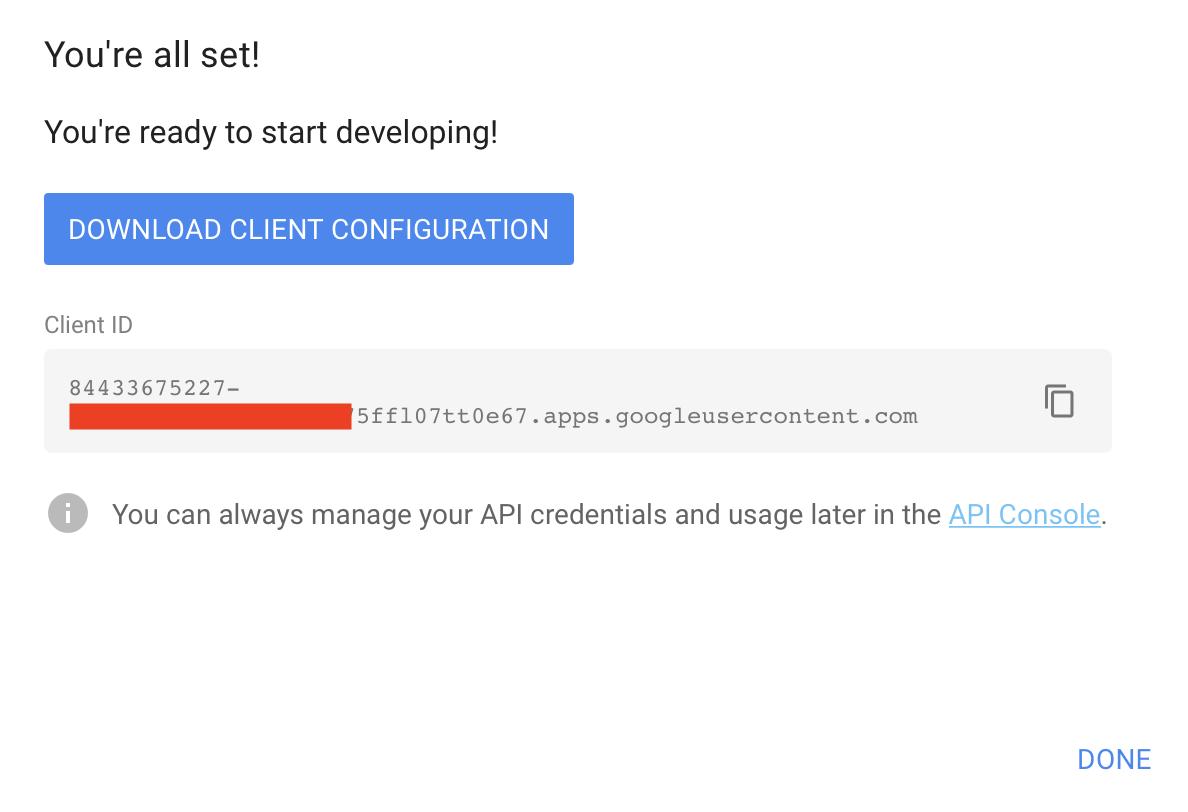
記得先複製一下Client ID,然後貼到專案裡TARGETS-Info,新增一項URL Types。
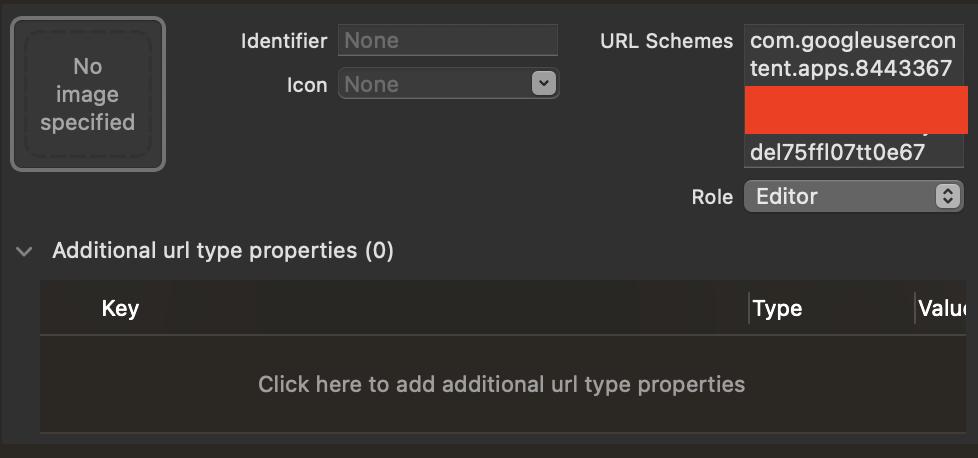
這邊要注意的是,我們剛剛複製的Client ID在URL Schemes前後是反過來的,需要調換順序,前面是com.googleusercontent.apps,後面就直接貼上即可。
接著寫一點程式碼,在AppDelegate.swift中import GoogleSignIn,並在AppDelegate的類別中加入GIDSignInDelegate。
class AppDelegate: UIResponder, UIApplicationDelegate, GIDSignInDelegate {
在application:didFinishLaunchingWithOptions:方法中加入:
GIDSignIn.sharedInstance().clientID = "你的Client ID"
GIDSignIn.sharedInstance().delegate = self
在application:openURL:options:方法中也加入:
return GIDSignIn.sharedInstance().handle(url)
此外,為了支援iOS 8以下版本,官方建議加入已棄用的application:openURL:sourceApplication:annotation:方法,但如果APP本身沒打算支援較低的版本,可以不用加入這一段。
func application(_ application: UIApplication,
                 open url: URL, sourceApplication: String?, annotation: Any) -> Bool {
  return GIDSignIn.sharedInstance().handle(url)
}
在剛剛加入GIDSignInDelegate時,XCODE應該會出現要求增加協議的警告,需要定義didSignInFor這個方法,所以在底下加入:
func sign(_ signIn: GIDSignIn!, didSignInFor user: GIDGoogleUser!, withError error: Error!) {
  if let error = error {
    if (error as NSError).code == GIDSignInErrorCode.hasNoAuthInKeychain.rawValue {
      print("The user has not signed in before or they have since signed out.")
    } else {
      print("\(error.localizedDescription)")
    }
    return
  }
  // Perform any operations on signed in user here.
  let userId = user.userID                  // For client-side use only!
  let idToken = user.authentication.idToken // Safe to send to the server
  let fullName = user.profile.name
  let givenName = user.profile.givenName
  let familyName = user.profile.familyName
  let email = user.profile.email
}
再來是ViewController的部分,一樣先import GoogleSignIn,在viewDidLoad加入:
GIDSignIn.sharedInstance()?.presentingViewController = self
GIDSignIn.sharedInstance()?.restorePreviousSignIn()
最後是按鈕,我在自定義的按鈕裡加入這一行:
GIDSignIn.sharedInstance().signIn()上面是處理登入的部分,如果要登出的話就是:
GIDSignIn.sharedInstance().signOut()
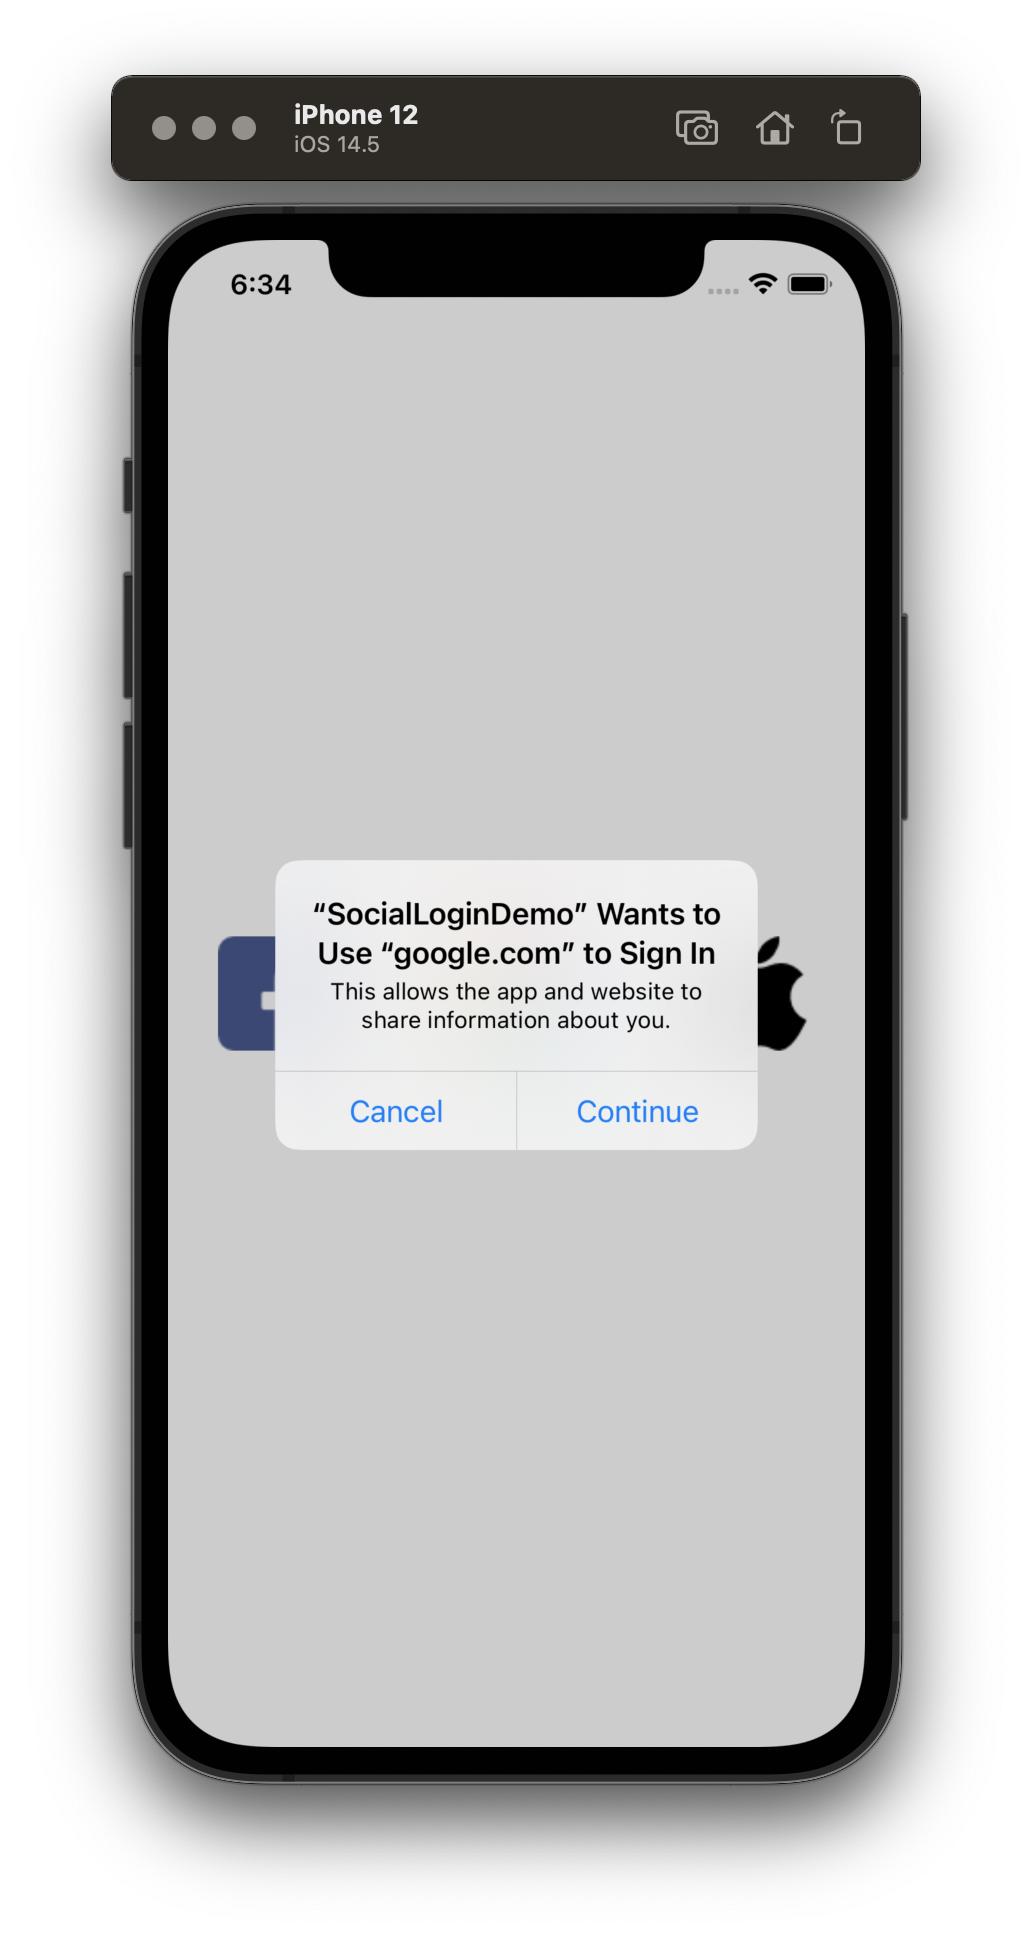
來看一下結果。
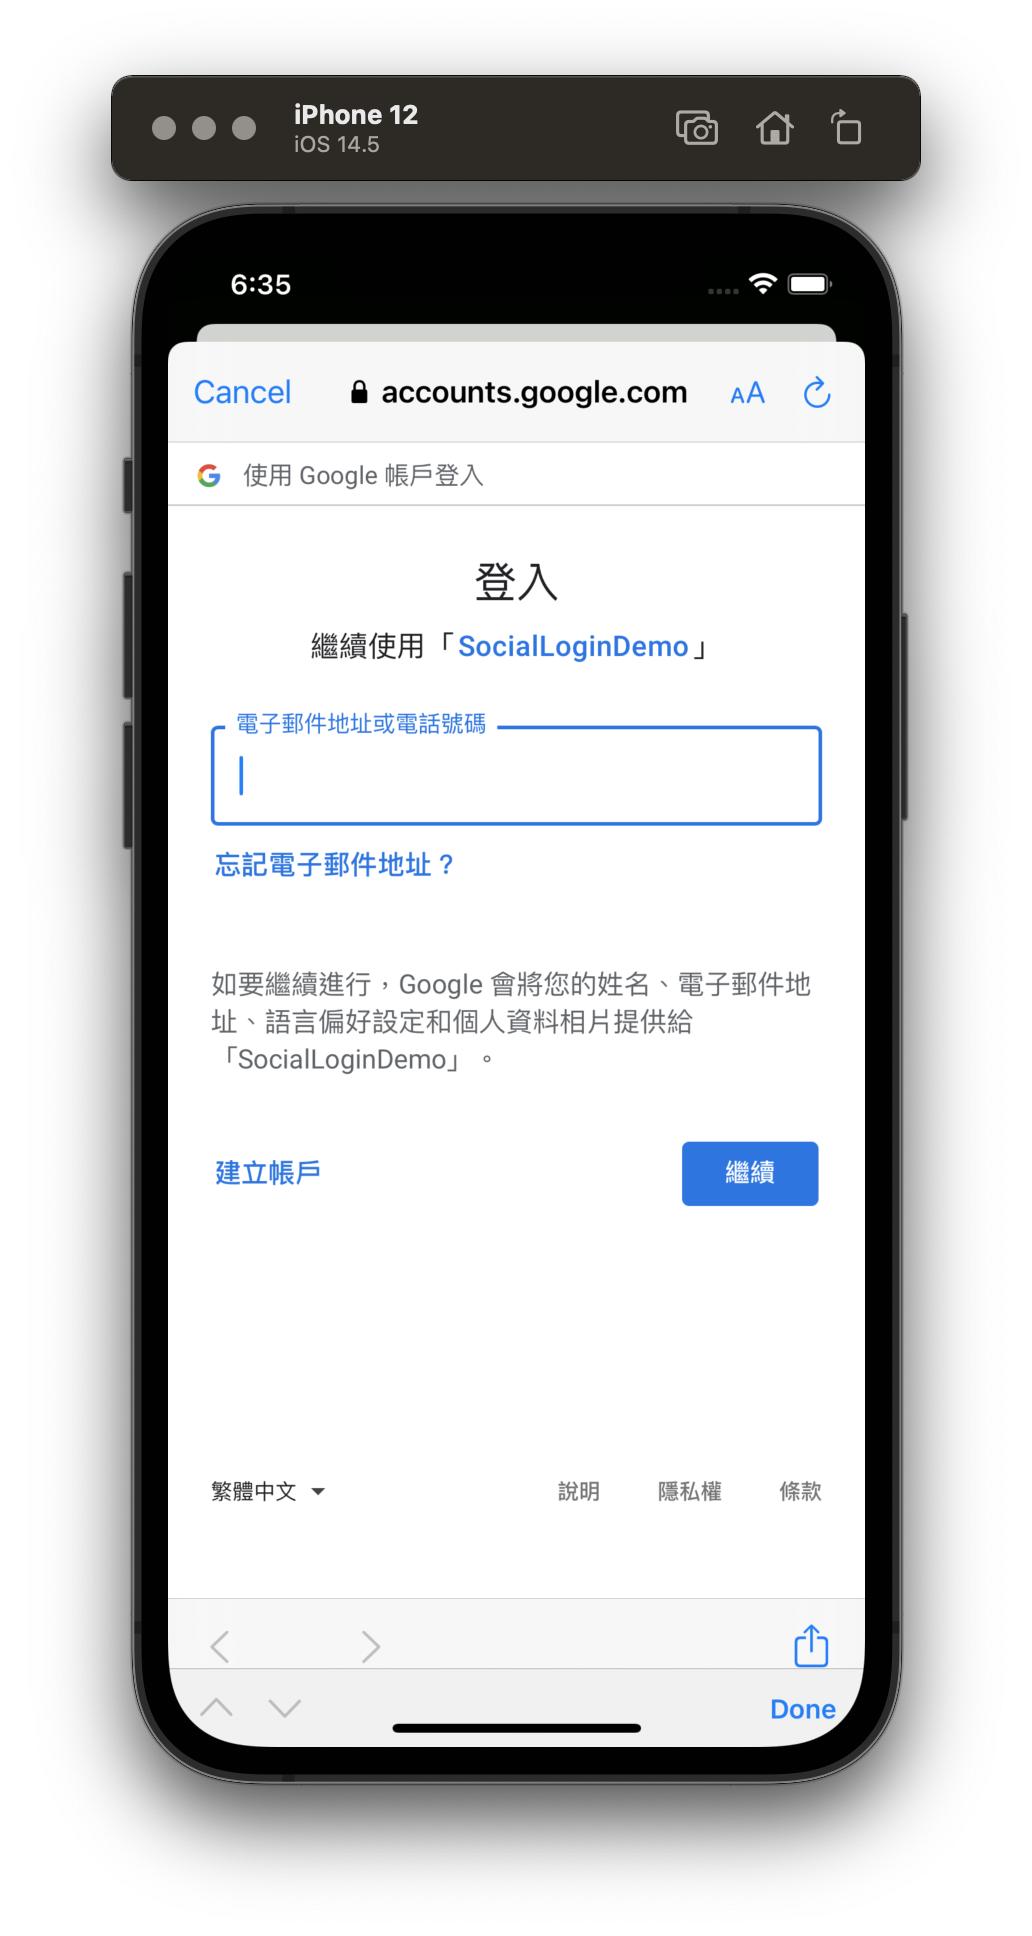

到這邊,使用者已經完成了登入的過程,開發者若要取得使用者資訊,可以從GIDGoogleUser中獲得。官方的教學是把這段程式碼放在AppDelegate裡,如果需要呈現在畫面上,可以傳值到ViewController裡,或是直接在ViewController裡加入GIDSignInDelegate。
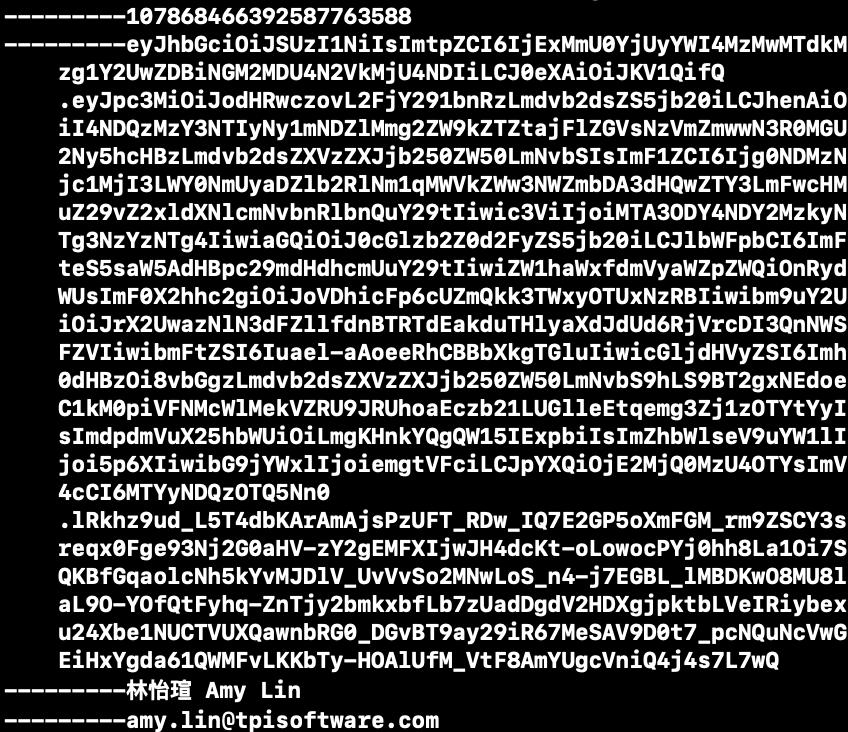
官方文件中列出了一些可能會使用到的基本資料,如使用者ID,ID Token、姓名、email等等,直接從log印出來看看,我把程式改成這樣:
if let userId = user.userID {
     print("---------\(userId)")
} // For client-side use only!
if let idToken = user.authentication.idToken {
     print("---------\(idToken)")
} // Safe to send to the server
if let fullName = user.profile.name {
     print("---------\(fullName)")
}
if let email = user.profile.email {
     print("---------\(email)")
}
印出來的結果:
以上到這邊是Google第三方登入的部分,更多的應用可以參考官方文件。
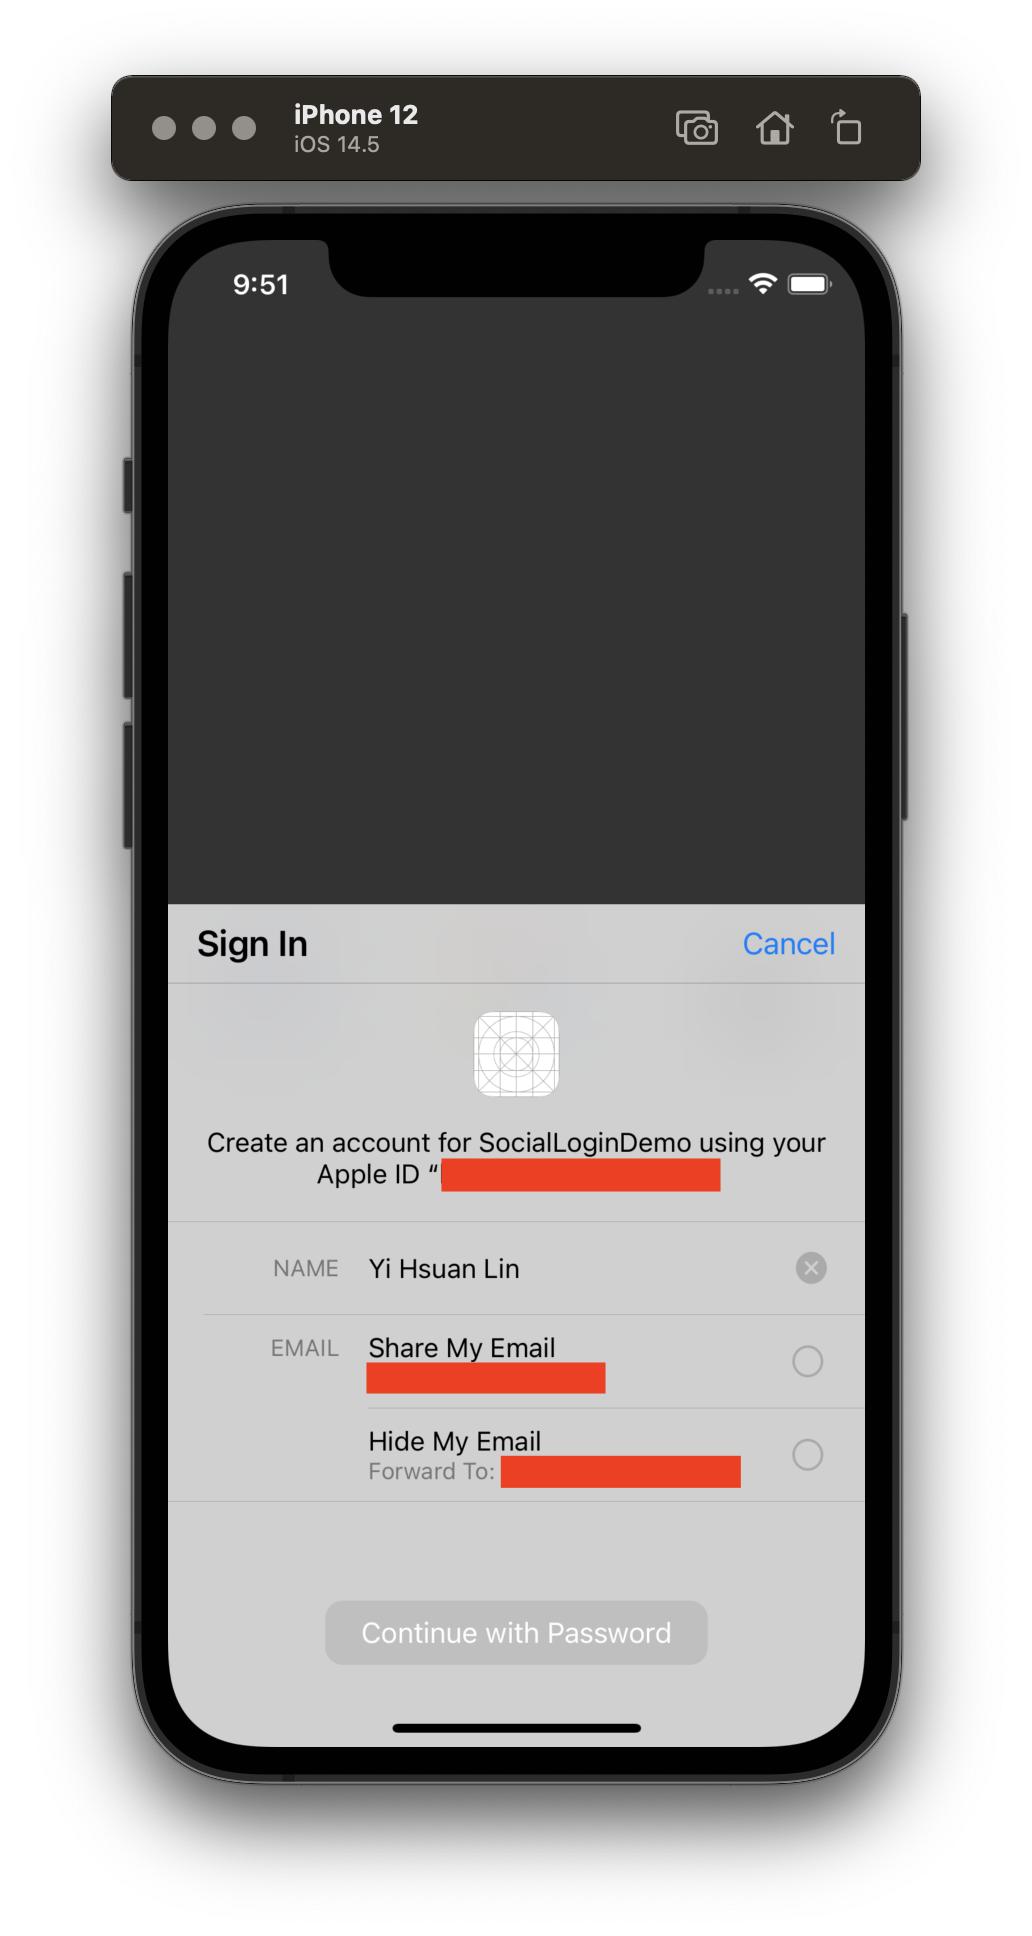
三、使用Apple ID作為第三方登入平台
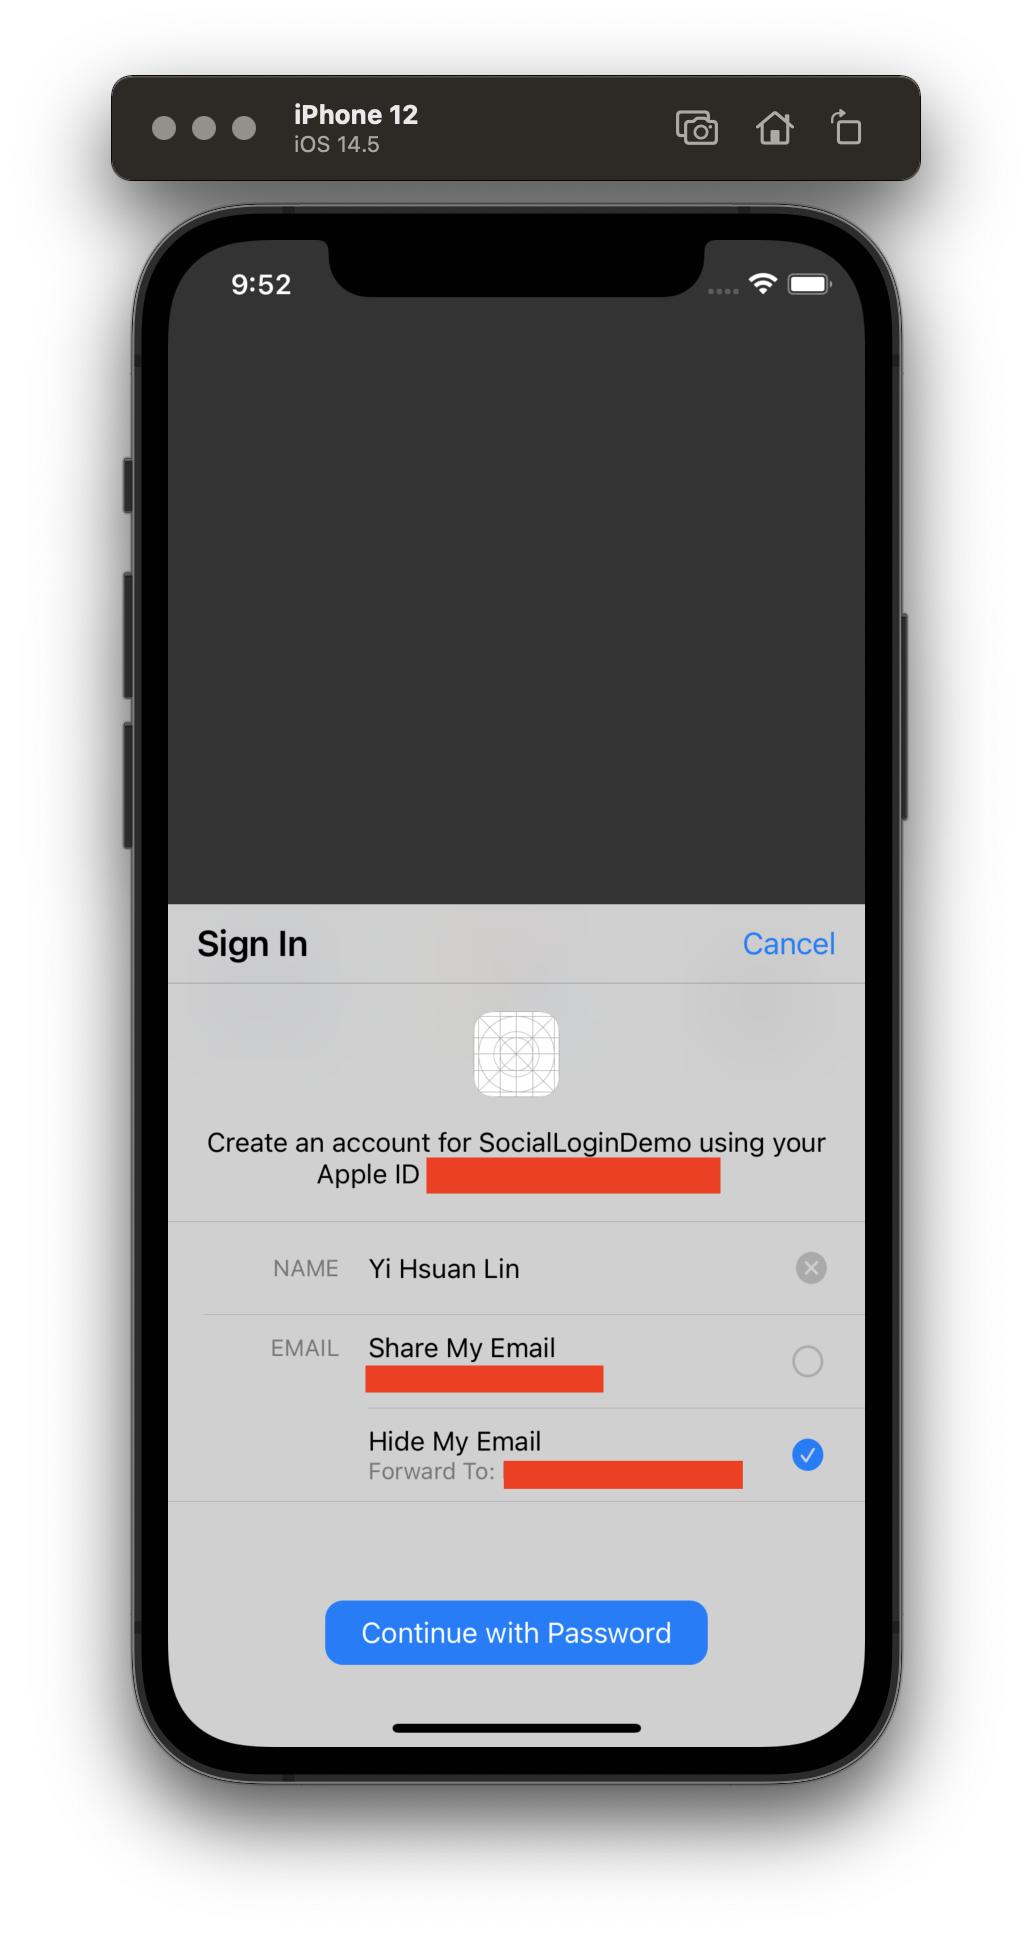
對iOS使用者來說,使用Apple ID登入或許是目前最安全的方式,開發者只會得到使用者的名字以及email,在登入時若選擇「隱藏我的電子郵件」,則開發者只會看到Apple幫忙建立的一組對應的、由系統產生的專屬帳號(網域為privaterelay.appleid.com),在保護隱私上更為徹底。
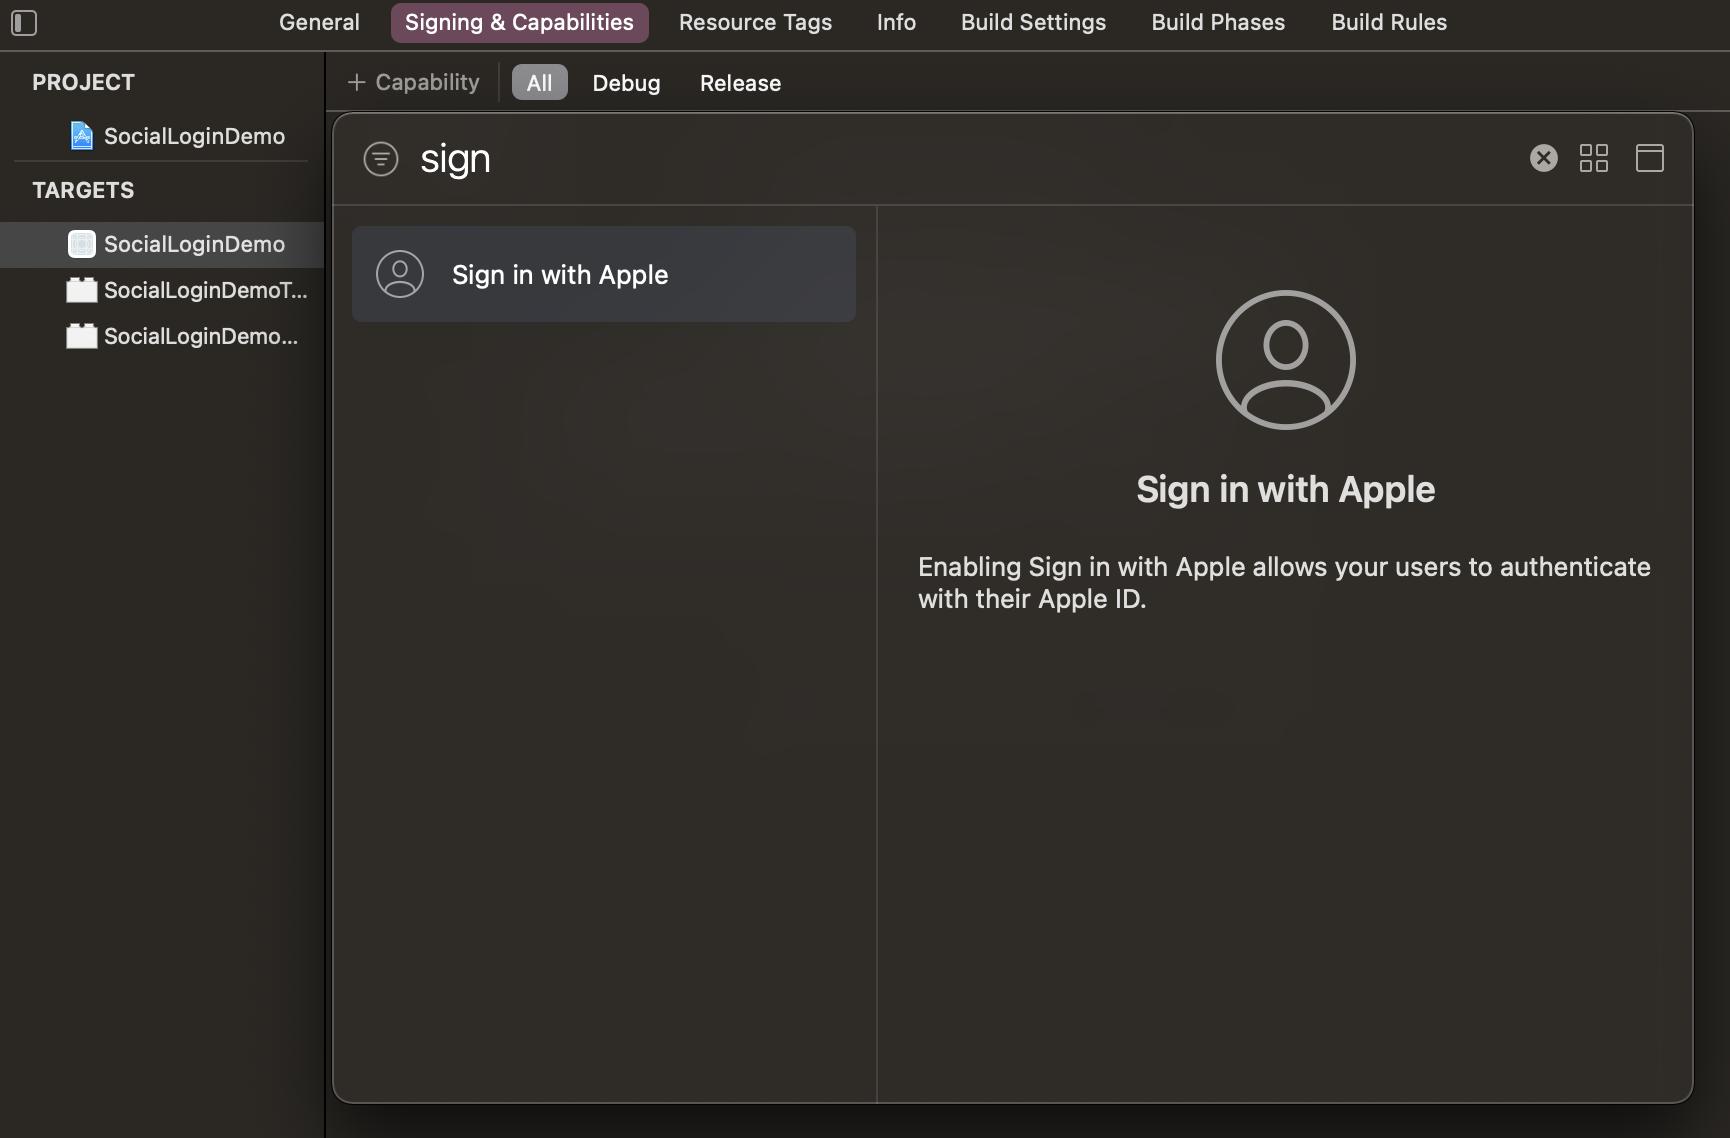
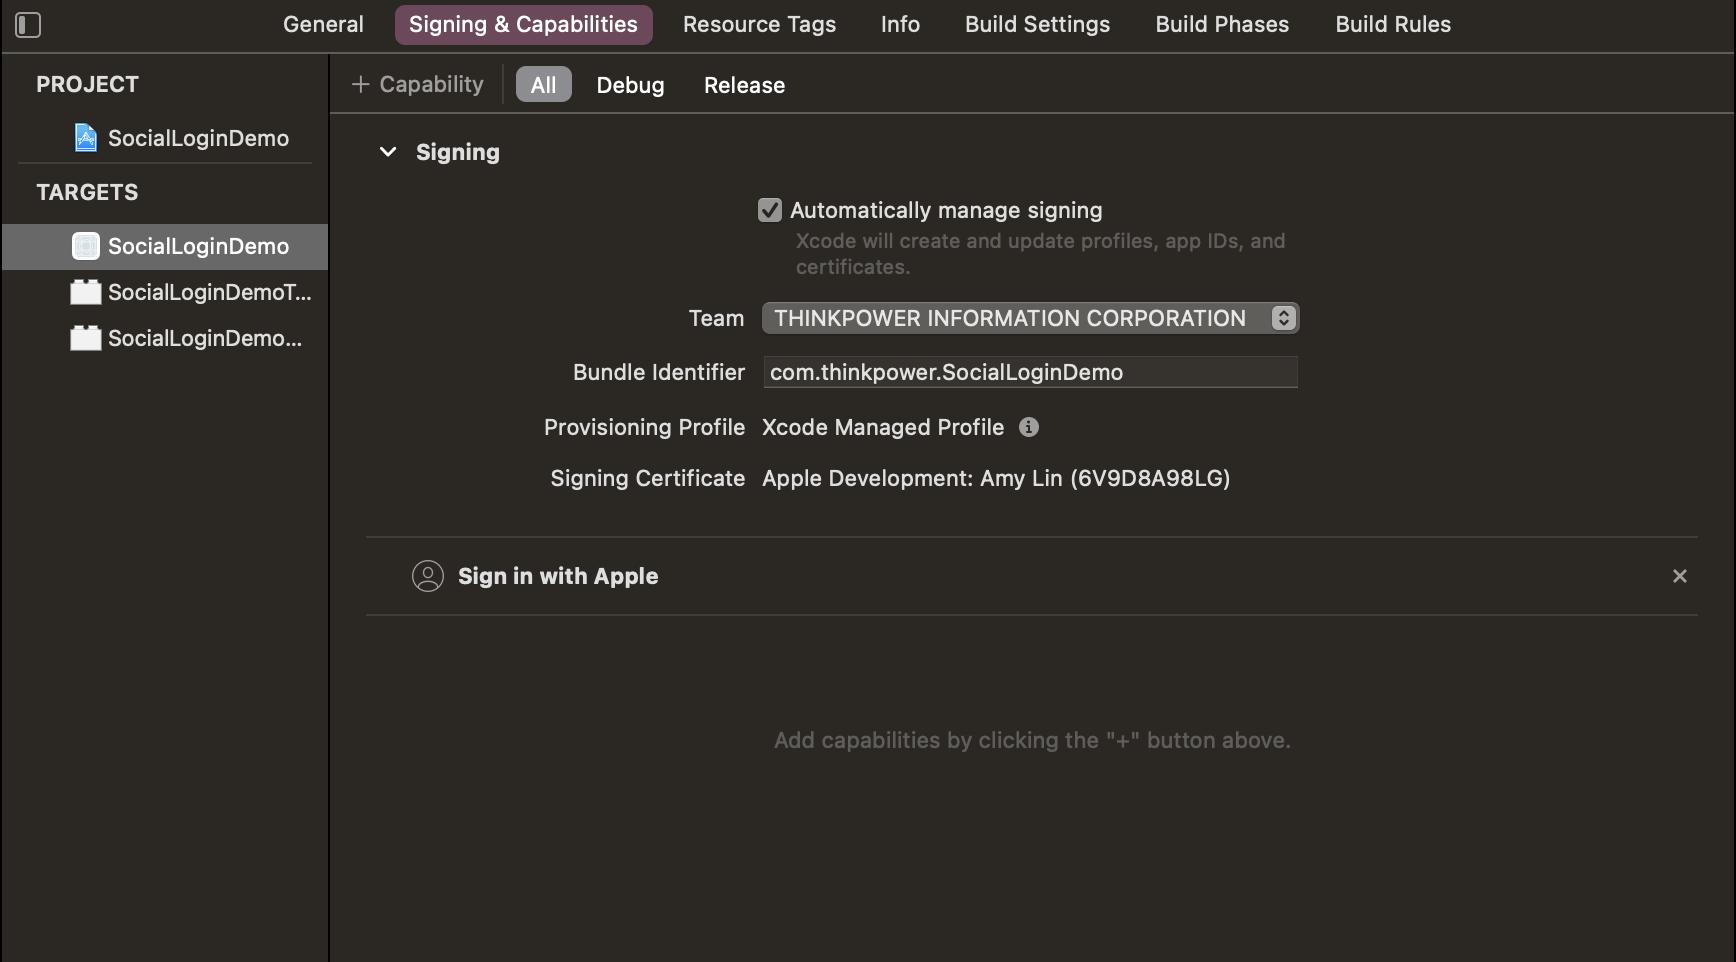
接著來著手操作吧,首先至Signing & Capacilities中,新增Capability。
(附註說明,如果不是有加入開發者計劃或是企業的Apple帳號的話,Capability裡是不會有Sign in with Apple這個選項的喔)
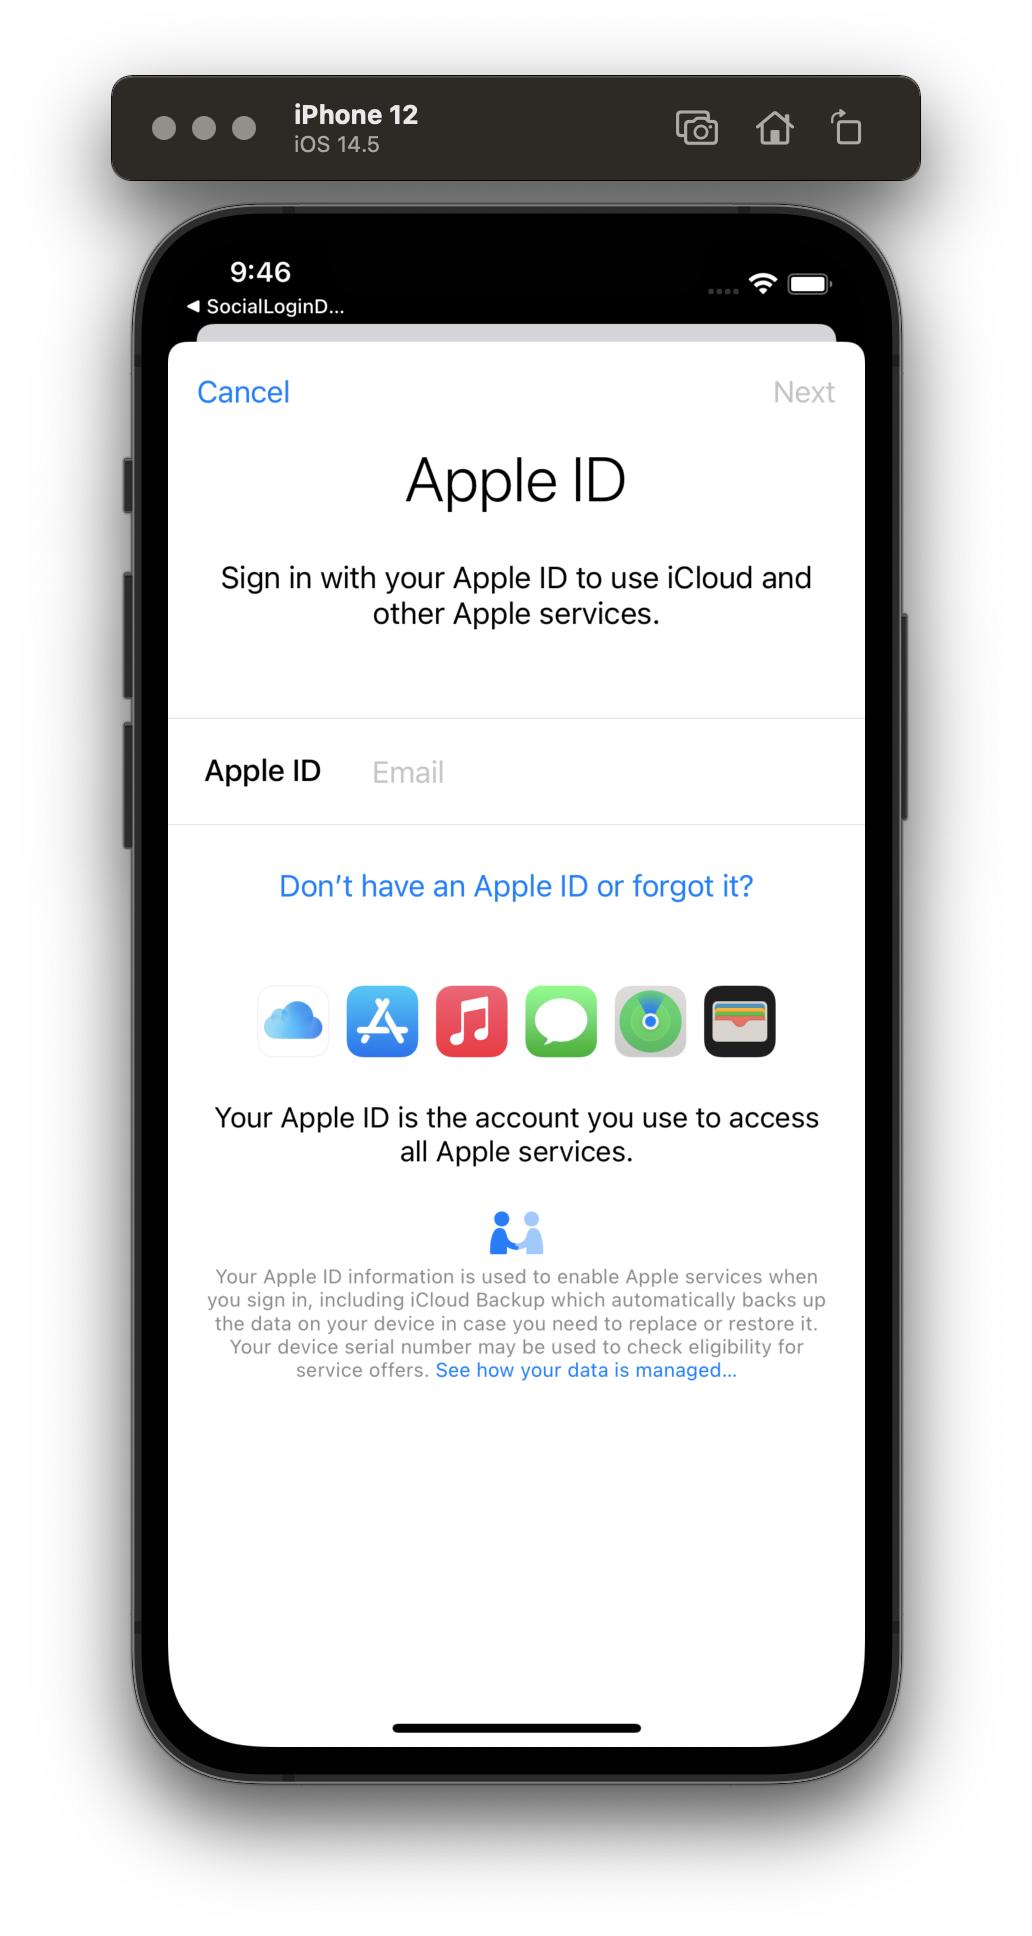
接著回到ViewController,先import AuthenticationServices,然後在自定義的按鈕裡加上:
let provider = ASAuthorizationAppleIDProvider()
let request = provider.createRequest()
request.requestedScopes = [.fullName, .email]
let authorizationController = ASAuthorizationController(authorizationRequests: [request])
authorizationController.delegate = self
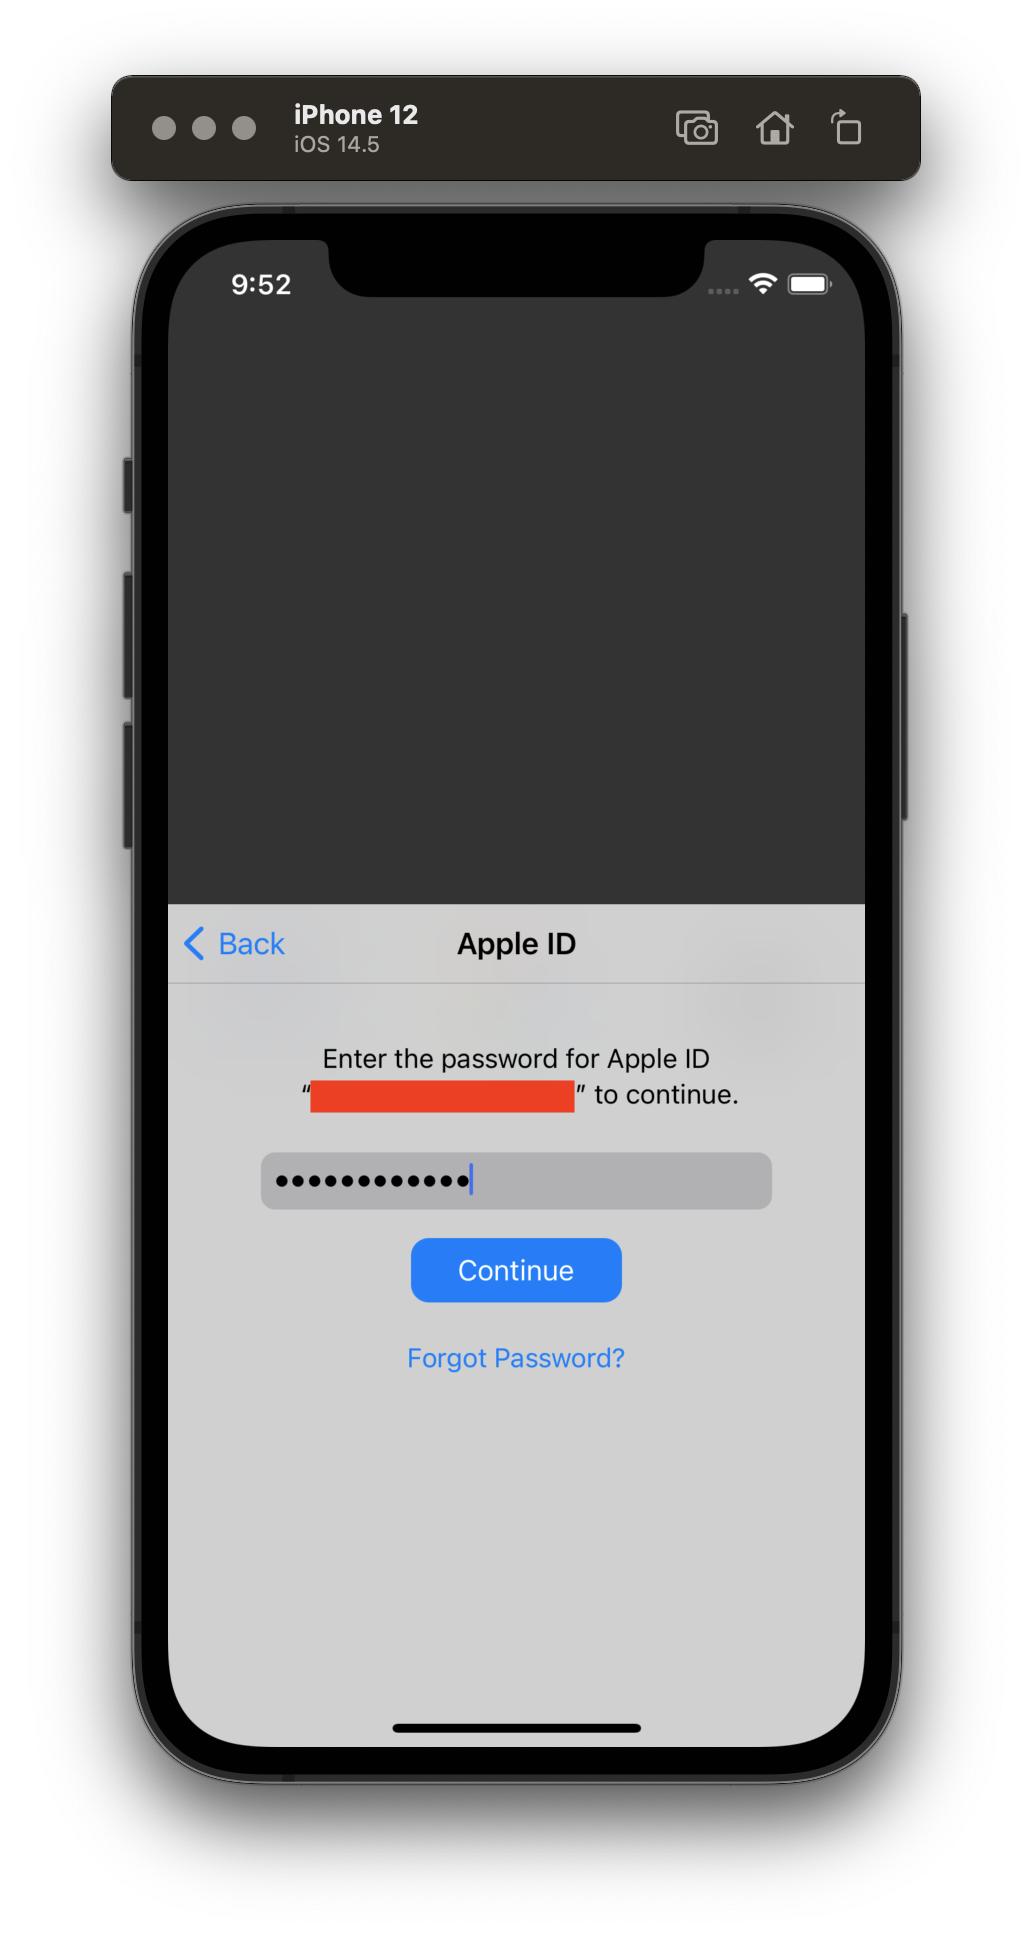
authorizationController.performRequests()
到這邊會出現一個錯誤提示,要求加入ASAuthorizationControllerDelegate,所以要加一個extension,連帶放入這些程式:
extension ViewController: ASAuthorizationControllerDelegate {

    func authorizationController(controller: ASAuthorizationController, didCompleteWithAuthorization authorization: ASAuthorization) {
        if let credential = authorization.credential as? ASAuthorizationAppleIDCredential {
            let userId = credential.user
            let fullname = credential.fullName
            let email = credential.email
            let idToken = credential.identityToken
            print("---------\(userId)")
            print("---------\(fullname)")
            print("---------\(email)")
            print("---------\(idToken)")
        }
    }

    func authorizationController(controller: ASAuthorizationController, didCompleteWithError error: Error) {
        print(error.localizedDescription)
    }

}
Error的部分也可以用switch去細分為不同的case,在ASAuthorizationError裡面可以看到failed、canceled等等的狀態,可以個別判斷為何種錯誤。
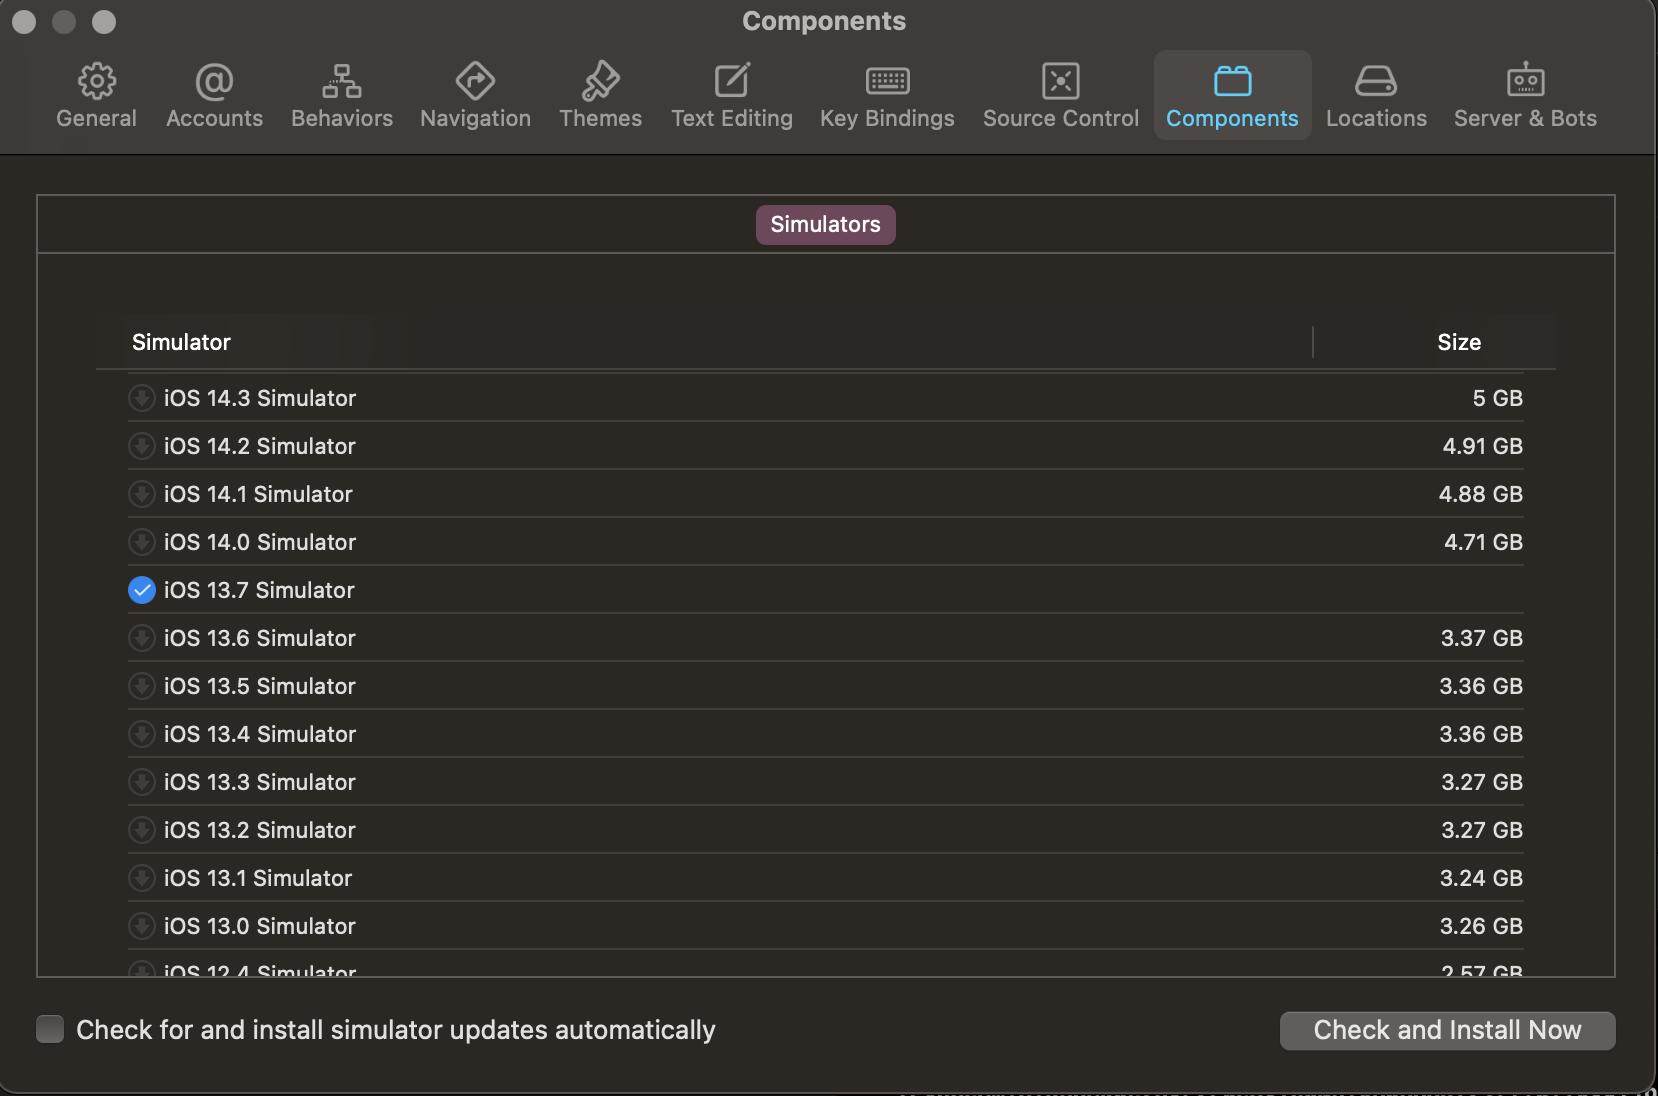
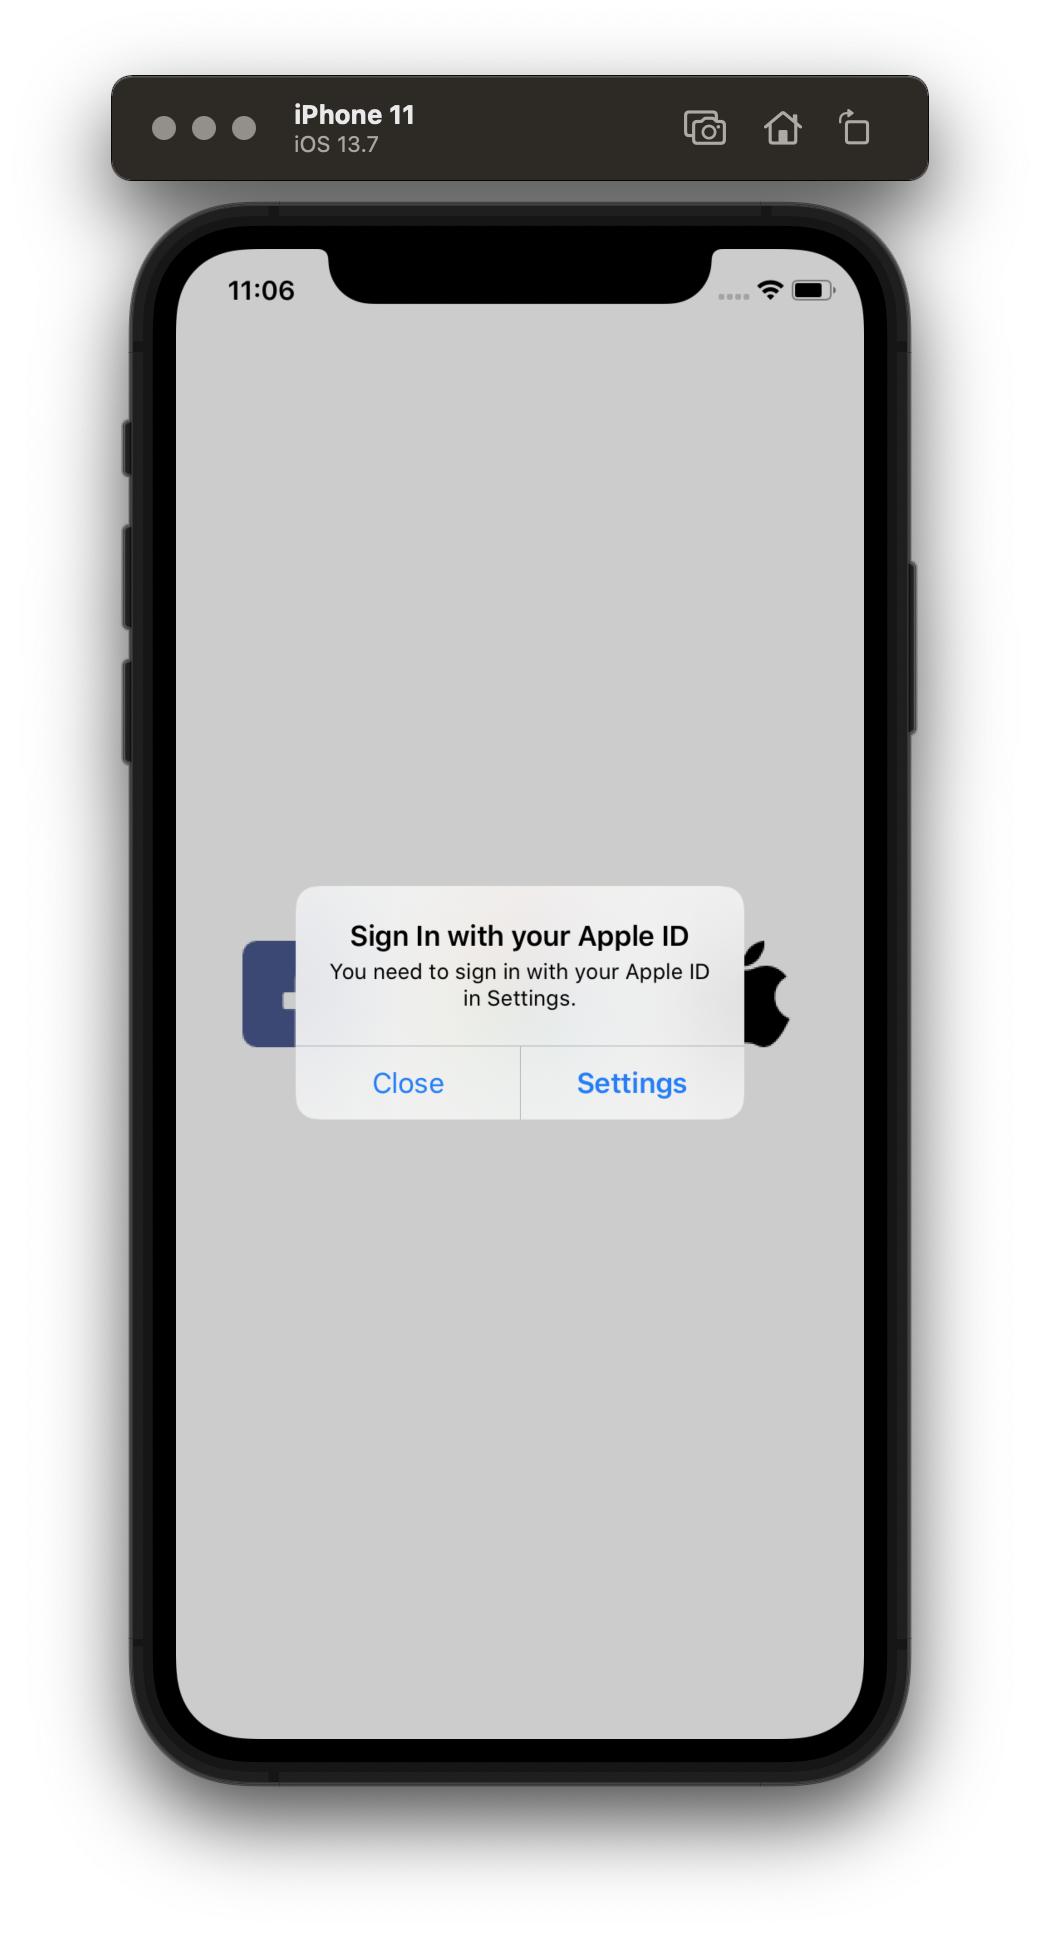
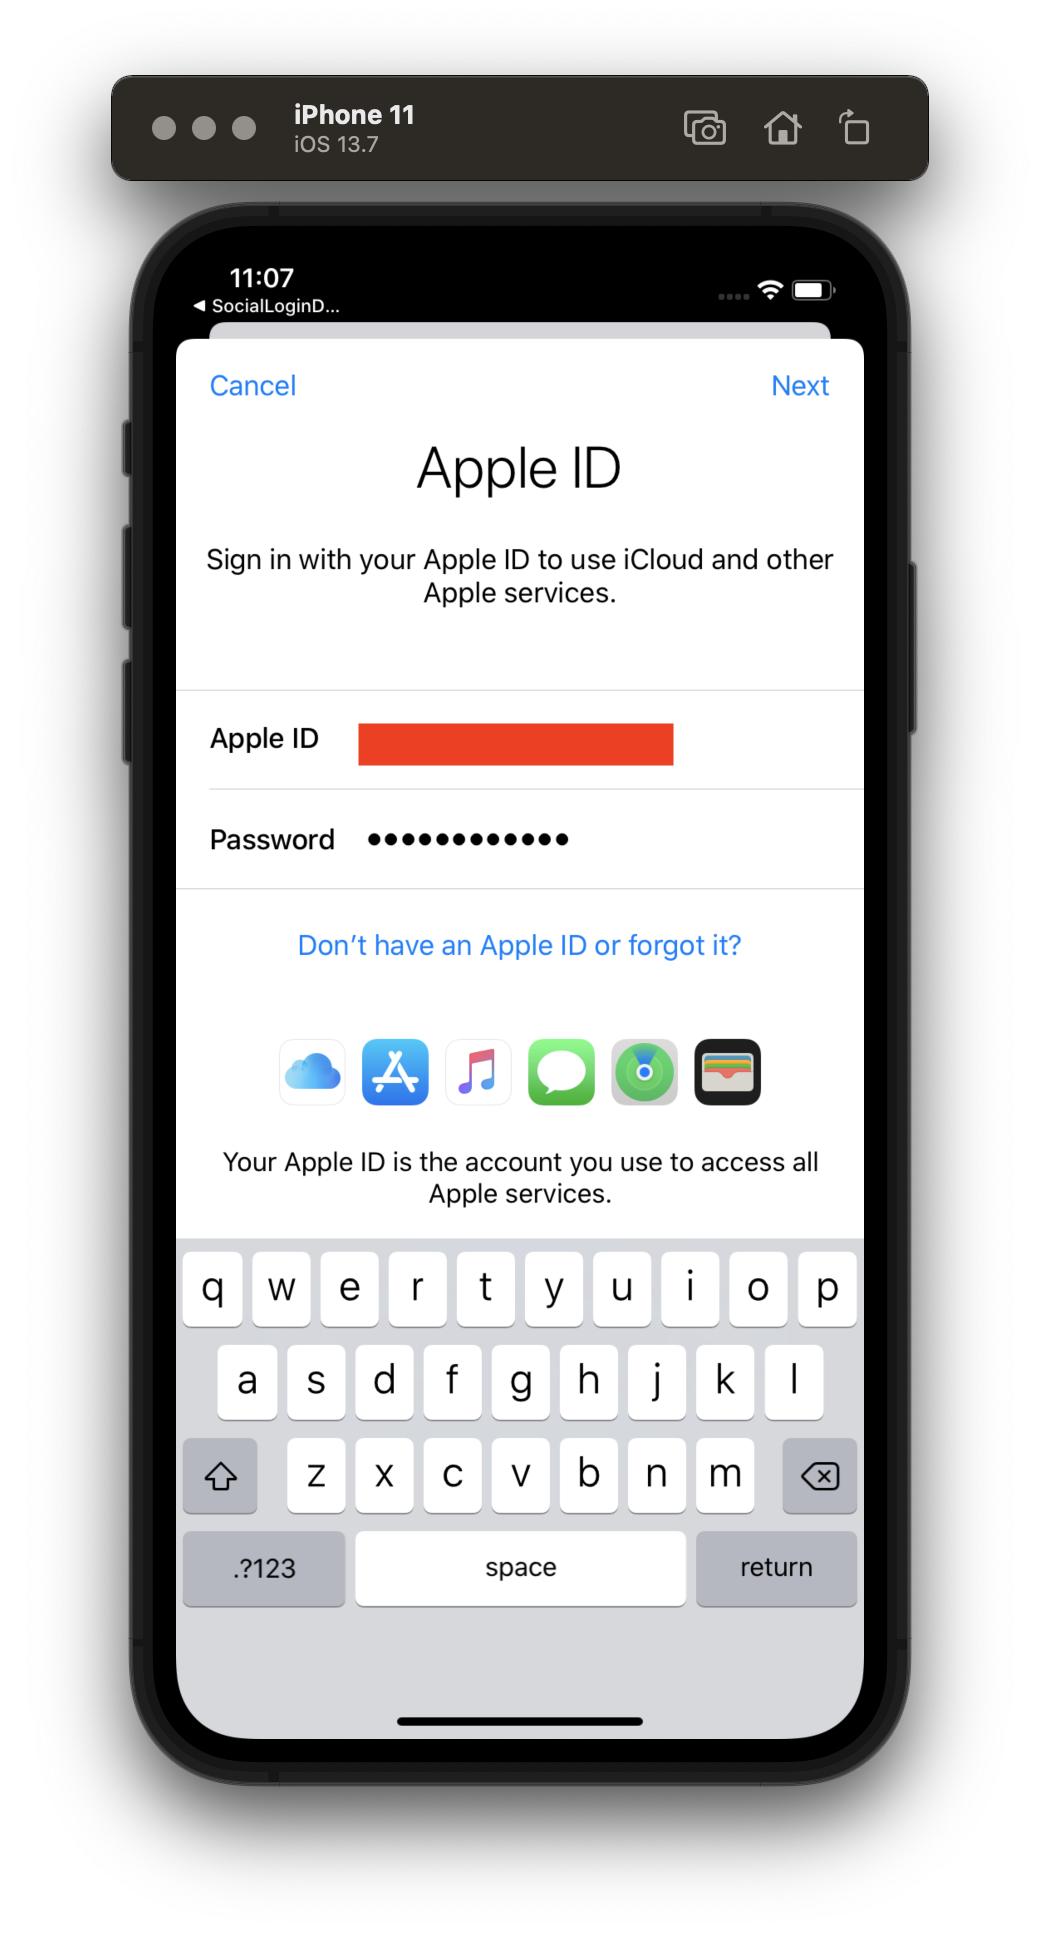
之後來試跑看看,我是使用模擬器,前面的步驟沒有問題:
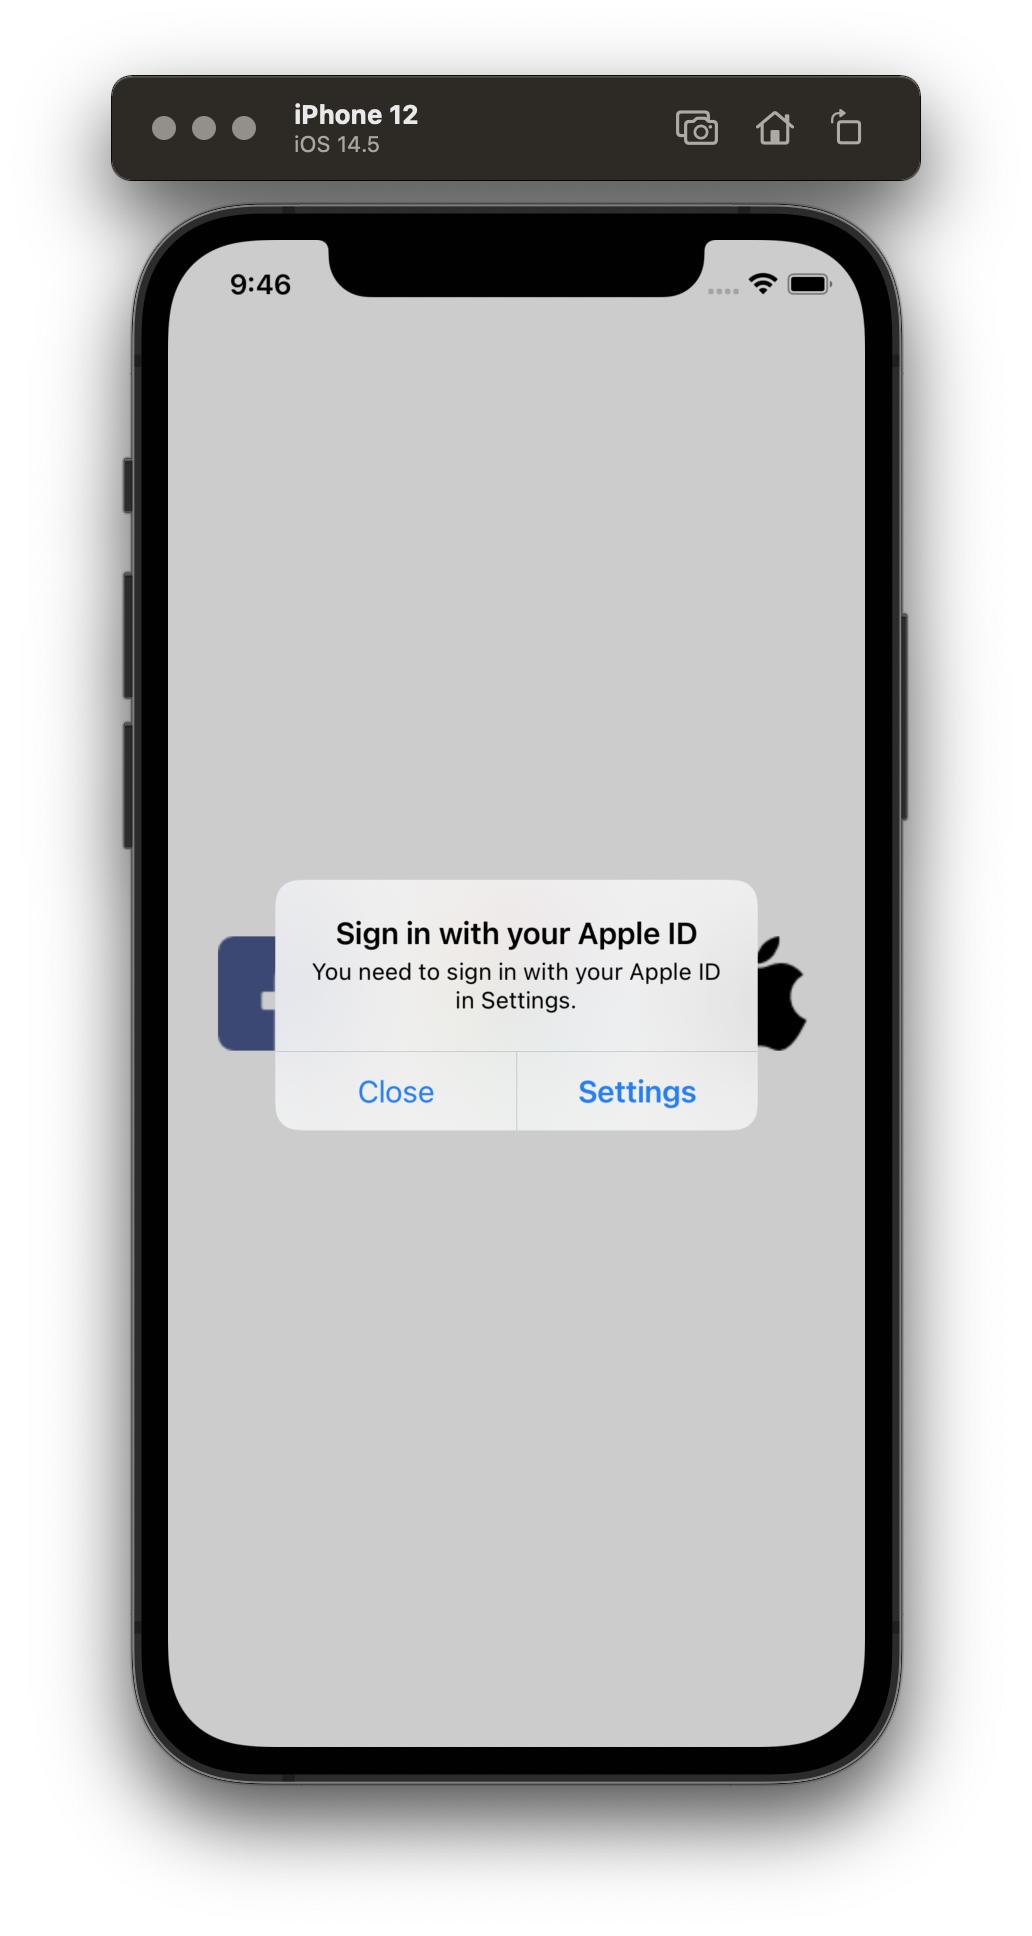
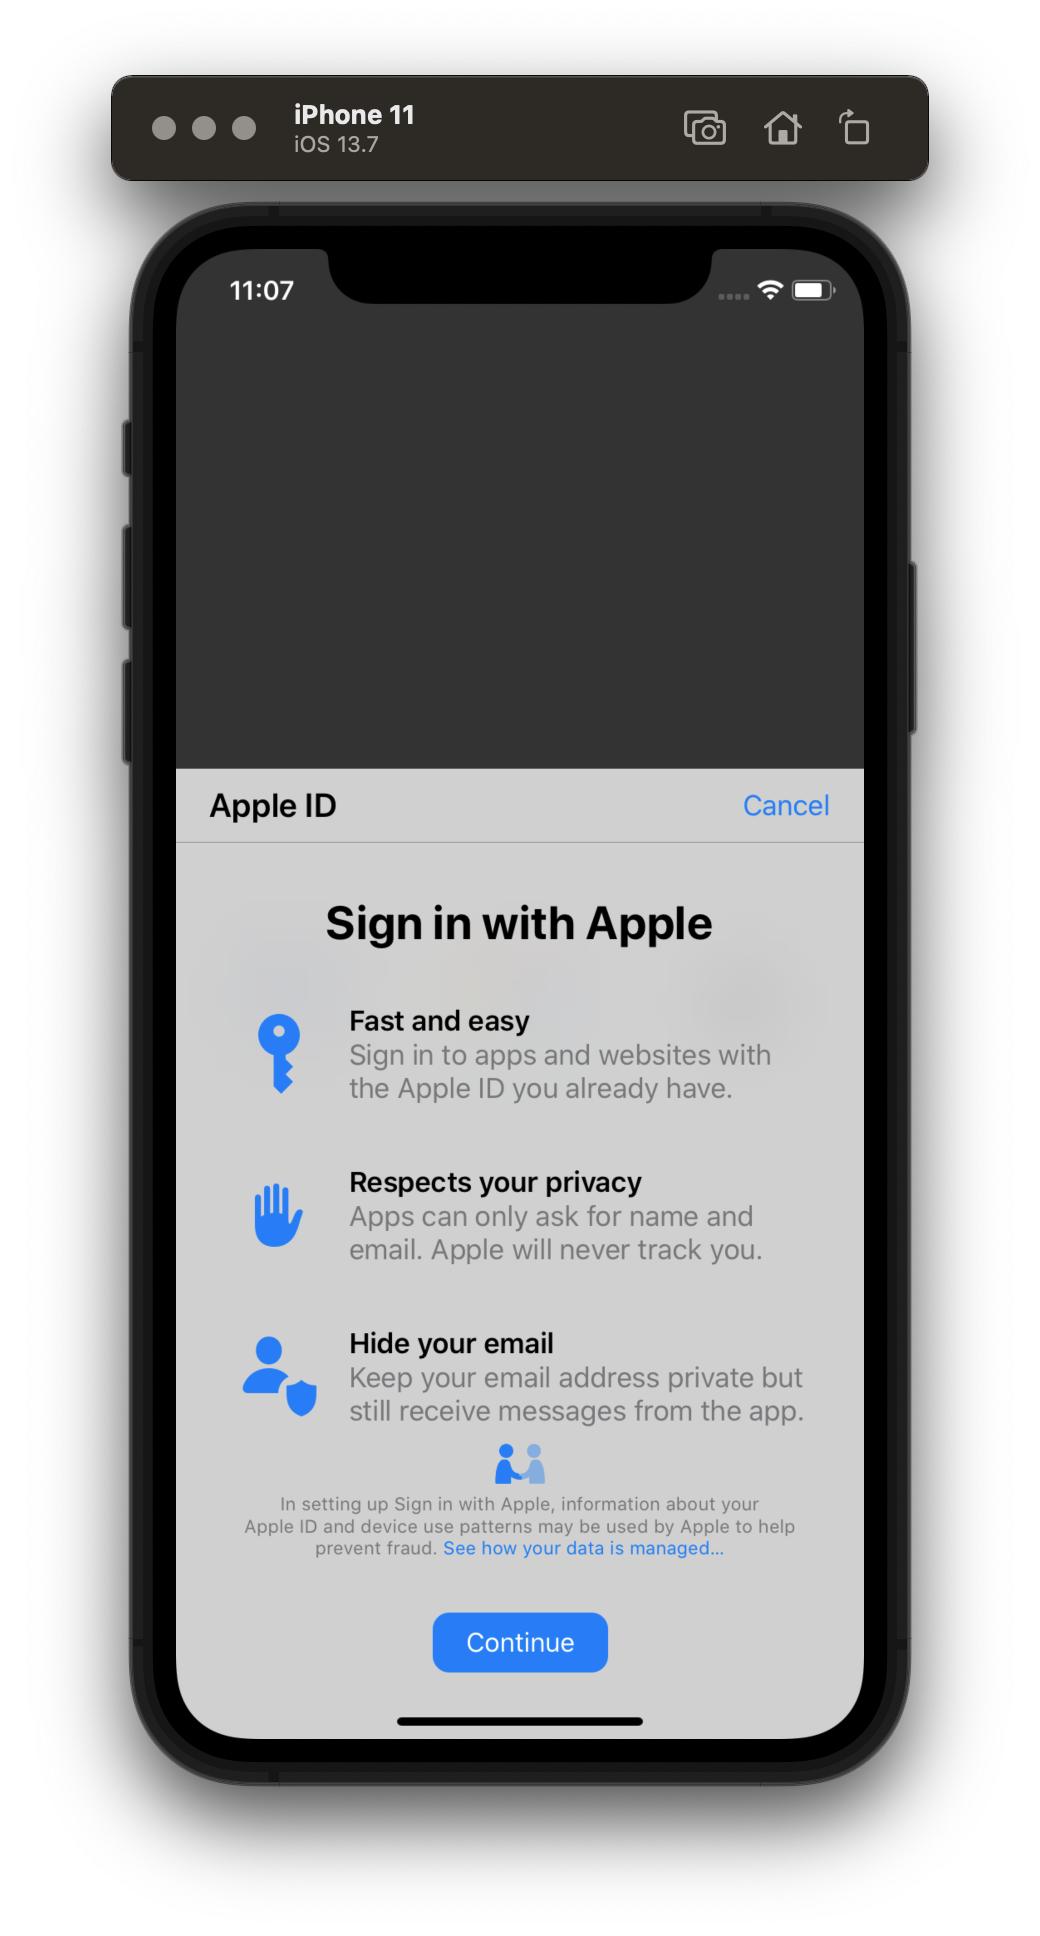
就沒有然後了,點下Contunue以後進入無止盡的轉圈圈。
後來搜尋了一下,在一年前也有人抱怨過這個問題,關於在iOS 14版本的模擬器會出現無法登入Apple ID的狀況:
https://developer.apple.com/forums/thread/651533
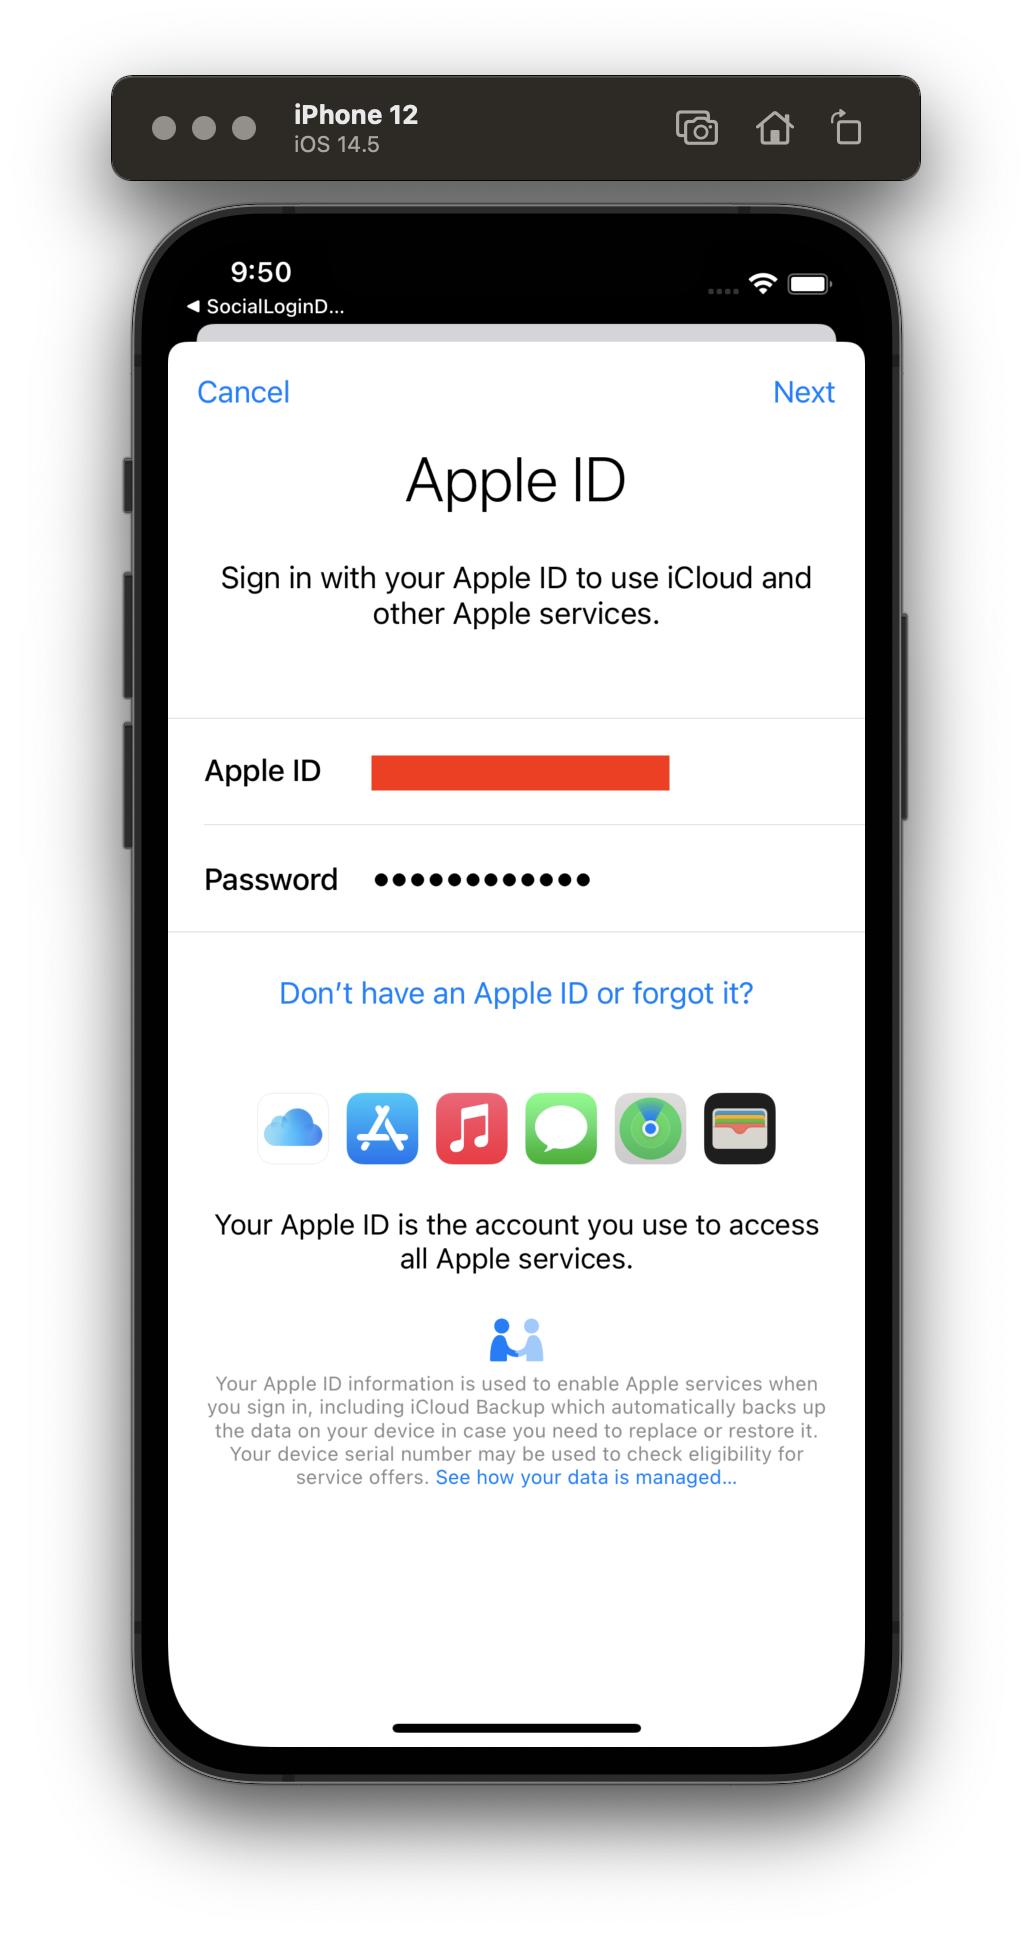
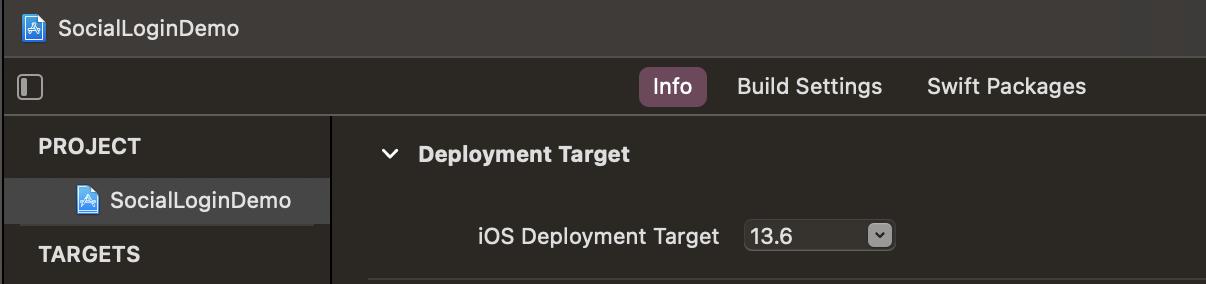
不過底下有人提供解法,先去下載13.7版本的模擬器,並把APP的支援版本改成13.6或以下。


再運行一次看看。
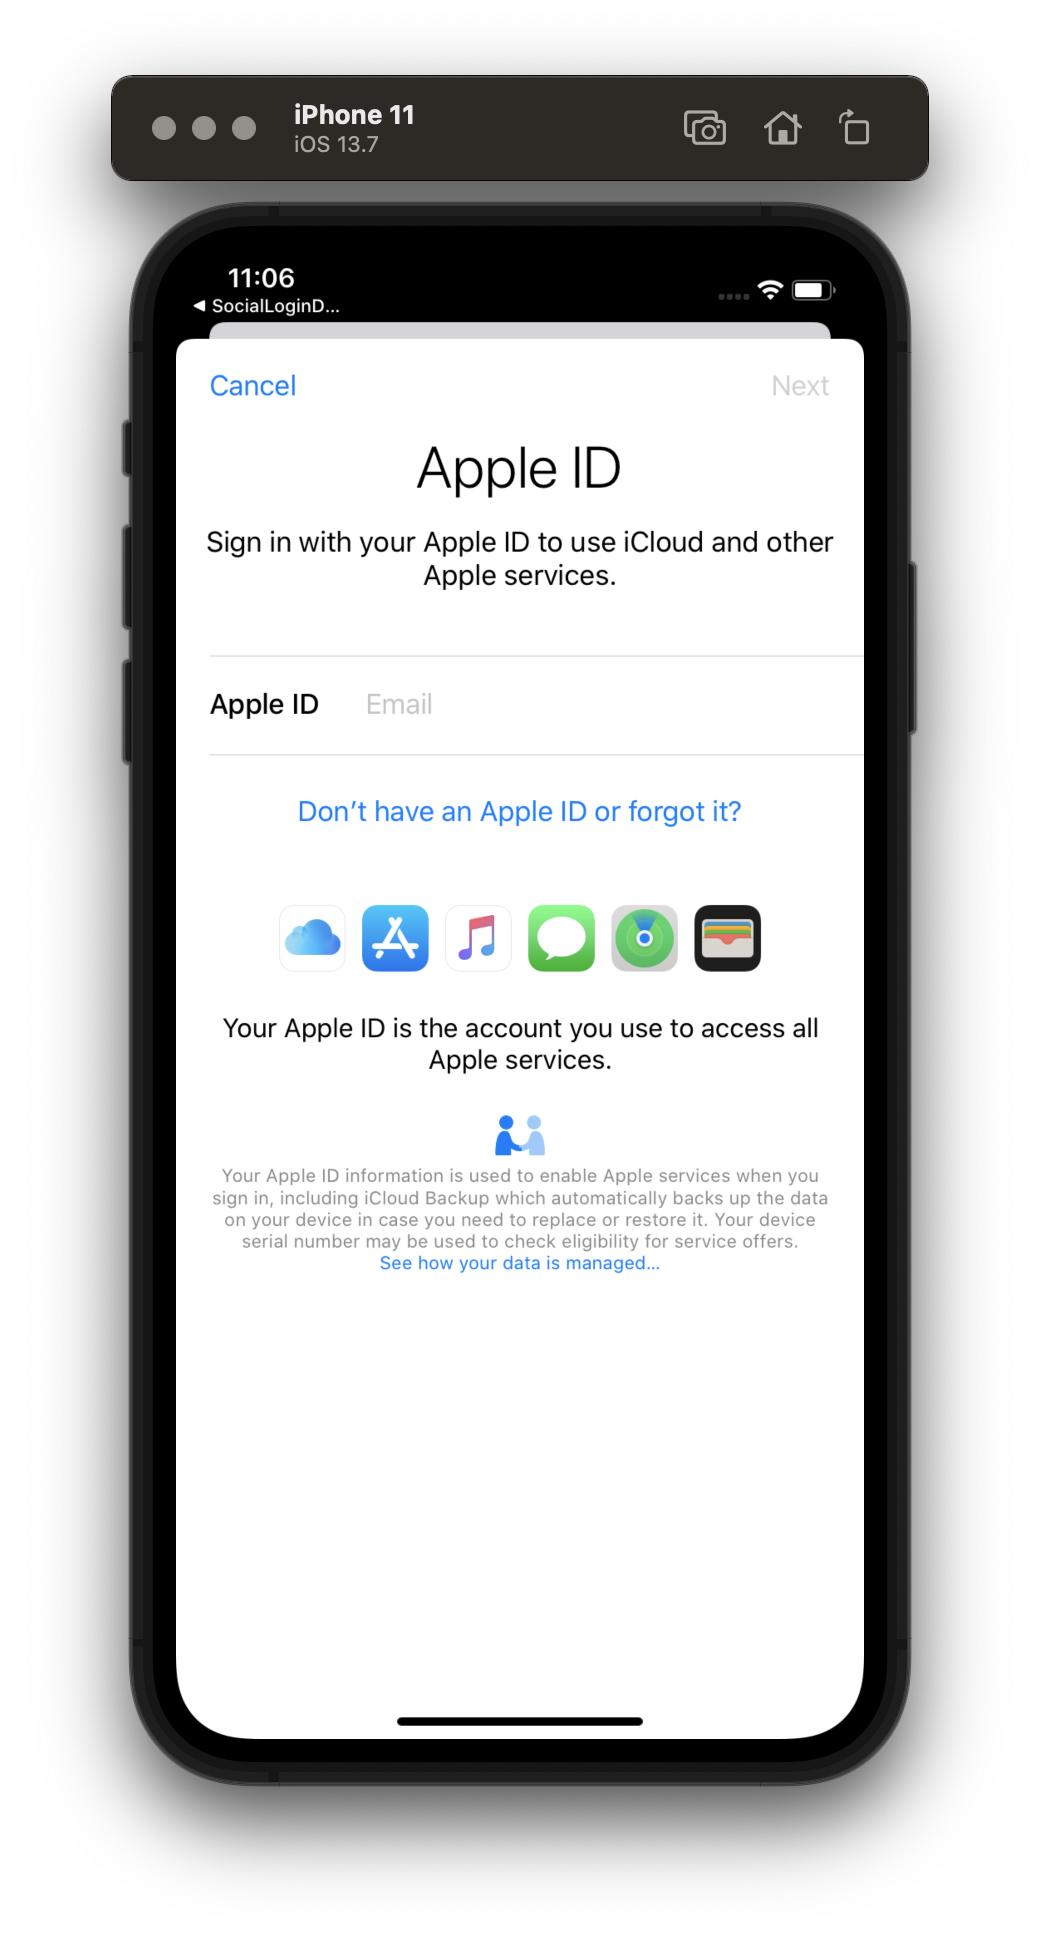


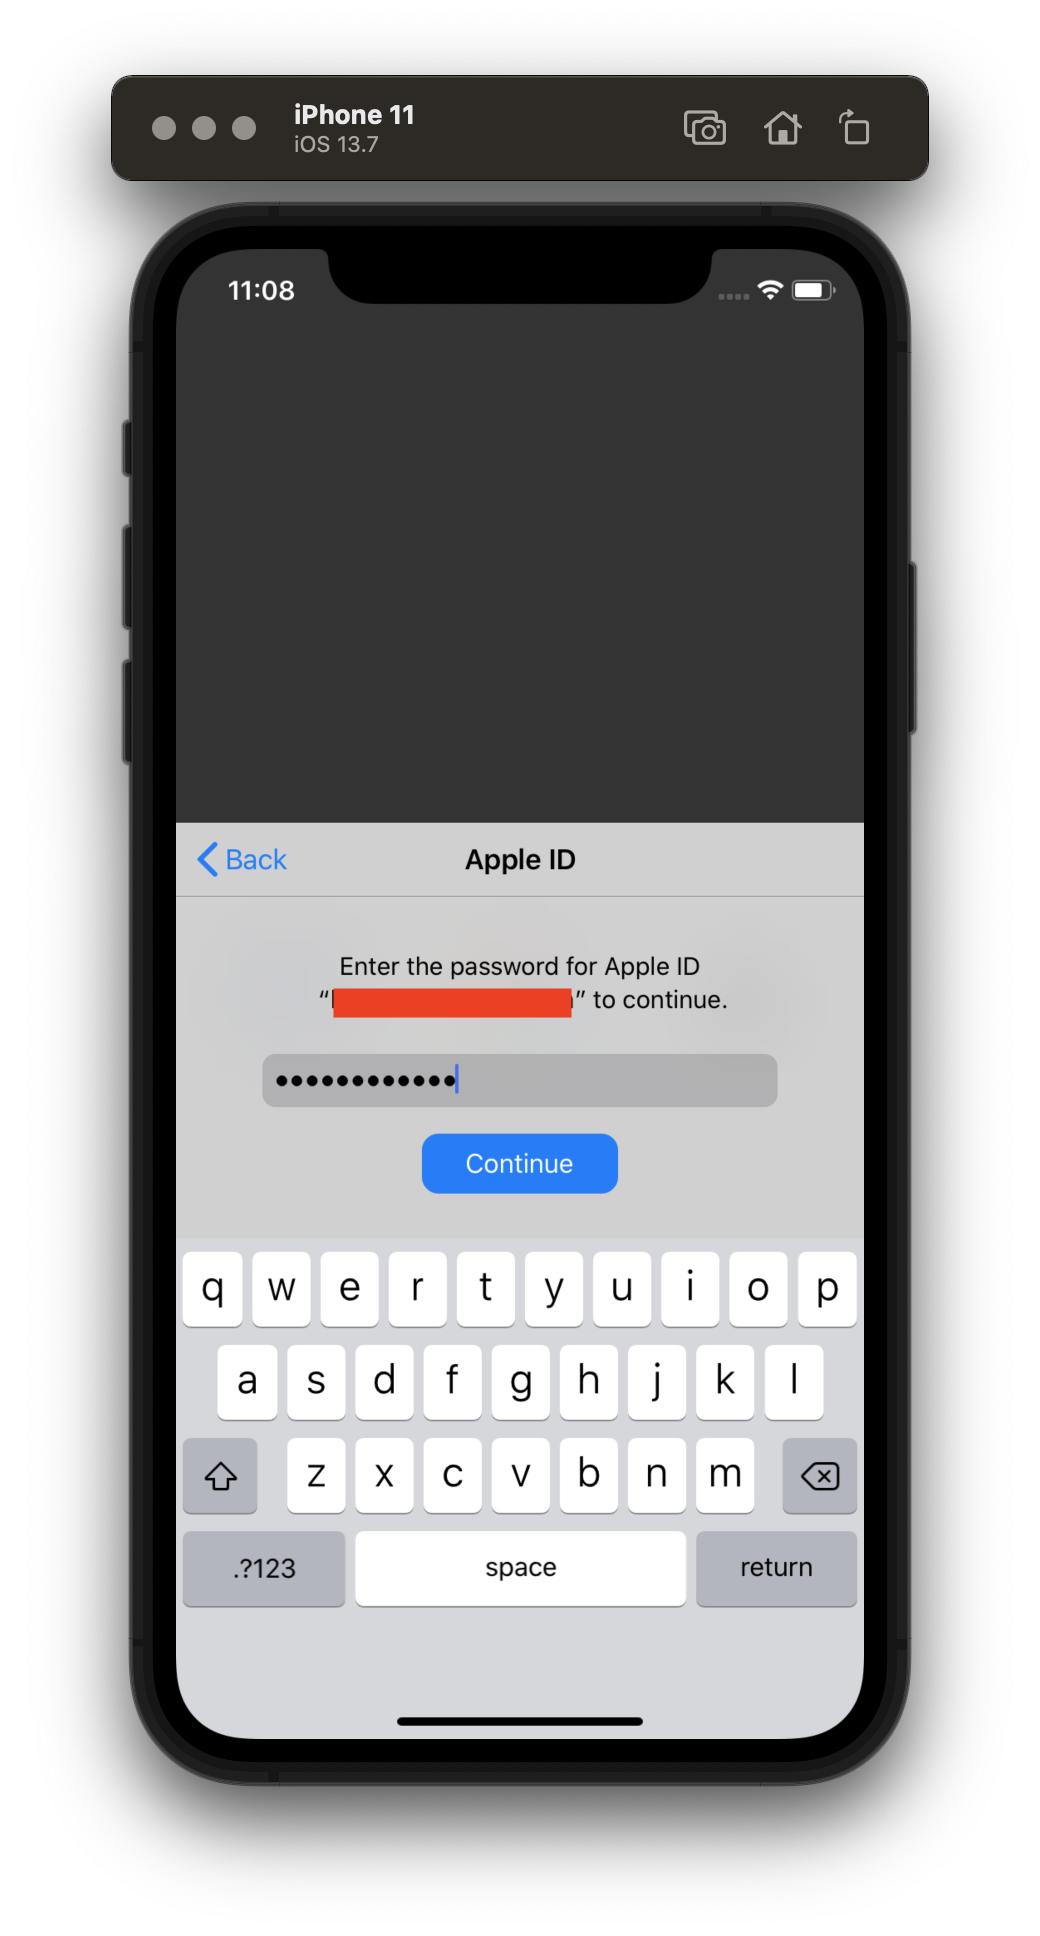

成功了!並且可以看到,在我選擇了Hide My Email之後,我log接收到的就是一組專屬的英數字帳號。
最後稍微說一下那個836 bytes,他的格式是個有時效性的JWT(JSON Web Token),寫成base64的編碼,我把程式改成:
guard let idToken = credential.identityToken else { return }
print("---------\(String(data: idToken, encoding: .utf8))")
會得到


這一大串是由Header、Payload、Signature所組成。有了IdentityToken可以向server驗證token是否過期,流程是這樣:

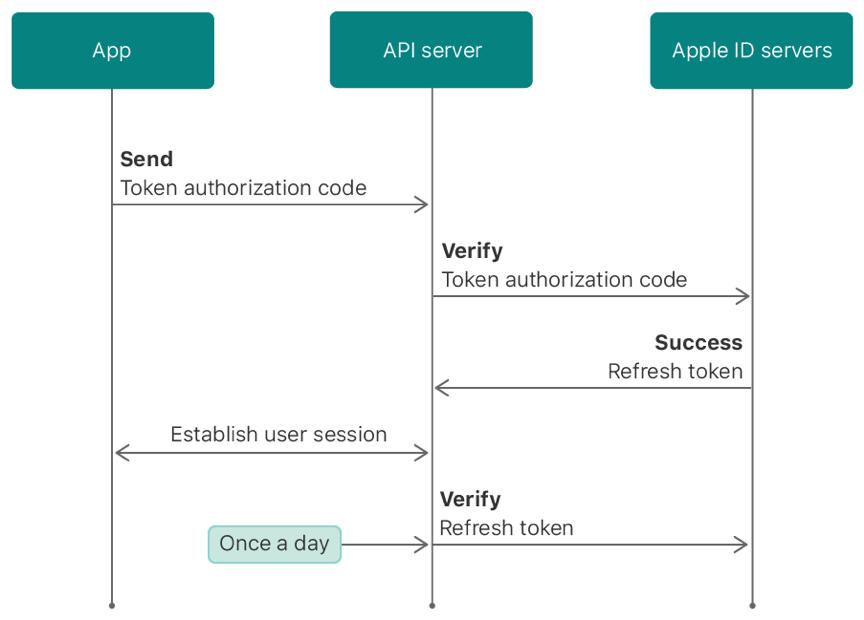
至於驗證token的方法請參考官方文件:
四、實際應用
在討論實際應用之前,先回顧一下開發者可以從這三個平台獲取的資料。
Google和Apple能獲取的資料較為基本,前者能拿到的是姓名、頭像,以及電子信箱;Apple能拿到的東西是姓名與電子信箱(使用者可以選擇顯示為中介mail)。Facebook能拿的東西就很多了,除了基本的名稱、頭像、電子信箱外,還可能取得使用者的眾多個人資料,例如性別、年齡、居住地、教育狀況,甚至是朋友名單(限使用同APP)、點過讚的粉絲專頁、貼文、影片等,畢竟比起其他兩者,FB是社群網站,能掌握的東西多得多。
不過綜合上述三種平台來看,開發者提供讓使用者以第三方平台作為快速註冊及登入,最方便的就是能快速取得使用者的名字或電子信箱,可以直接拿來作為使用者的代稱,例如在登入以後可以直接從第三方平台拿到的名字稱呼使用者,然後再提供一個可以修改的地方;也可以收集到使用者信箱,作為行銷推廣使用等等。
或者最常見的,是利用分享的功能,在取得貼文的權限以後貼到使用者的公開頁面,藉以達到宣傳的效果,或是列出同樣有使用同個APP的朋友等,這兩點我們在很多的手遊APP裡應該都能看到有類似的機制,比如說請朋友送體力之類的,雖然要求這些權限需要通過FB的審核,但只要附上完整的說明,我想有那麼多前輩APP在先了,應該不會被特別刁難(大概吧)(欸)。
不過有個重要的事情,根據文件:https://developer.apple.com/app-store/review/guidelines/#sign-in-with-apple
APP中如果提供第三方登入,除非是教育類,或者是企業內部使用的情形,否則一定要加入Sign in with Apple的部分,所以如果要在iOS的APP中加入任何的第三方平台作為登入,勢必也得加上Apple登入。
但以我個人經驗,如果是打算以第三方登入所取得的信箱資料作為ID的話,最好不要讓使用者在其他地方有需要填ID的時候,一律在APP內作業,因為在選擇了隱藏信箱後ID就會變成了那一串亂碼般的英數字,然而一些遊戲的獎勵是在網頁上操作,我根本不記得我的代理mail是什麼最後只好重新註冊一個,還好還沒玩多久⋯⋯(扯遠了)。不過整體來說Apple ID是很方便,還可以用Touch ID或Face ID快速登入,如果只是單純作為APP註冊的話,我覺得對iOS使用者來說是最好的選擇了。
總之,以上就是目前最普遍使用的三種第三方登入的說明,這邊都只列出基本使用的方法,如果有興趣想活用在更多方面,請至各官方文件進行探索囉。
參考資料:
https://developers.facebook.com/docs/facebook-login/ios
https://developers.google.com/identity/sign-in/ios/start-integrating
https://developer.apple.com/documentation/authenticationservices/implementing_user_authentication_with_sign_in_with_apple
https://developer.apple.com/forums/thread/651533