初探GraphQL
一. 什麼是GraphQL
GraphQL是開源的API資料查詢與操作語言/技術,為Facebook所創造,於2012年開始在FB內部使用,並於2015年開源供大眾使用,2018年11月7日,GraphQL從Facebook轉移到由非營利性Linux基金會新成立的GraphQL基金會。
二. 為何要使用GraphQL
Facebook創建GraphQL的目的是用來取代REST API,與REST API比起來,使用GraphQL API最主要的好處有:
l 減少前端呼叫API的次數
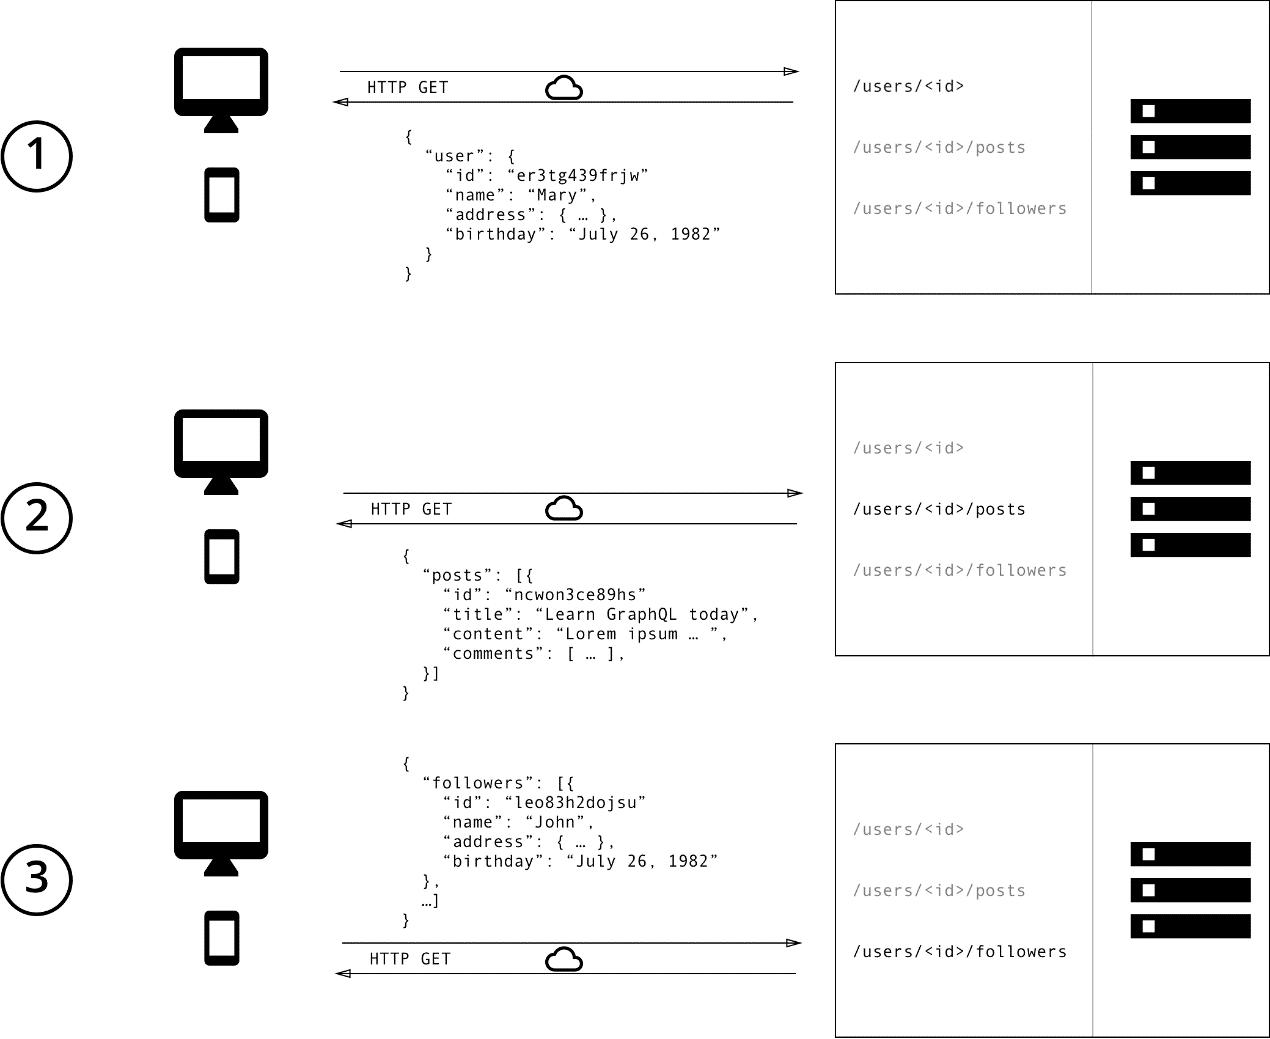
以部落格為例,若前端想取得某位作者的[基本資料/PO文/跟隨者]等三種資訊,若以REST API為Server端,則總共要發3次API請求(如下圖):
若是採用GraphQL則只要一次API呼叫:
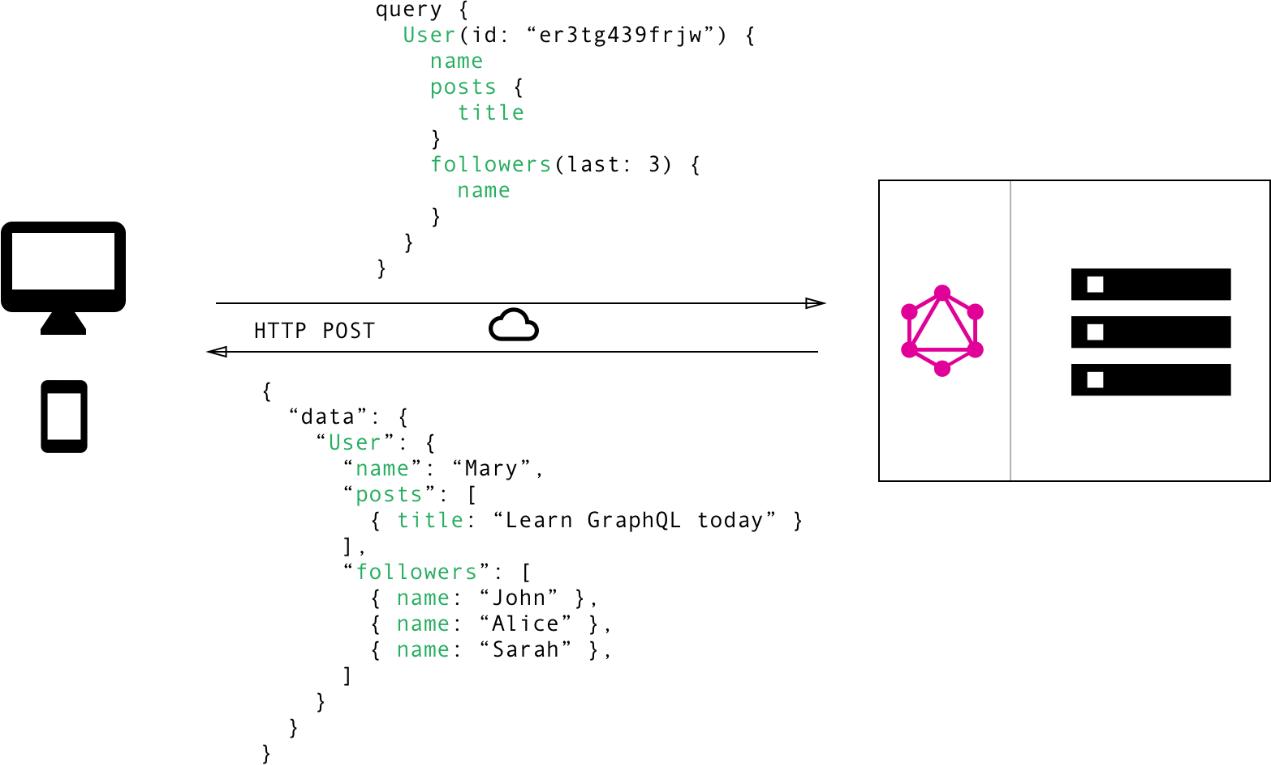
由上可知,GraphQL基本上可以減少N-1次的API請求,其中N表REST API的請求次數。
l 前端取得資料不再有過度(Overfetching)或不足(Underfetching):
以REST API取得資料時會有提取過度(Overfetching)的狀況,比如說有一個REST端點/users用來讀取作者的完整資料列表,包括作者們的代碼、姓名、eMail、電話、地址….等,但有時候前端只需要簡單的使用者資料,如代碼與姓名,此時便會有過度提取的問題,浪費頻寬與下載時間。若採用GraphQL則可由前端指定要提取的資料,每一次提取都是剛剛好的。
REST API也會有提取不足(Underfetching)的情形,例如,某個前端需要顯示作者與其跟隨者的列表,假設/users/<user-id>/followers端點用來取得某位作者的跟隨者列表,此時需要先發出1次/users請求先取得作者列表,再發出n次/users/<user-id>/followers請求取得個別作者的跟隨者列表,因此總共要發出n+1次請求,這種情形又稱為n+1 problem。若改用GraphQL,則只要一次API請求即可取得所有資訊,包括作者列表與對應之跟隨者列表。
l 前端的快速反覆開發:
GraphQL以schema 技術描述API端點所提供的資料存取結構,下列是簡單的User型別scheme定義,用來描述User資料的欄位資訊:
type User{
  id: Int!
name: String!
  age: Int!
  }
一旦GraphQL API端點Scheme描述充足且正確,則前端就可以隨心所欲下GraphQL查詢以提取需要的資料,此時不管前端畫面如何改版,都與後端API端點無關,前端開發人員可以不需要與後端API人員討論並等候其完成API改版,前端人員可以完全獨立運作,實現真正的[前後分離]。
若想進一步了解GraphQL的特色與優勢,請參考:
https://www.howtographql.com/basics/1-graphql-is-the-better-rest/
https://www.prisma.io/blog/top-5-reasons-to-use-graphql-b60cfa683511
三. 如何使用GraphQL(以Asp.Net Core為例)
接下來以Asp.Net Core為例,說明如何用Asp.Net Core建立Server端GraphQL端點,並示範如何在前端以GraphQL語言呼叫GraphQL API端點提取資料。
1. 建立Asp.Net Core專案
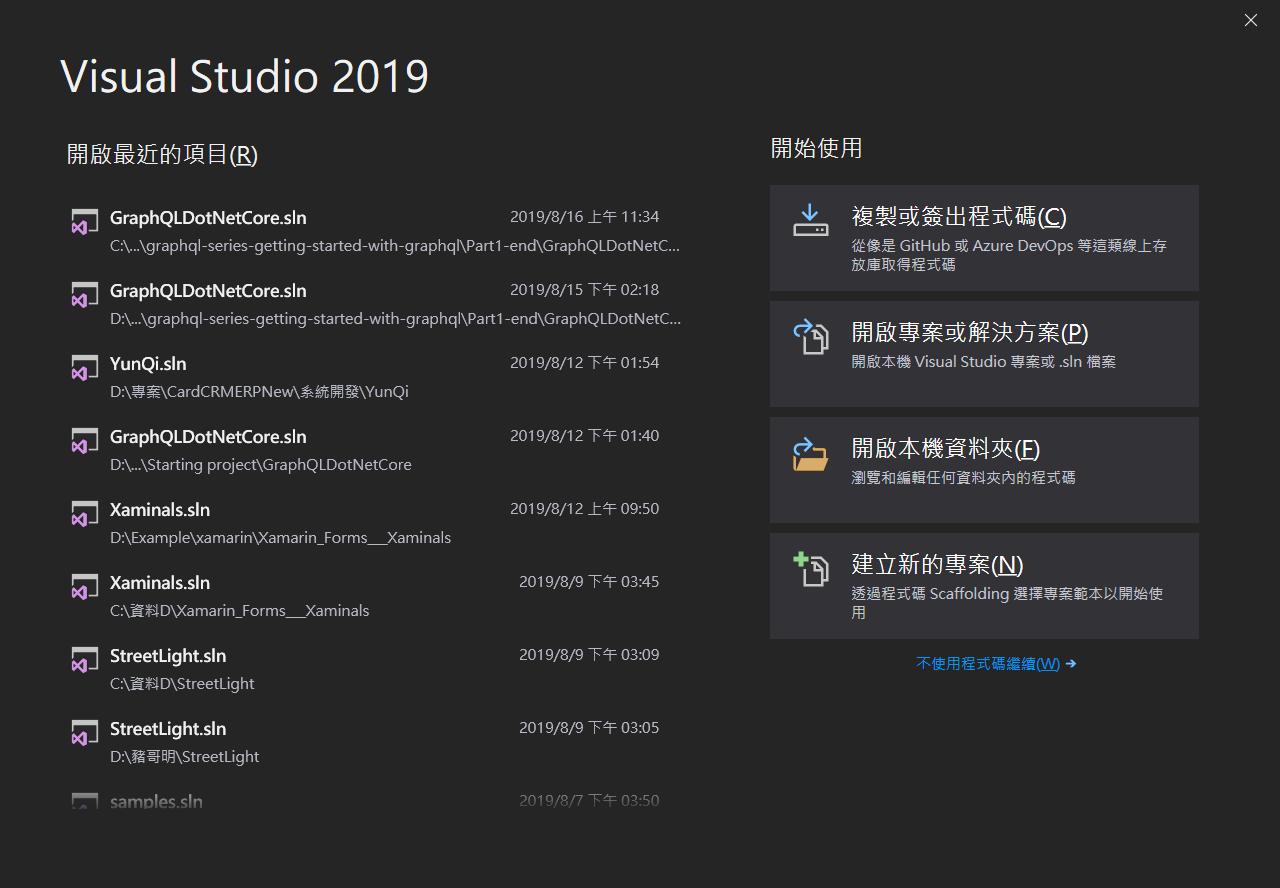
1-1.請先啟動Visual Studio 2019,點按[建立新專案]。
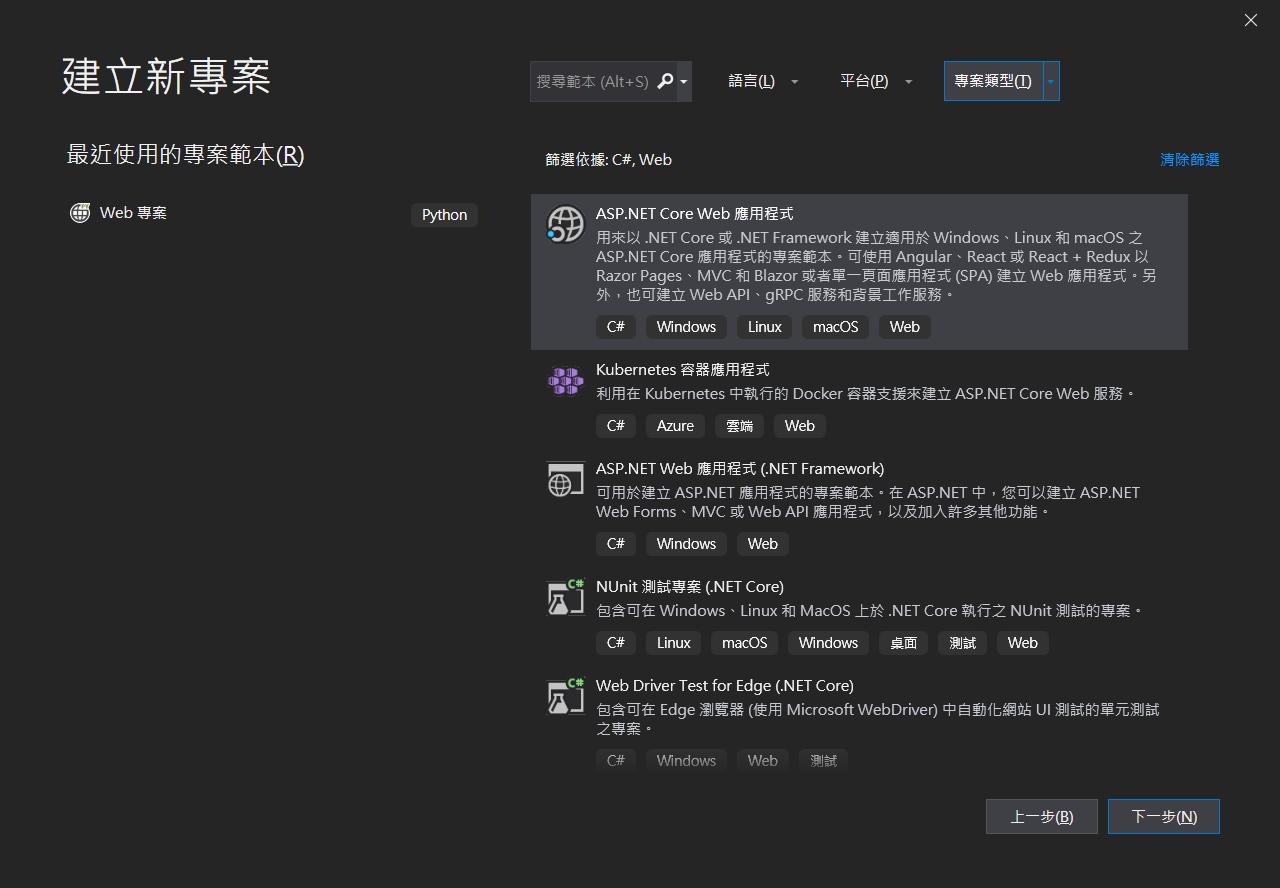
1-2.選擇專案類型[Web],點選[Asp.Net Core應用程式],按下一步。
1-3.輸入專案名稱[StartGraphQL]與儲存位置,按建立。

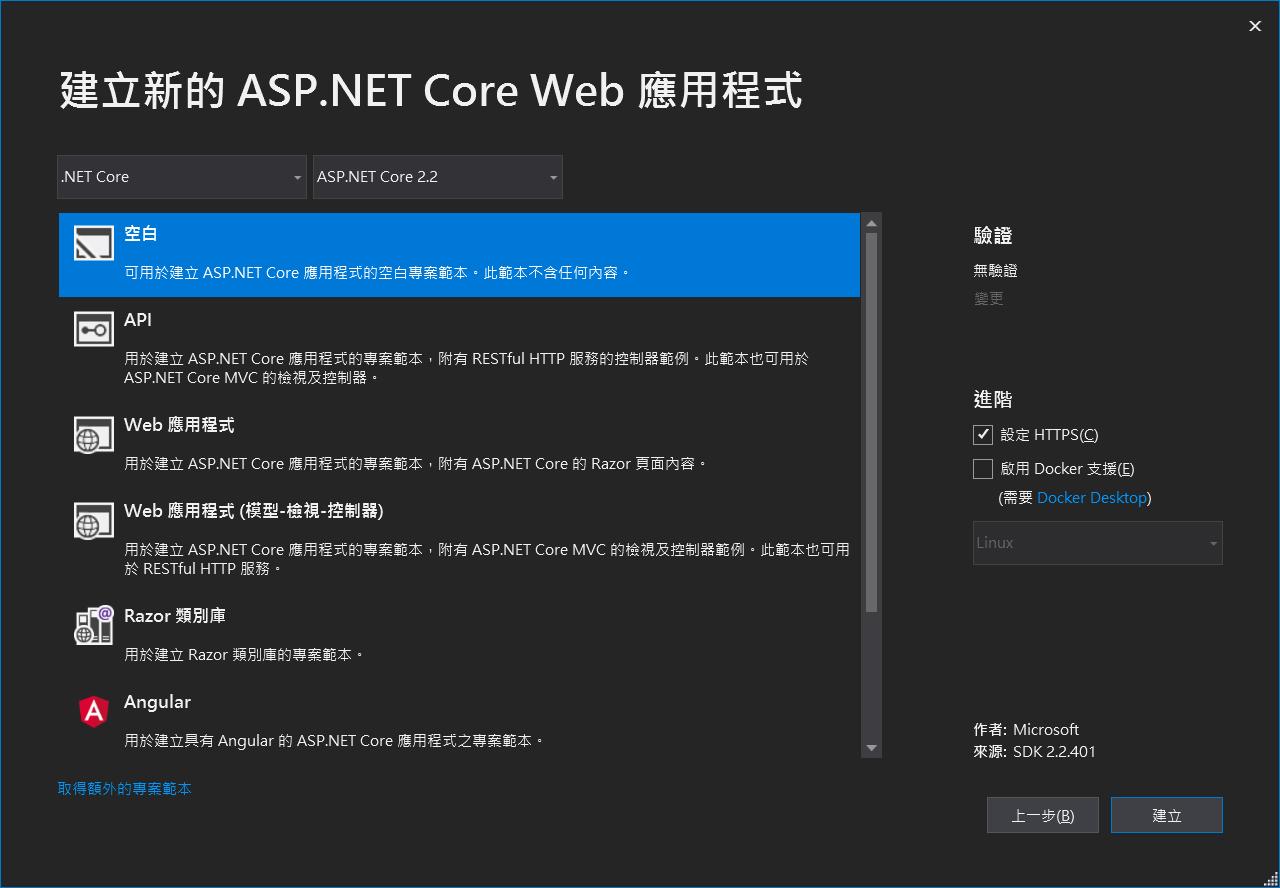
1-4.點選[.Net Core]、[Asp.Net Core 2.2]、[空白],再按建立。
2. 加入必要的GraphQL組件
總共要加入下列GraphQL相關NuGet組件:
l GraphQL
l GraphQL.Server.Transports.AspNetCore
l GraphQL.Server.Ui.Playground
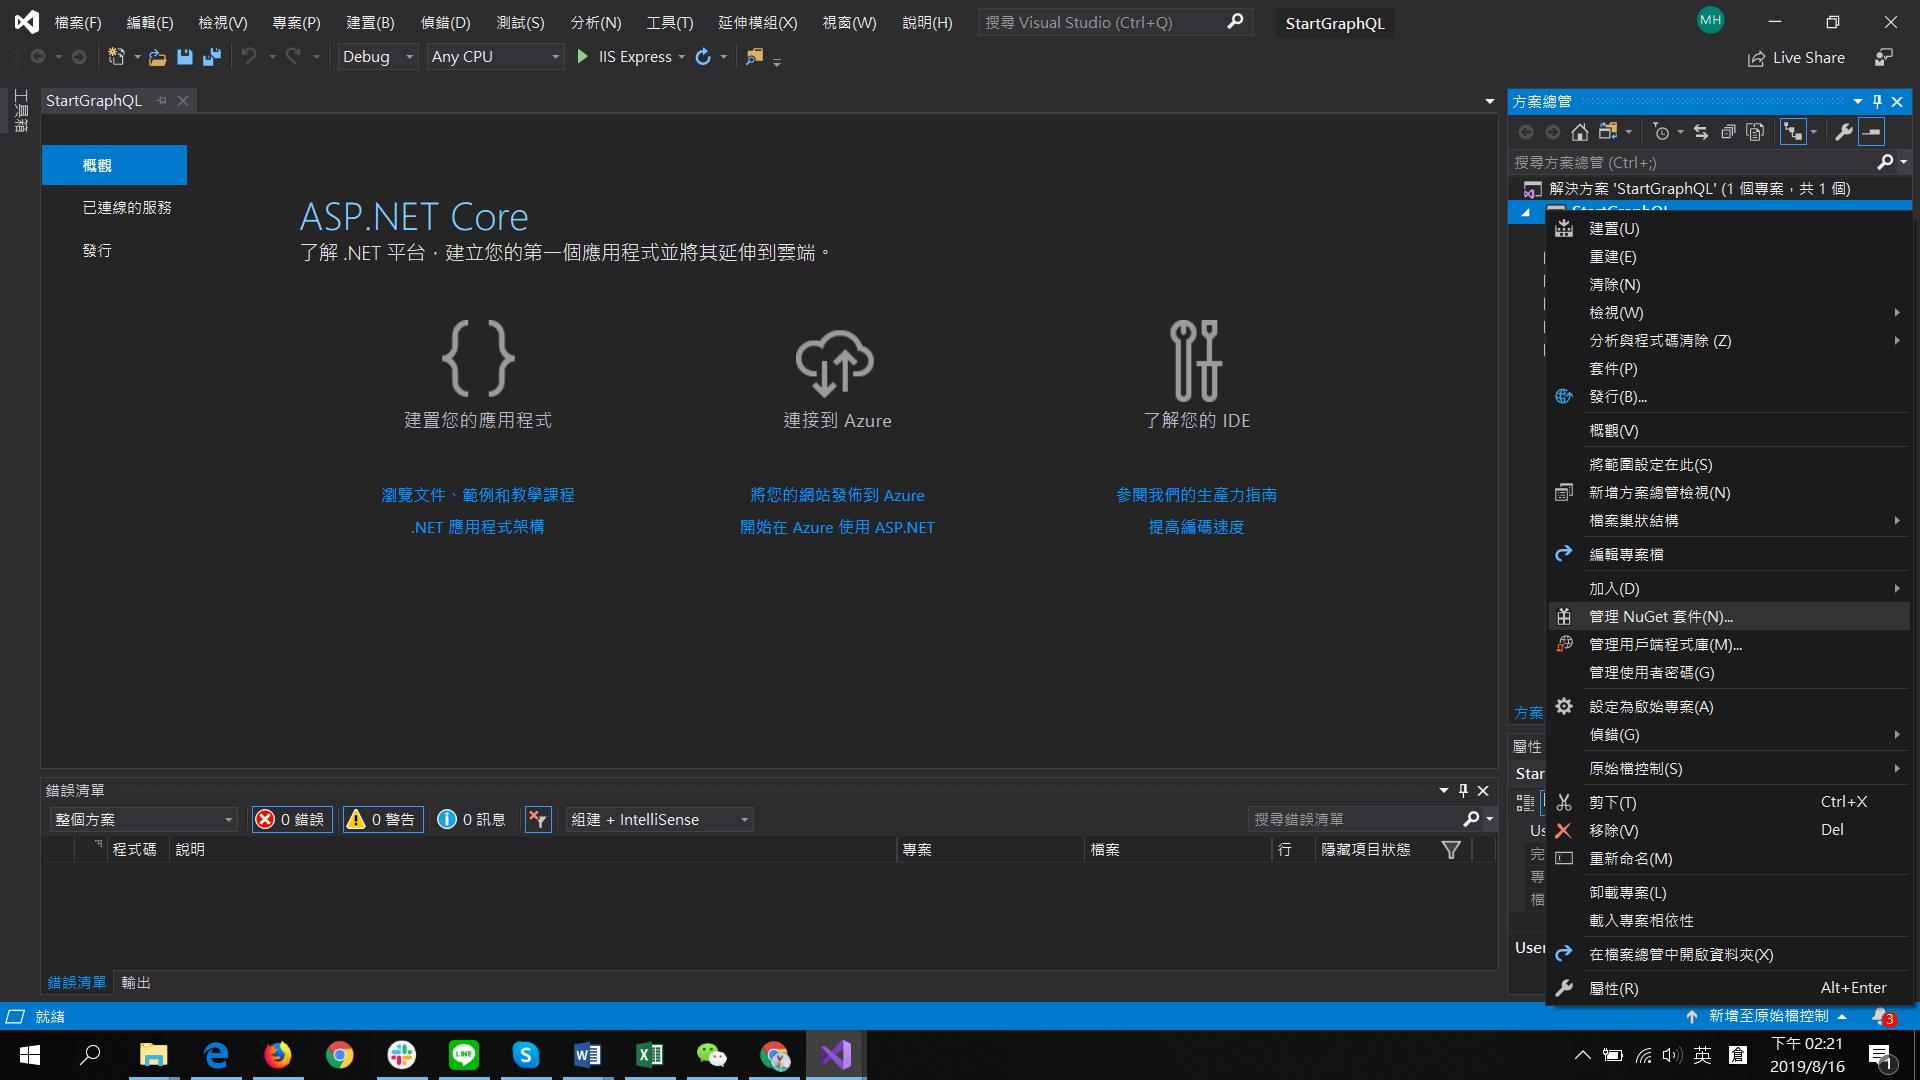
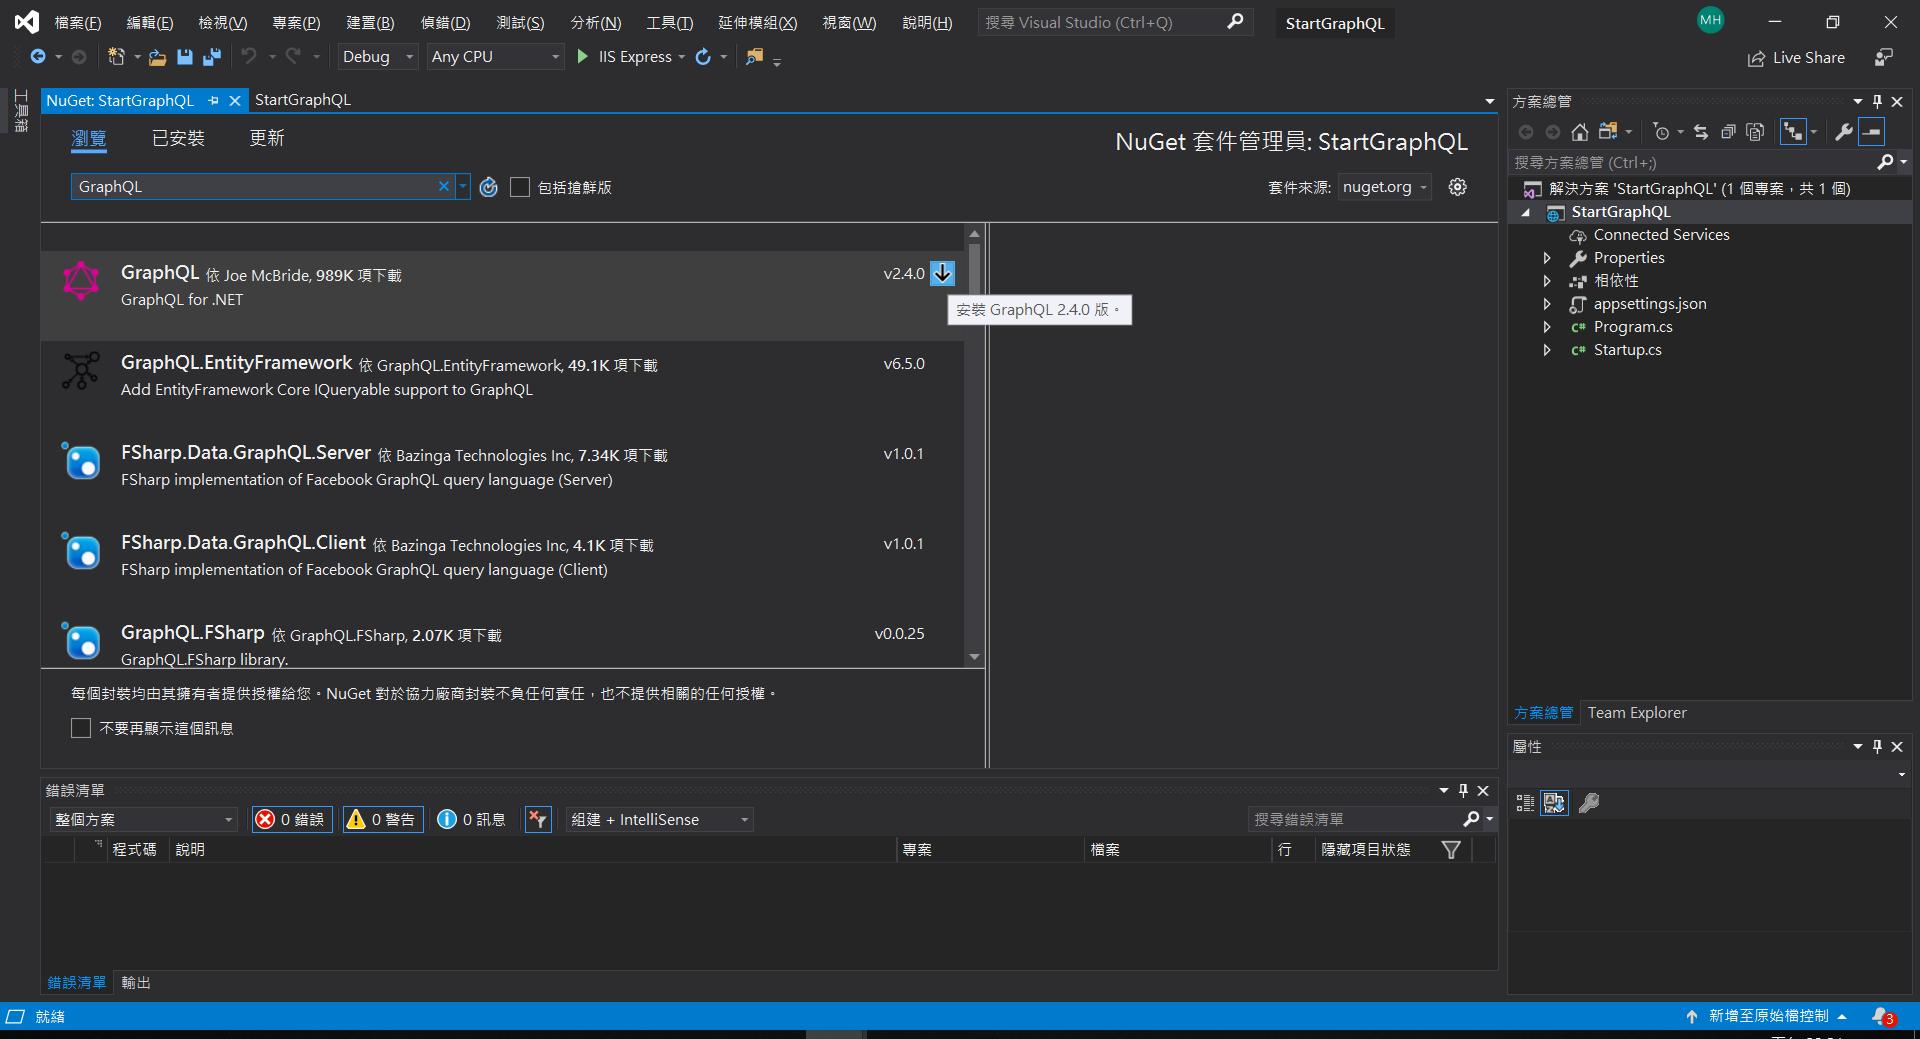
請在專案名稱[StartGraphQL]上按右鈕,點按[管理NuGet套件],接著點按瀏灠,輸入組件名稱[GraphQL],再點按組件[GraphQL]右方的下箭頭鈕(安裝GraphQL 2.4.0版)。
重覆以上步驟,再安裝GraphQL.Server.Transports.AspNetCore與GraphQL.Server.Ui.Playground兩個組件。
3. 建立資料庫存取相關類別
接著我們要建立資料存取層,以提供GraphQL API端點存取資料,我們將使用Entity Framework之Code-First Pattern快速建立資料存取層。
3-1.建立Data Model(Data Entities)
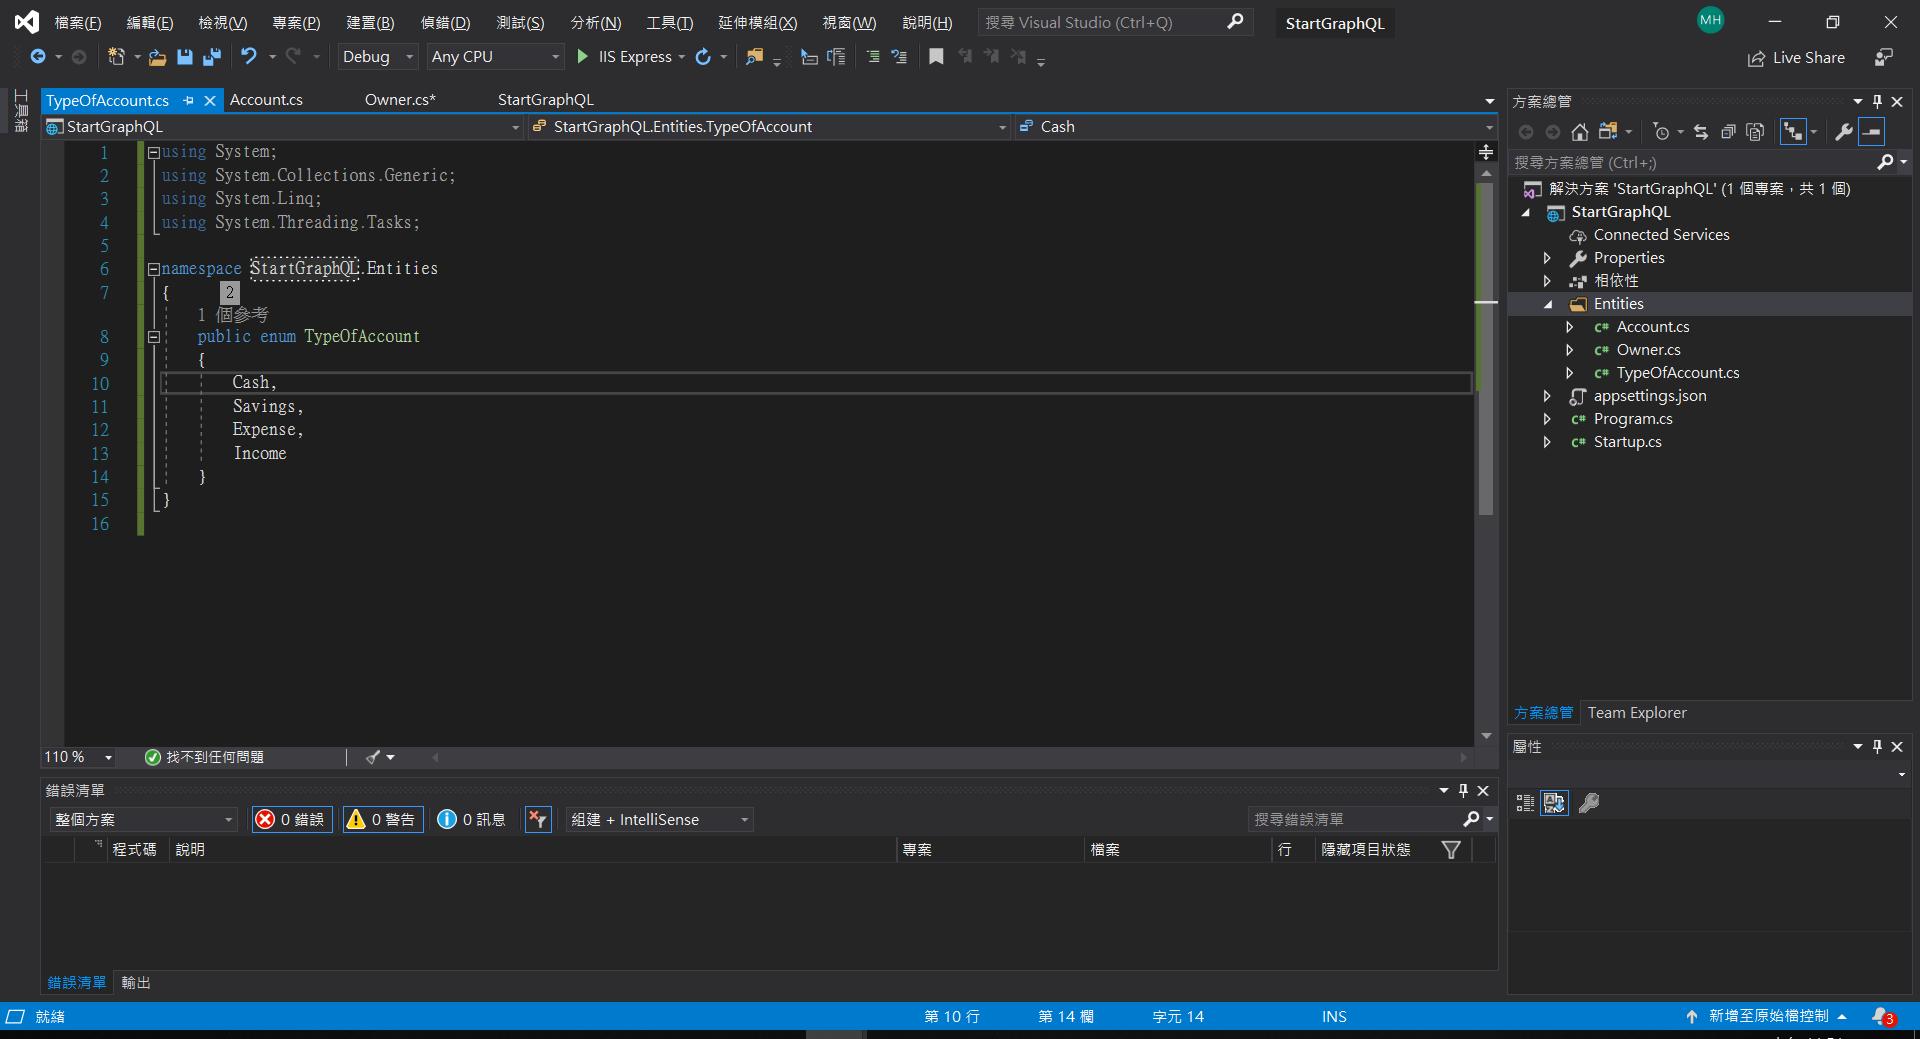
請在專案底下建立資料夾[Entities],然後加入[Owner]、[Account]、[TypeOfAccount]等三個類別,其中[Owner]與[Account]為Entity Class(Data Model),代表資料類別,與DB中的資料表對應,而TypeOfAccount用來支援Account Class中的Type成員型別:
using System;
using System.Collections.Generic;
using System.ComponentModel.DataAnnotations;
namespace StartGraphQL.Entities
{
    public class Owner
    {
        [Key]
        public Guid Id { get; set; }
        [Required(ErrorMessage = "Name is required")]
        public string Name { get; set; }
        public string Address { get; set; }
        public ICollection<Account> Accounts { get; set; }
    }
}
using System;
using System.ComponentModel.DataAnnotations;
using System.ComponentModel.DataAnnotations.Schema;
namespace StartGraphQL.Entities
{
    public class Account
    {
        [Key]
        public Guid Id { get; set; }
        [Required(ErrorMessage = "Type is required")]
        public TypeOfAccount Type { get; set; }
        public string Description { get; set; }
        [ForeignKey("OwnerId")]
        public Guid OwnerId { get; set; }
        public Owner Owner { get; set; }
    }
}
using System;
using System.Collections.Generic;
using System.Linq;
using System.Threading.Tasks;
namespace StartGraphQL.Entities
{
    public enum TypeOfAccount
    {
        Cash,
        Savings,
        Expense,
        Income
    }
}
3-2.建立DB Context相關類別
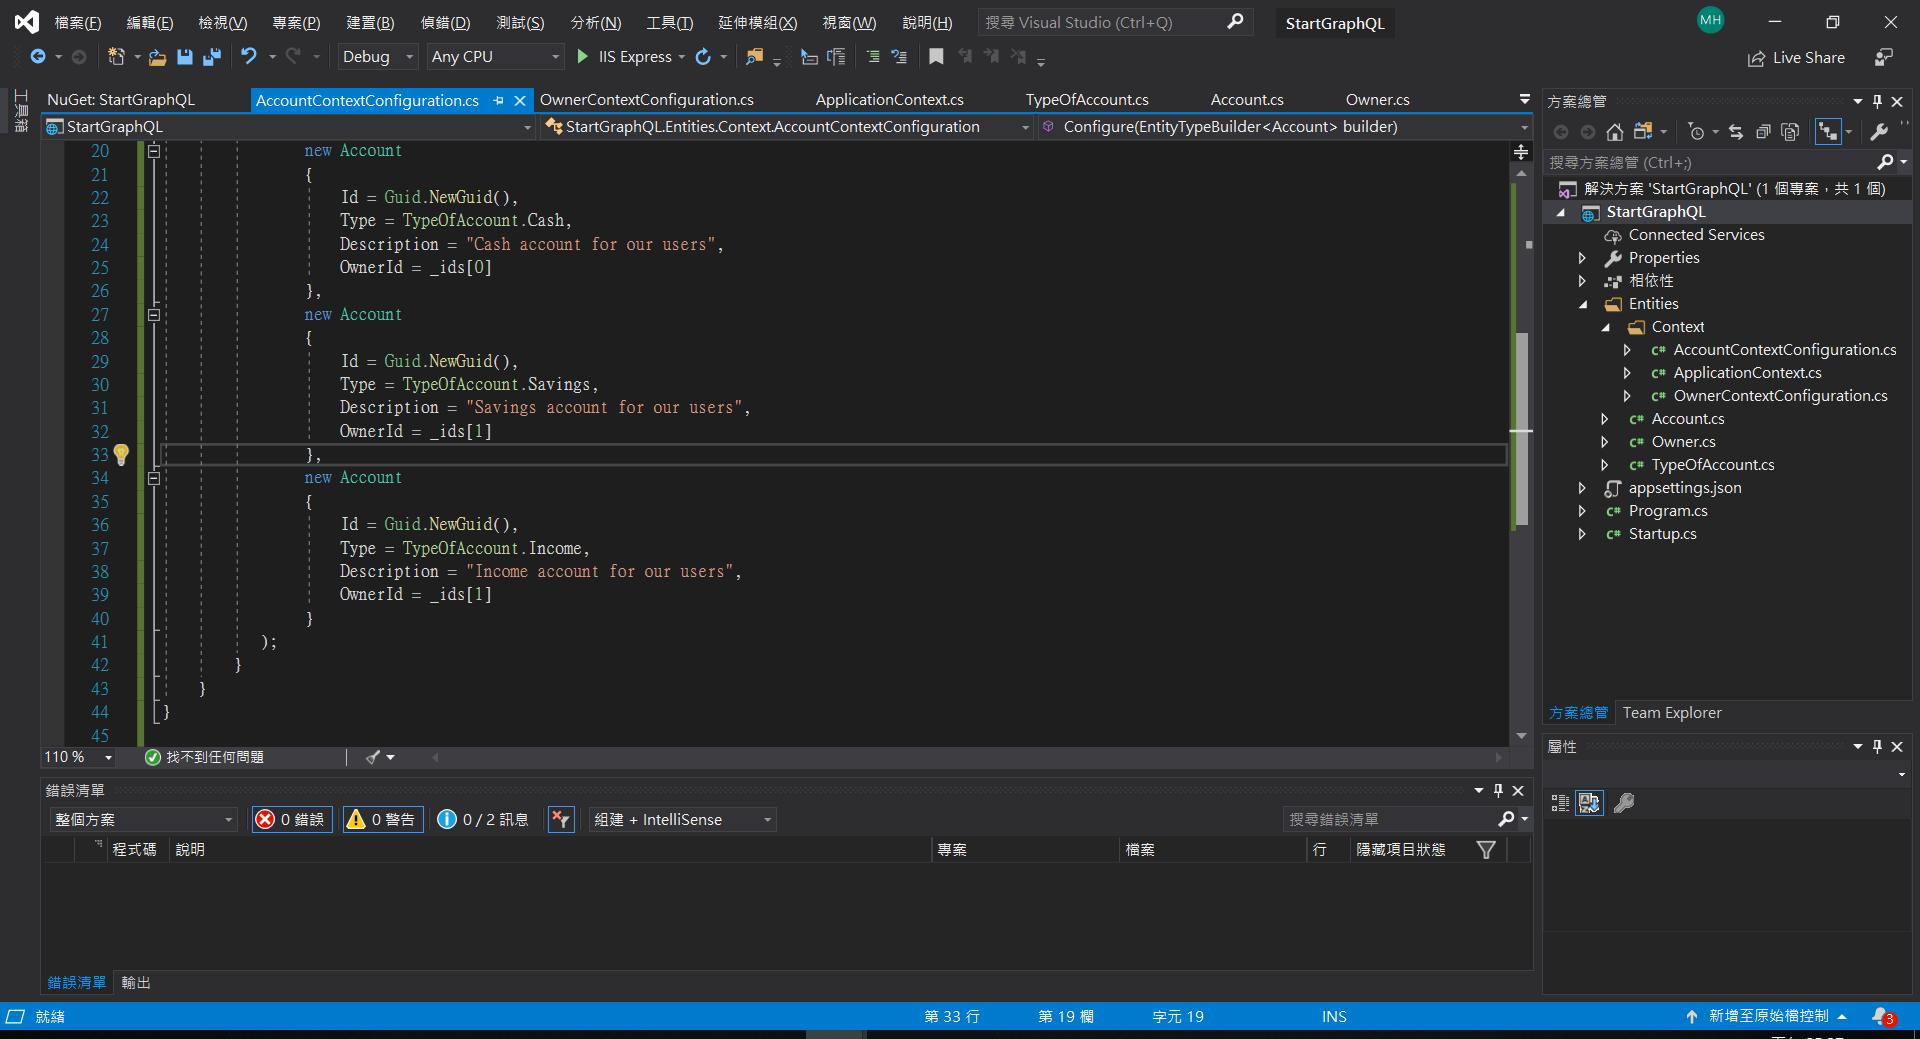
請在資料夾[Entities]底下建立子資料夾[Context],然後加入[ApplicationContext]、[OwnerContextConfiguration]、[AccountContextConfiguration]等三個類別,其中[ApplicationContext]為DB Context類別,與DB中的資料庫對應,而[OwnerContextConfiguration]、[AccountContextConfiguration]則為資料初始化類別,分別用來提供兩個Data Entity類別[Owner]與[[Account]兩個資料表類別之初始資料以利測試:
using Microsoft.EntityFrameworkCore;
using System;
using System.Collections.Generic;
using System.Linq;
using System.Threading.Tasks;
namespace StartGraphQL.Entities.Context
{
    public class ApplicationContext : DbContext
    {
        public ApplicationContext(DbContextOptions options)
            : base(options)
        {
        }
        protected override void OnModelCreating(ModelBuilder modelBuilder)
        {
            var ids = new Guid[] { Guid.NewGuid(), Guid.NewGuid() };
            modelBuilder.ApplyConfiguration(new OwnerContextConfiguration(ids));
            modelBuilder.ApplyConfiguration(new AccountContextConfiguration(ids));
        }
        public DbSet<Owner> Owners { get; set; }
        public DbSet<Account> Accounts { get; set; }
    }
}
using Microsoft.EntityFrameworkCore;
using Microsoft.EntityFrameworkCore.Metadata.Builders;
using System;
namespace StartGraphQL.Entities.Context
{
    public class OwnerContextConfiguration : IEntityTypeConfiguration<Owner>
    {
        private Guid[] _ids;
        public OwnerContextConfiguration(Guid[] ids)
        {
            _ids = ids;
        }
        public void Configure(EntityTypeBuilder<Owner> builder)
        {
            builder
              .HasData(
                new Owner
                {
                    Id = _ids[0],
                    Name = "John Doe",
                    Address = "John Doe's address"
                },
                new Owner
                {
                    Id = _ids[1],
                    Name = "Jane Doe",
                    Address = "Jane Doe's address"
                }
            );
        }
    }
}
using Microsoft.EntityFrameworkCore;
using Microsoft.EntityFrameworkCore.Metadata.Builders;
using System;
namespace StartGraphQL.Entities.Context
{
    public class AccountContextConfiguration : IEntityTypeConfiguration<Account>
    {
        private Guid[] _ids;
        public AccountContextConfiguration(Guid[] ids)
        {
            _ids = ids;
        }
        public void Configure(EntityTypeBuilder<Account> builder)
        {
            builder
                .HasData(
                new Account
                {
                    Id = Guid.NewGuid(),
                    Type = TypeOfAccount.Cash,
                    Description = "Cash account for our users",
                    OwnerId = _ids[0]
                },
                new Account
                {
                    Id = Guid.NewGuid(),
                    Type = TypeOfAccount.Savings,
                    Description = "Savings account for our users",
                    OwnerId = _ids[1]
                },
                new Account
                {
                    Id = Guid.NewGuid(),
                    Type = TypeOfAccount.Income,
                    Description = "Income account for our users",
                    OwnerId = _ids[1]
                }
           );
        }
    }
}
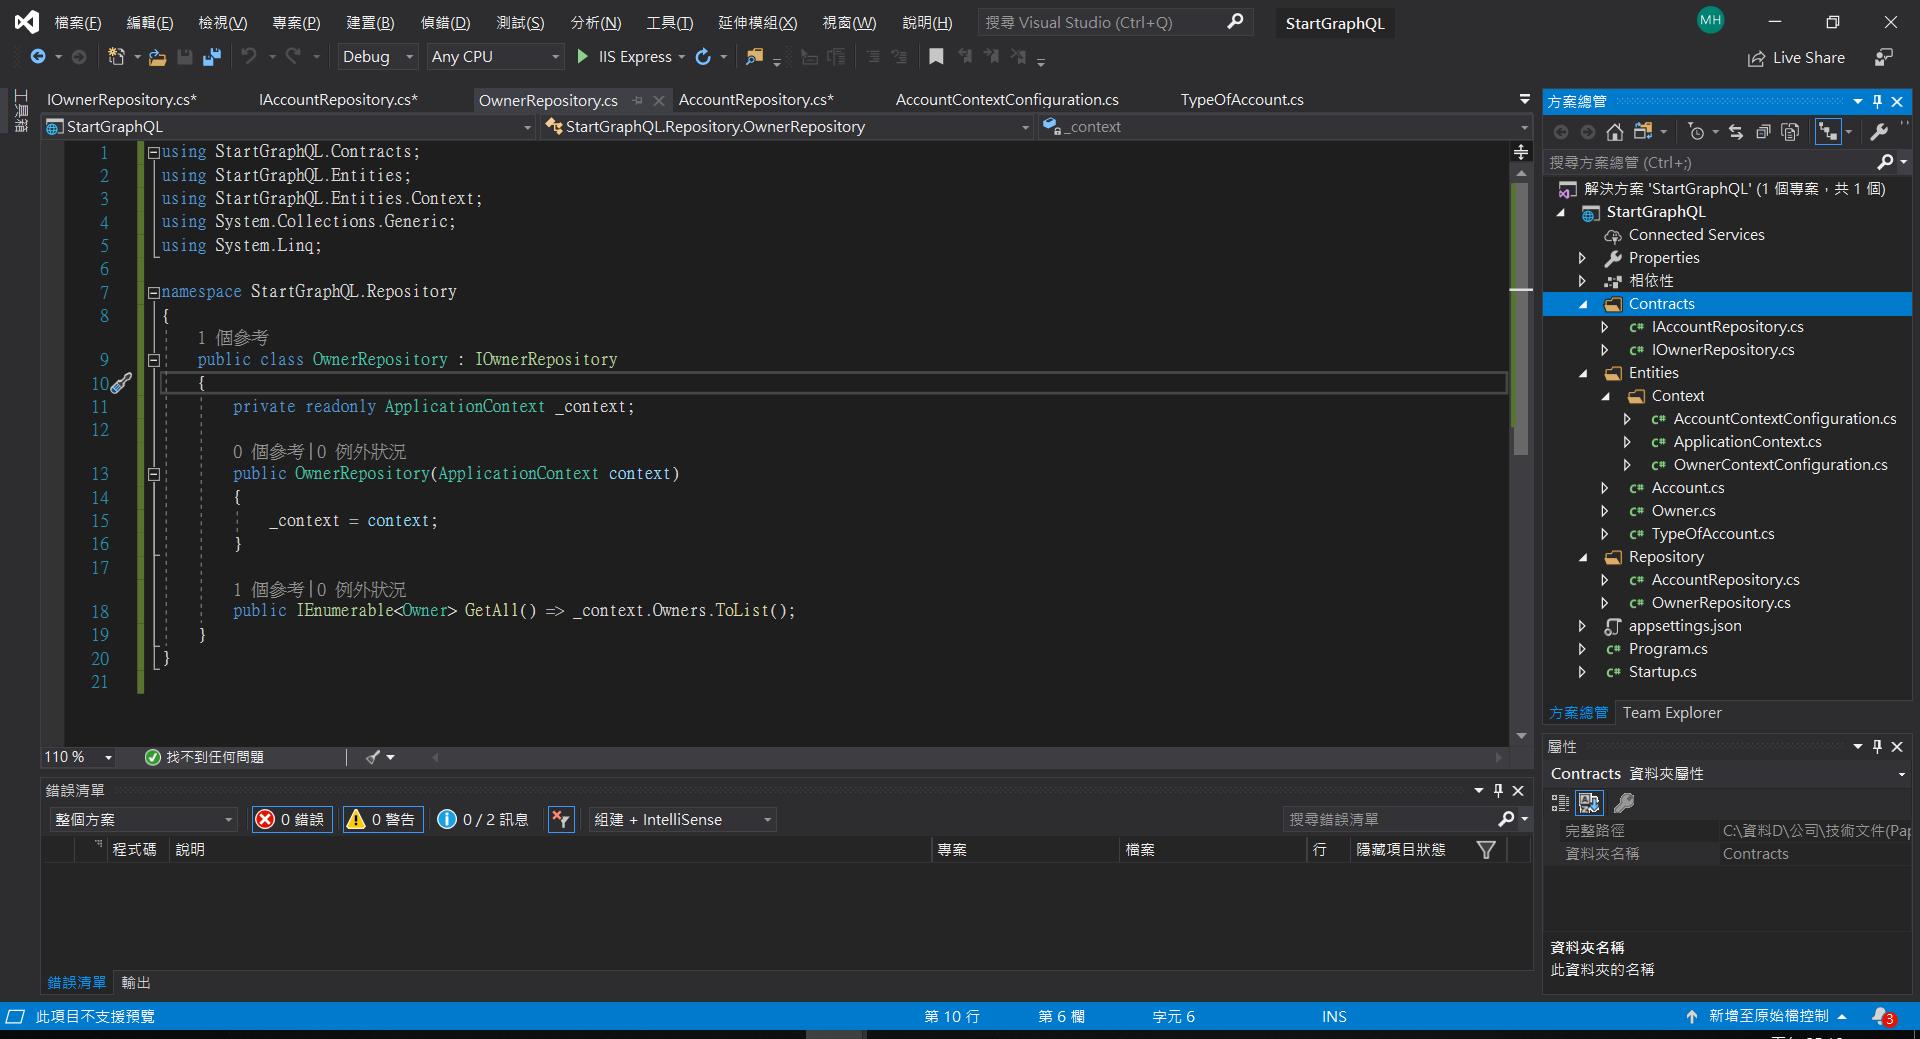
3-3.建立Repository相關類別
請在專案底下建立子資料夾[Repository],然後加入[AccountRepository]、[OwnerRepository]兩個類別,分別用來支援Data Entity類別[Account]與[Owner]的存取作業。
再於專案底下建立子資料夾[Contracts],然後加入[IAccountRepository]、[IOwnerRepository]兩個類別,為[AccountRepository]與[OwnerRepository]兩個類別對應的介面定義:
using GraphQLDotNetCore.Contracts;
using GraphQLDotNetCore.Entities;
using System.Collections.Generic;
using System.Linq;
namespace GraphQLDotNetCore.Repository
{
    public class OwnerRepository : IOwnerRepository
    {
        private readonly ApplicationContext _context;
        public OwnerRepository(ApplicationContext context)
        {
            _context = context;
        }
        public IEnumerable<Owner> GetAll() => _context.Owners.ToList();
    }
}
using GraphQLDotNetCore.Contracts;
using GraphQLDotNetCore.Entities;
namespace GraphQLDotNetCore.Repository
{
    public class AccountRepository : IAccountRepository
    {
        private readonly ApplicationContext _context;
        public AccountRepository(ApplicationContext context)
        {
            _context = context;
        }
    }
}
using GraphQLDotNetCore.Entities;
using System.Collections.Generic;
namespace GraphQLDotNetCore.Contracts
{
    public interface IOwnerRepository
    {
        IEnumerable<Owner> GetAll();
    }
}
namespace GraphQLDotNetCore.Contracts
{
    public interface IAccountRepository
    {
    }
}
4. 建立DI相關機制
首先在appsettings.json加入下列連線字串,以支援EF之Code-First機制產生資料庫與資料表:
{
  "Logging": {
    "LogLevel": {
      "Default": "Warning"
    }
  },
  "ConnectionStrings": {
    "sqlConString": "data source=MichaelNotebook,1433;initial catalog=CodeMaze;persist security info=True;user id=<帳號>;password=<密碼>;MultipleActiveResultSets=True;"
  },
  "AllowedHosts": "*"
}
PS.你的電腦必須先安裝MS SQL Server 2012以上版本。
接著在startup.cs中加入下列程式,以支援資料存取類別之DI機制:
using System;
using System.Collections.Generic;
using System.Linq;
using System.Threading.Tasks;
using Microsoft.AspNetCore.Builder;
using Microsoft.AspNetCore.Hosting;
using Microsoft.AspNetCore.Http;
using Microsoft.Extensions.DependencyInjection;
namespace StartGraphQL
{
    public class Startup
    {
        public Startup(IConfiguration configuration)
        {
            Configuration = configuration;
        }
        public IConfiguration Configuration { get; }
        public void ConfigureServices(IServiceCollection services)
        {
// 加入下列程式
            services.AddDbContext<ApplicationContext>(opt =>
                opt.UseSqlServer(Configuration.GetConnectionString("sqlConString")));
            services.AddScoped<IOwnerRepository, OwnerRepository>();
            services.AddScoped<IAccountRepository, AccountRepository>();
            services.AddScoped<IDependencyResolver>(s => new FuncDependencyResolver(s.GetRequiredService));

            services.AddMvc().SetCompatibilityVersion(CompatibilityVersion.Version_2_2)
                .AddJsonOptions(options => options.SerializerSettings.ReferenceLoopHandling = ReferenceLoopHandling.Ignore);
        }
        // This method gets called by the runtime. Use this method to configure the HTTP request pipeline.
        public void Configure(IApplicationBuilder app, IHostingEnvironment env)
        {
            if (env.IsDevelopment())
            {
                app.UseDeveloperExceptionPage();
            }
            else
            {
                // The default HSTS value is 30 days. You may want to change this for production scenarios, see https://aka.ms/aspnetcore-hsts.
                // 加入下列程式
                app.UseHsts();
            }
                // 加入下列程式
            app.UseHttpsRedirection();

            app.UseMvc();
        }
    }
}
5. 建立資料庫/資料表/記錄
請執行[工具/NuGet套件管理員/套件管理器主控台],然後輸入下列指令以建立資料庫CodeMaze:
update-database PS.你的電腦必須先安裝MS SQL Server。
6. 建立GraphQL Types
目前我們己完成資料存取層(EF)之實作,接著要實作GraphQL API端點,首先我們要實作GraphQL Types,用來對應資料存取層之Data Entities,請在專案底下建立資料夾[GraphQL],並在[GraphQL]資料夾底下建立子資料夾[GraphQLTypes],然後在[GraphQLTypes]底下建立類別[OwnerType],用來處理Entity Class [Owner]:
PS.本例我們將先以Owner為例。

using GraphQL.Types;
using StartGraphQL.Entities;
using System;
using System.Collections.Generic;
using System.Linq;
using System.Threading.Tasks;
namespace StartGraphQL.GraphQL.GraphQLTypes
{
// 所有的GraphQL Types都繼承至ObjectGraphType<T>,並在泛型中指定Data Entity型別
// 未來GraphQL API端點回傳的是GrqphQL Types [OwnerType]而非Entity Class [Owner]
    public class OwnerType : ObjectGraphType<Owner>
    {
// 在建構式ObjectGraphType.Field方法指定GraphQL Types之欄位(成員)
        public OwnerType()
        {
// Id欄位,對應於[Owner.Id],Description指定欄位描述文字
            Field(x => x.Id, type: typeof(IdGraphType)).Description("Id property from the owner object.");
// Name欄位,對應於[Owner.Name]
            Field(x => x.Name).Description("Name property from the owner object.");
// Address欄位,對應於[Owner.Address]
            Field(x => x.Address).Description("Address property from the owner object.");
        }
    }
}
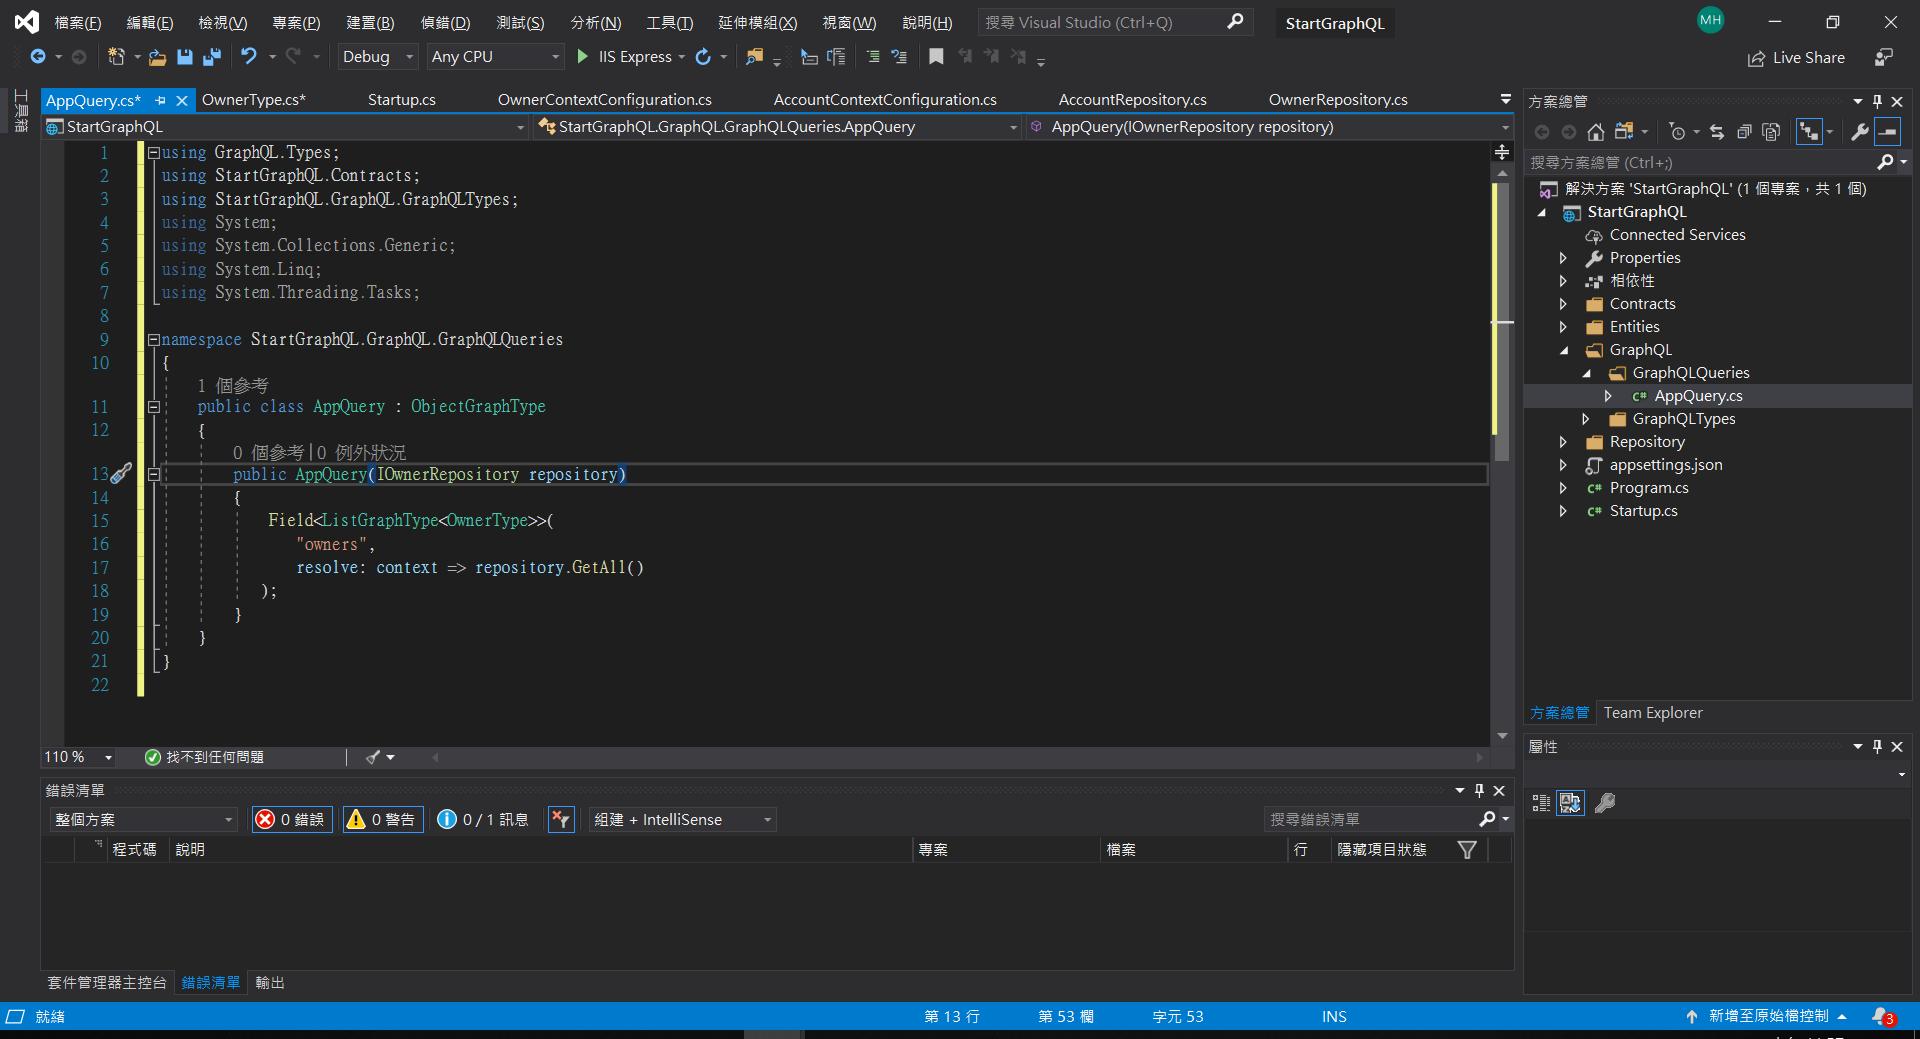
7. 建立GraphQL Queries
接著要實作GraphQL Queries,負責實際的資料存取作業,GraphQL Queries會呼叫真正的資料存取層進行資料存取作業,請在[GraphQL]資料夾底下建立子資料夾[GraphQLQueries],然後在[GraphQLQueries]底下建立類別[AppQuery]:
using GraphQL.Types;
using StartGraphQL.Contracts;
using StartGraphQL.GraphQL.GraphQLTypes;
using System;
using System.Collections.Generic;
using System.Linq;
using System.Threading.Tasks;
namespace StartGraphQL.GraphQL.GraphQLQueries
{
// 所有的GraphQL Queries都繼承至ObjectGraphType,這是GraphQL API端點之傳回值型別
    public class AppQuery : ObjectGraphType
    {
// 在建構式以DI Pattern 引入Repository物件以進行實際的資料存取作業
        public AppQuery(IOwnerRepository repository)
        {
// 以泛型版Field方法指定傳回值型別,ListGraphType是GraphQL.Net中的List<T>,
// ListGraphType<OwnerType>就表示C#中的List<Owner>,
// Field的第1個參數”owners”為此欄位的名稱,未來Client端必須以此指定回傳之欄位,
// 第2個參數會呼叫Repository類別之資料存取方法,並回傳真正的結果。
            Field<ListGraphType<OwnerType>>(
               "owners",
               resolve: context => repository.GetAll()
           );
        }
    }
}
PS.更多的GraphType與C# Type之對應,請參考SchemaTypes in GraphQL .NET。
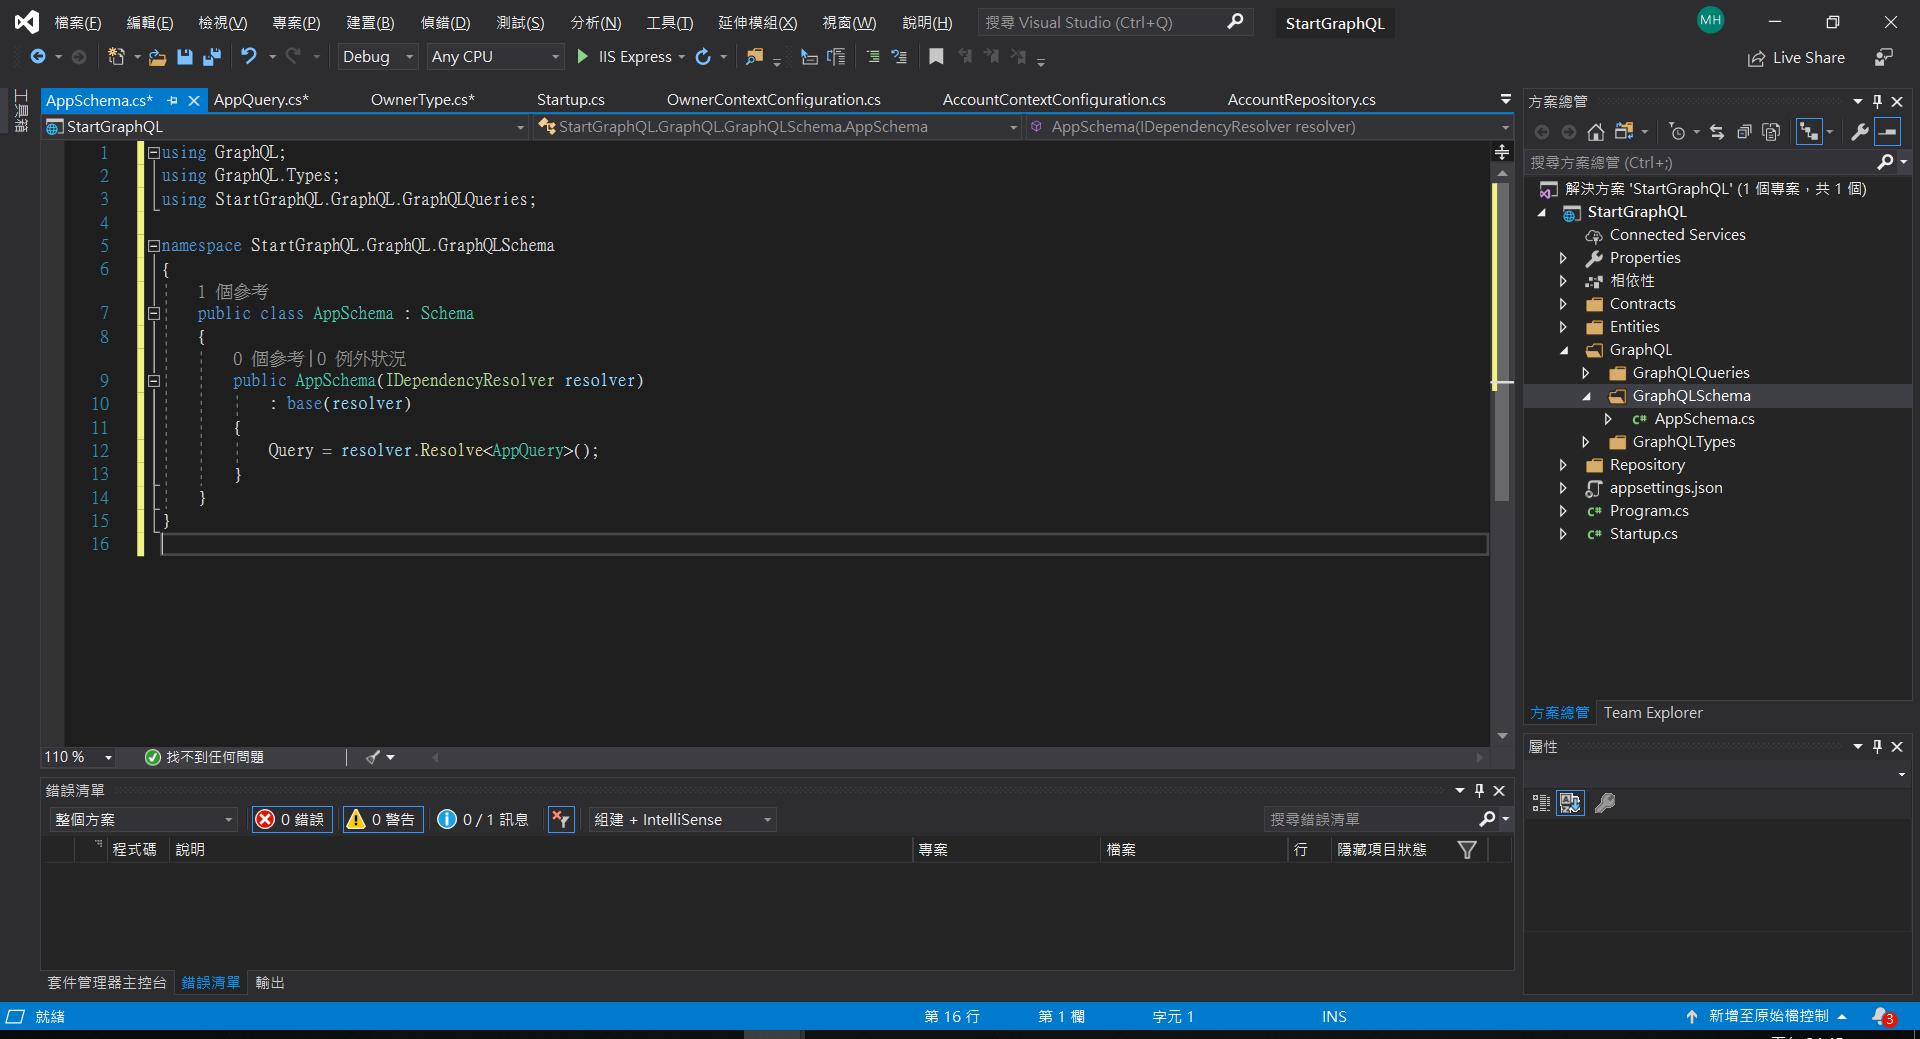
8. 建立GraphQL AppSchema
接著實作GraphQL AppSchema,代表真正的GraphQL API端點,負責接收Client端傳送過來的API Request(Query, Mutation or Subscription),再轉呼叫對應的GraphQL資料存取類別(本例為AppQuery)並轉回傳存取結果給Client端。
請在[GraphQL]資料夾底下建立子資料夾[GraphQLSchema],然後在此資料夾底下建立類別[AppSchema]:
using GraphQL;
using GraphQL.Types;
using StartGraphQL.GraphQL.GraphQLQueries;
namespace StartGraphQL.GraphQL.GraphQLSchema
{
// GraphQL AppSchema類別繼承自Schema類別
    public class AppSchema : Schema
    {
// 在建構式引入IDependencyResolver類別,以解析/處理Client Request事件
        public AppSchema(IDependencyResolver resolver)
            : base(resolver)
        {
// IDependencyResolver的Query成員,用來解析/處理Client Request事件之Query(Get)動作,
// 我們要指定用來處理Query動作之類別,本例為AppQuery。
            Query = resolver.Resolve<AppQuery>();
        }
    }
}
9. Libraries and Schema Registration
最後我們必須在Startup.cs中註冊GraphQL相關模組,請在Startup.cs加入下列程式:
using GraphQL;
using GraphQL.Server;
using GraphQL.Server.Ui.Playground;
using StartGraphQL.Contracts;
using StartGraphQL.Entities;
using StartGraphQL.GraphQL.GraphQLSchema;
using StartGraphQL.Repository;
using Microsoft.AspNetCore.Builder;
using Microsoft.AspNetCore.Hosting;
using Microsoft.AspNetCore.Mvc;
using Microsoft.EntityFrameworkCore;
using Microsoft.Extensions.Configuration;
using Microsoft.Extensions.DependencyInjection;
using Newtonsoft.Json;
using StartGraphQL.Entities.Context;
namespace StartGraphQL
{
    public class Startup
    {
        public Startup(IConfiguration configuration)
        {
            Configuration = configuration;
        }
        public IConfiguration Configuration { get; }
        public void ConfigureServices(IServiceCollection services)
        {
            services.AddDbContext<ApplicationContext>(opt =>
                opt.UseSqlServer(Configuration.GetConnectionString("sqlConString")));
            services.AddScoped<IOwnerRepository, OwnerRepository>();
            services.AddScoped<IAccountRepository, AccountRepository>();
// 註冊IDependencyResolver物件
            services.AddScoped<IDependencyResolver>(s => new FuncDependencyResolver(s.GetRequiredService));
// 註冊AppSchema物件
            services.AddScoped<AppSchema>();
// 註冊GraphQL以及GraphTypes物件,其中AddGraphTypes()會自動幫我們註冊所有GraphQL Types,省下我們個別註冊每一個GraphQL Type的時間。
            services.AddGraphQL(o => { o.ExposeExceptions = false; })
                .AddGraphTypes(ServiceLifetime.Scoped);

            services.AddMvc().SetCompatibilityVersion(CompatibilityVersion.Version_2_2)
                .AddJsonOptions(options => options.SerializerSettings.ReferenceLoopHandling = ReferenceLoopHandling.Ignore);
        }
        // This method gets called by the runtime. Use this method to configure the HTTP request pipeline.
        public void Configure(IApplicationBuilder app, IHostingEnvironment env)
        {
            if (env.IsDevelopment())
            {
                app.UseDeveloperExceptionPage();
            }
            else
            {
                // The default HSTS value is 30 days. You may want to change this for production scenarios, see https://aka.ms/aspnetcore-hsts.
                app.UseHsts();
            }
            app.UseHttpsRedirection();
// 在Configure中加入GraphQL Middleware,以及GraphQL Client端測試用Middleware GraphQLPlayground
            app.UseGraphQL<AppSchema>();
            app.UseGraphQLPlayground(options: new GraphQLPlaygroundOptions());

            app.UseMvc();
        }
    }
}
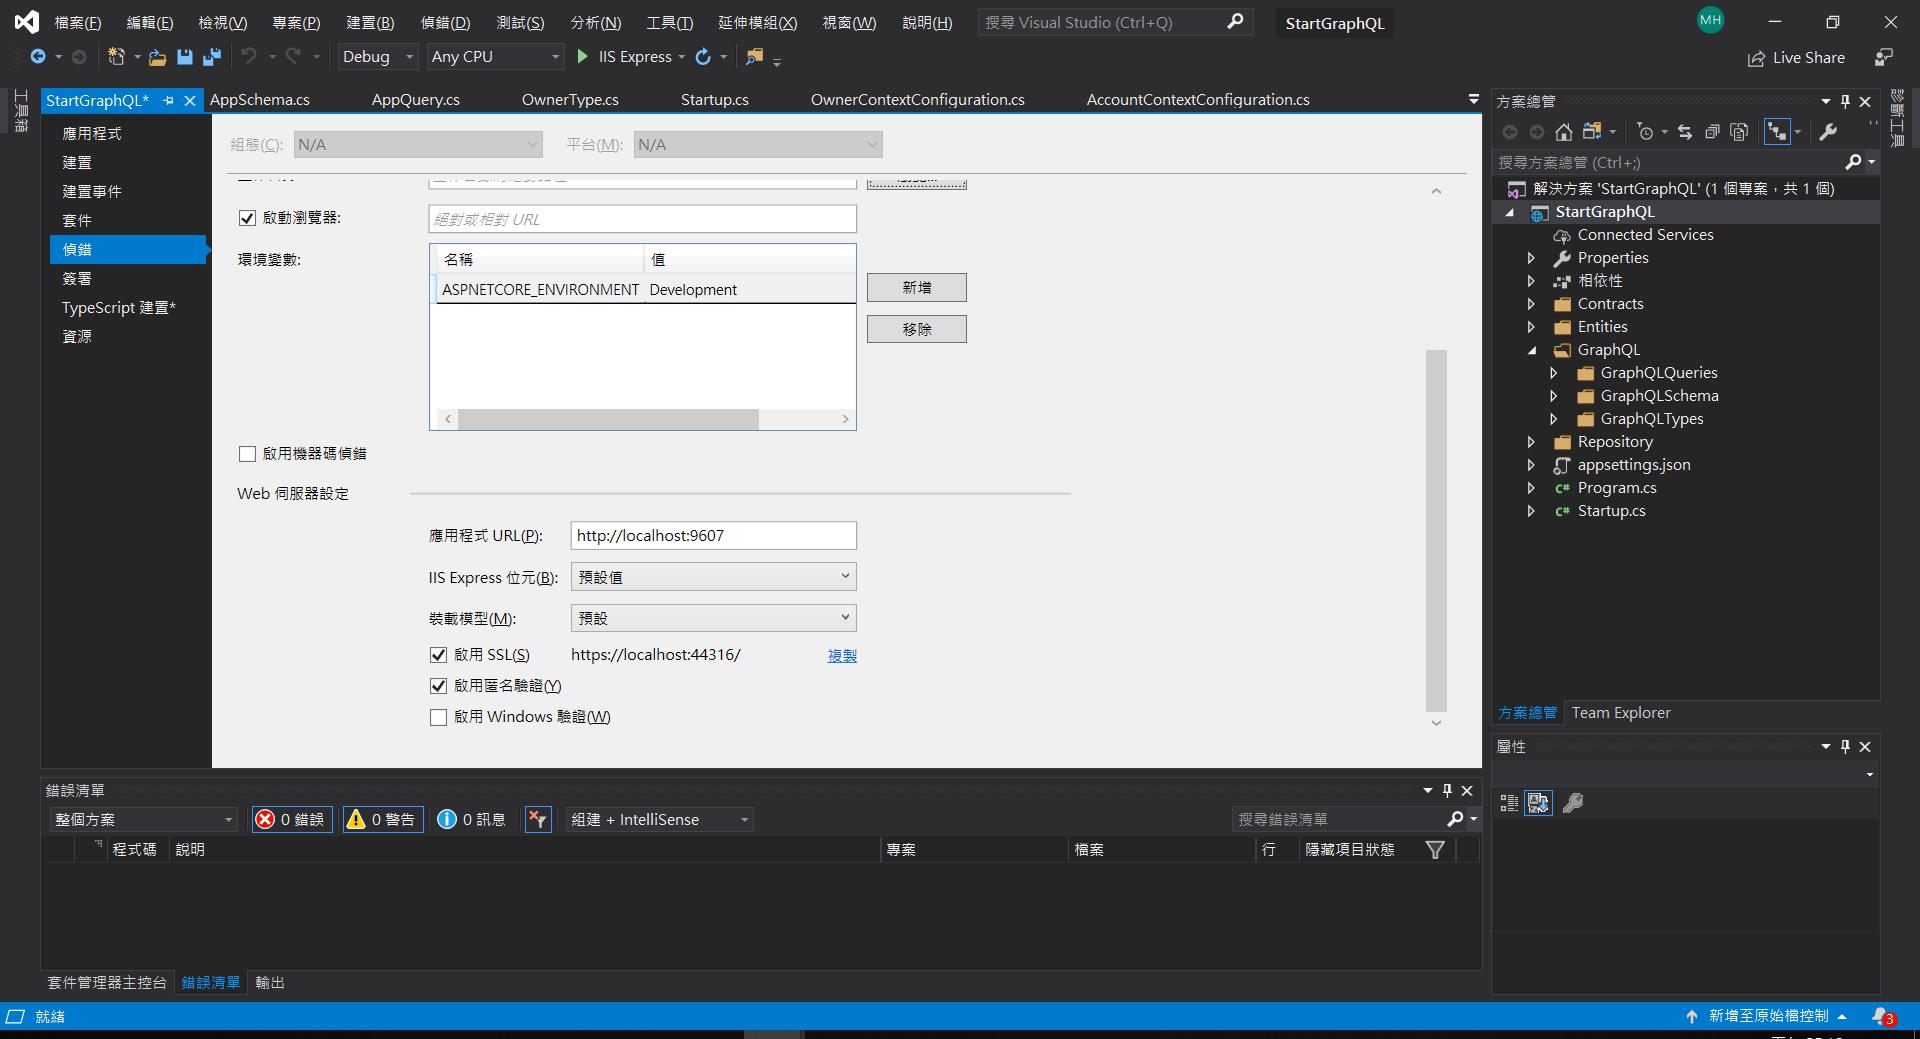
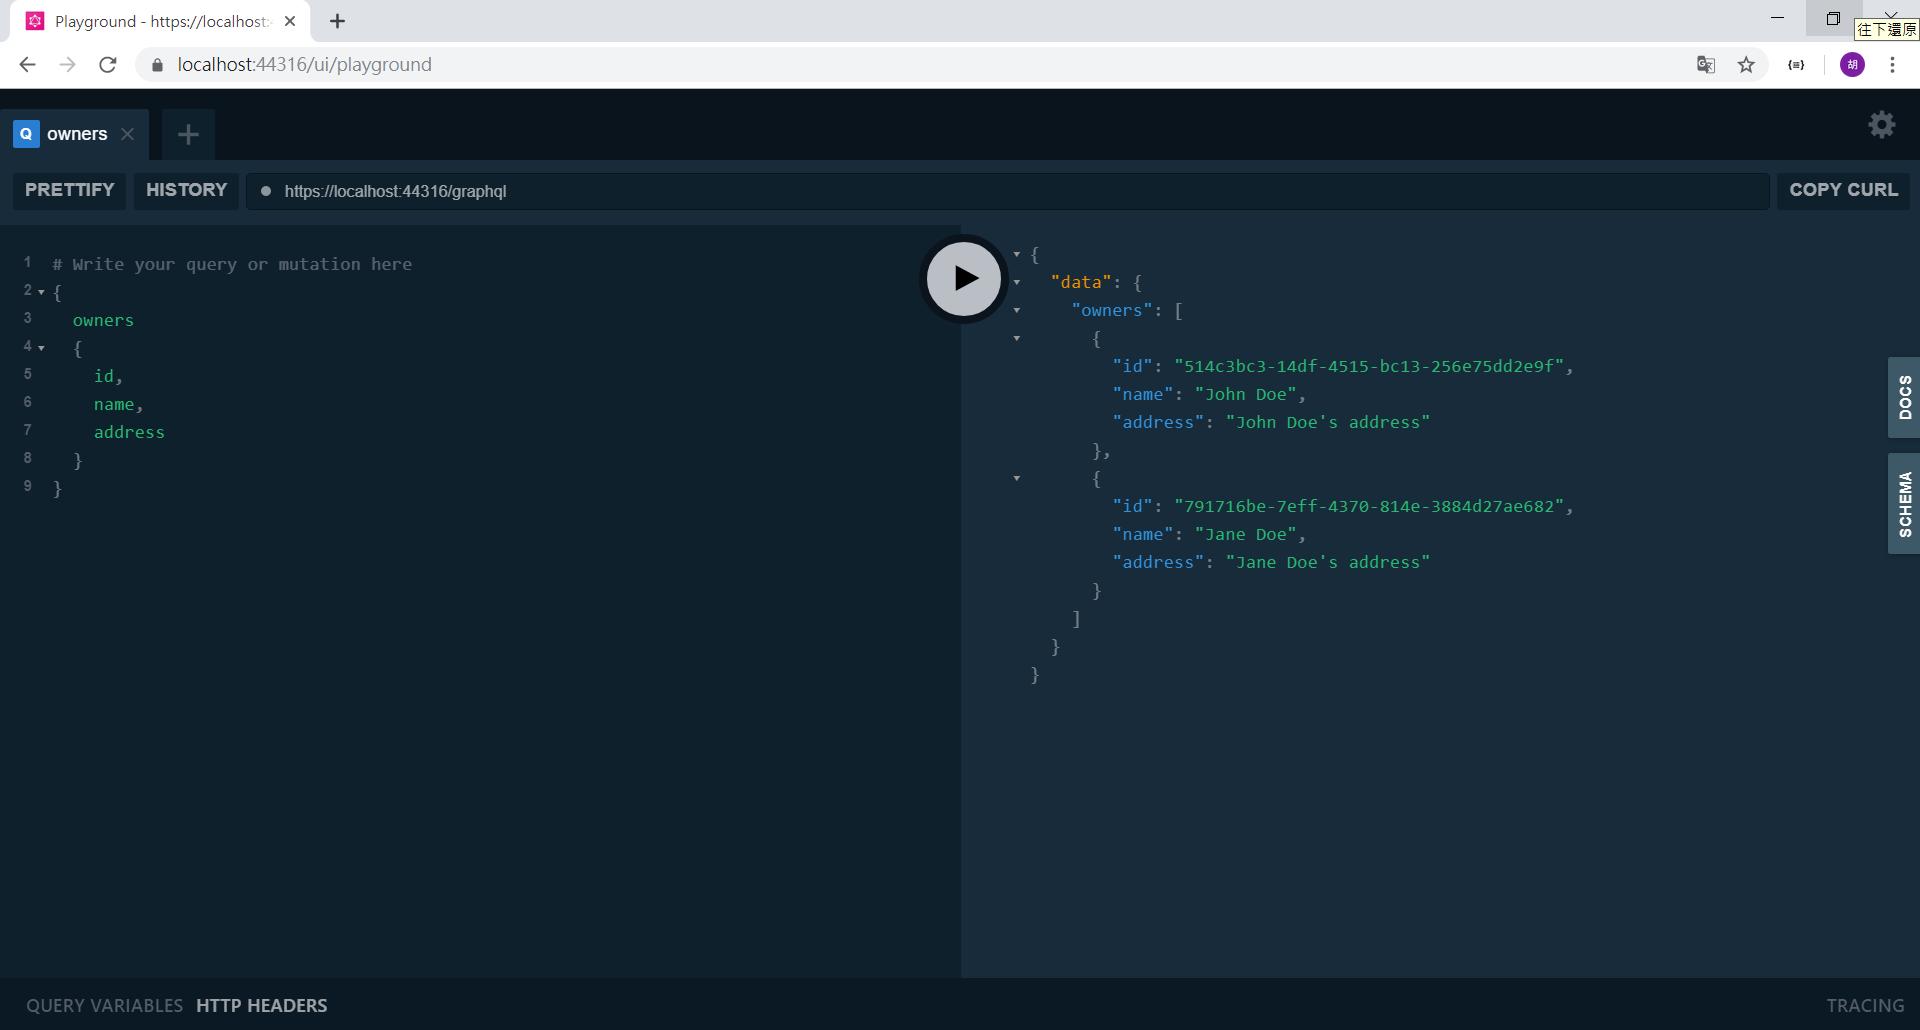
10. 測試
請鍵入快速鍵F5以啟動Asp.Net Core專案,然後在瀏灠器網址列輸入下列網址:
https://localhost:44316/ui/playground
PS.若你沒有啟用SSL,請改為Http,而Port(44316)請鍵入你自己的埠號。
以下為GraphQL.UI.Playground tool之執行畫面,我們可以在左邊窗格輸入GraphQL查詢語法呼叫Asp.Net Core GraphQL API端點來查詢資料,輸入完成後點按中間的![]() (Excute Query(Ctrl+Enter)),查詢結果(API傳回值)將為Json格式並顯示在右邊窗格:
(Excute Query(Ctrl+Enter)),查詢結果(API傳回值)將為Json格式並顯示在右邊窗格:
四. 討論
由以上範例可知,我們可以用幾個簡單的步驟將GraphQL引入.Net專案,以提供不同於Resuful之API端點,讓Client端能自行決定要查詢的資料結構,同時簡化Server/Client端的API建置作業,以下為GraphQL的官網文件入口,有興趣的人可以進一步研究: