利用javascript自己打造Virtual DOM - 基礎篇
前言
近年來React盛行,也常常會聽到Virtual DOM的關鍵字,
但由於框架的便利性,便沒有好好去深入了解其運作原理,正好藉這個機會來互相交流;
一般來說,此概念源自於希望能減少直接操作實體DOM的操作成本,而作為刷新頁面的緩衝使用,
其流程為當資料更新時,
檢查更新(前)(後)Virtual DOM哪裡有不同之處(diff),再把差異部分patch上去。
Virtual DOM
那首先我得先看看Virtual DOM 到底是甚麼樣子:
Virtual DOM 其實就是利用javascript Plain Object 去模仿實體DOM的結構
const element = {
  tagName: 'div',
  attrs: {
    id: 'name',
  },
  children: []
};
那一般常見一定會遇到的包含名稱(tagName)、元素屬性(attrs)、children list(這邊取名都是屬於自定義只要後續能對應到實體DOM即可)
那我們就可以建立一個CreateElement.js 作為產生Virtual DOM 的lib
export default (tagName, {attrs = {},children = []} = {}) => {
    return{
        tagName,
        attrs,
        children,
    };
};
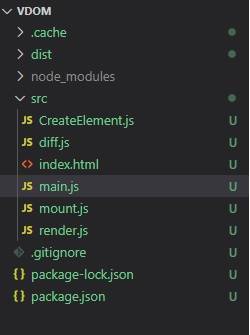
接著把以上程式加入到這邊我透過npm+Parcel 建立的專案
目標結構如下:
index.html,就用最基本的結構
<html>
    <head>
        <title>Hello world!</title>
    </head>
    <body>
        <div id="app"></div>
        <script src="main.js">

        </script>
    </body>
</html>
main.js 就是我們要產生Virtual DOM的部分
import CreateElement from './CreateElement';
const createvApp = CreateElement('div',{
attrs:{
id: 'app',
},
children: [
CreateElement('img',{
attrs:{
src: 'https://media.giphy.com/media/mGPjrn9F6h8RKUIn6J/giphy.gif'
}
})
],
});
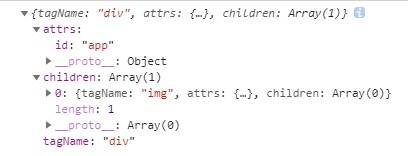
console.log(createvApp);npm執行結果如下:
那我們接著要把Virtual DOM 繪製成實體DOM
這邊我建立一個render.js
const renderElem = ({tagName, attrs, children}) => {
    const element = document.createElement(tagName);

    //set Attributes
    for(const [k,v] of Object.entries(attrs)){
        element.setAttribute(k,v);
    }

    //set children
    for(const child of children){
        const $child = render(child);
        element.appendChild($child);
    }

    return element;
};

const render = (vNode) => {
    if(typeof vNode === 'string'){
        return document.createTextNode(vNode);
    }

    return renderElem(vNode);
}

export default render;
那下面部分加入包含textNode的判斷
回到main.js 去做render
const $app = render(createvApp);
console.log($app);
結果如下:

但我還需要一個mount.js才能在頁面顯示結果
export default ($node, $target) => {
    $target.replaceWith($node);
    return $node;
};
(注意replaceWith在IE無法使用)
回到main.js
const $app = render(createvApp);

let $rootEl = mount($app, document.getElementById('app'));
結果就會如下:

Diff Virtual DOM
我們可以從Virtual DOM的資料變化,只去更新實體DOM變更的部分,
來降低整體重新render所需消耗的效能,這邊React有提供一個從原始複雜度O(n^3)降O(n)的觀念:
- 每層去比較是否節點有不同元素的type,有則往下長的樹必不同
- 同樣type的props,我們用key作為重新render的依據
套用在這個簡單的案例的話,我們可以分析出4種情境:
1. 如果更新後node為undefind,則表示原node已被刪除
2. 前後兩者node皆為textNode
3 一個node為純字串,一個node為virtual DOM
4. 新舊node 內有元素不同
這邊我們先開設一個diff.js,目標是要把diff完的node attached到實體DOM上
const diff = (vOldNode, vNewNode) => {
    if(vNewNode === undefined){
        return $node => {
            $node.remove();
            return undefined;
        };
    }

    if(typeof vOldNode === 'string' ||
        typeof vNewNode === 'string'){
            if(vOldNode !==vNewNode){
                return $node =>{
                    const $newNode = render(vNewNode);
                    $node.replaceWith(newNode);
                    return $newNode;
                };
            }
        }
        else
        return $node => undefined;

    if(vOldNode.tagName !== vNewNode.tagName){
        return $node => {
            const $newNode = render(vNewNode);
            $node.replaceWith(newNode);
            return $newNode;
        };
    }
attrubute, children list的部分
const diffAttrs = (oldAttrs,newAttrs) => {
    //attribute不只一個 所以需要array來存取所有需要的函數
    const patches = [];
    //放上新的attrubutes
    for(const [k,v] of Object.entries(newAttrs)){
        patches.push($node => {
            //暫存patch函數
            $node.setAttribute(k,v);
            return $node;
        });
    }
    //移除舊的attributes
    for(const k in oldAttrs){
        if(!(k in newAttrs)){
            patches.push($node =>{
                //暫存patch函數
                $node.removeAttribute(k);
                return $node;
            });
        }
    }
    //最後傳出去的外層patch函數
    return $node => {
        for(const patch in patches){
            //apply到實體DOM
            patch($node);
        }
    };
};
const diffChildren = (oldVChildren, newVChildren) => {
const childPatches = [];
oldVChildren.forEach((oldVChild, i) => {
childPatches.push(diff(oldVChild, newVChildren[i]));
});
const additionalPatches = [];
for (const additionalVChild of newVChildren.slice(oldVChildren.length)) {
additionalPatches.push($node => {
$node.appendChild(render(additionalVChild));
return $node;
});
}
return $parent => {
for (const [patch, child] of zip(childPatches, $parent.childNodes)) {
patch(child);
}
for (const patch of additionalPatches) {
patch($parent);
}
return $parent;
};
};children 所使用的zip函式
const zip = (xs,ys) =>{
    const zipped = [];
    for(let i =0;i<Math.min(xs.length,ys.length); i++){
        zipped.push([xs[i],ys[i]]);
    }
    return zipped;
};
最後再回去修改main.js部分
import CreateElement from './CreateElement';
import render from './render';
import mount from './mount';
import diff from './diff';

const createVApp = (count) => CreateElement('div', {
    attrs: {
      id: 'app',
      dataCount: count,
    },
    children: [
      String(count),
      CreateElement('img', {
        attrs: {
          src: 'https://media.giphy.com/media/cuPm4p4pClZVC/giphy.gif',
        },
      }),
    ],
  });

  let count = 0;
  let vApp = createVApp(count);
  const $app = render(vApp);
  let $rootEl = mount($app, document.getElementById('app'));

  setInterval(() => {
    count++;
    const vNewApp = createVApp(count);
    const patch = diff(vApp, vNewApp);
    $rootEl = patch($rootEl);
    vApp = vNewApp;
  }, 1000);

  console.log($rootEl);
結果如下,每秒數字會改變,包含實體DOM裡面會有計數

以上範例就到此結束,感謝各位的閱讀!