RxJS
RxJS基本概念及應用
2021/11/05 16:59:56
0
2205
RxJS核心概念
Observable 是 RxJS 的核心,核心Observable 再加上相關的 Operators(map, filter...)
主要重點:
- Observerble(可觀察的物件)-代表一組未來即將產生的事件資料(被觀察的物件),一般可觀察物件的變數後會加上$。
- Observer(觀察者物件)-代表一個用來接收『 觀察結果 』的物件(收到的就是事件資料),裡面包含3個含有回呼函式的屬性(next, error, complete)。
- Subscription(訂閱物件)-代表正在執行 Observable/Observer 的執行個體(可用來取消訂閱)。
- Operators(運算子)-主要用來處理事件資料的集合。
- Subject(主體物件)-主要用來廣播收到的事件資料給多位Observer(觀察者)。
- Schedulers(排程控制器)-用來集中管理與調度多重事件之間的資料,以控制事件併發的情況。
觀察者 Observer
Observable 可以被訂閱(subscribe),或說可以被觀察,而訂閱 Observable 的物件又稱為 觀察者(Observer)。觀察者是一個具有三個方法(method)的物件,每當 Observable 發生事件時,便會呼叫觀察者相對應的方法。
觀察者的三個方法(method):
- next:每當 Observable 發送出新的值,next 方法就會被呼叫。
- error:每當 Observable 內發生錯誤時,error 方法就會被呼叫。
- complete:在 Observable 沒有其他的資料可以取得時,complete 方法就會被呼叫,在 complete 被呼叫之後,next 方法就不會再起作用。
Example1
// 建立可觀察的 Observerble 物件
var click$ = rxjs.fromEvent(document, 'click');

// 建立訂閱物件(訂閱 Observerble 物件並自動建立觀察者物件Observer)
var subs$ = click$.subscribe(x => console.log(x));

// 取消訂閱 Subscription 物件
subs$.unsubscribe();
Example2: sweet-alert組件與service的應用
建立 sweet-alert component 及其 service,並將基本的畫面及功能先寫好。
sweet-alert-component.html
<div class="alert-template" *ngIf="isOpen">
	<div class="alert-content">
		<div class="alert-icon">
			<div class="pi pi-check-circle" [ngClass]="[icon, iconType]"></div>
		</div>
		<div class="alert-message">{{ message }}</div>
		<div class="alert-button d-flex">
			<div class="mr-3">
				<button class="btn btn-light" (click)="closeAlert()">否</button>
			</div>
			<div>
				<button class="btn btn-success" (click)="closeAlert()">是</button>
			</div>
		</div>
	</div>
</div>
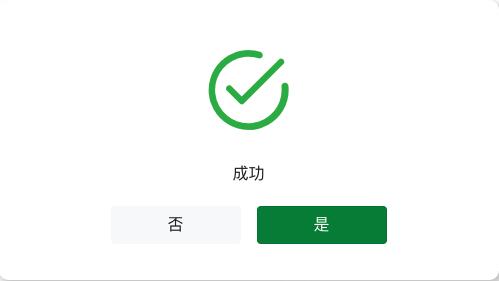
彈窗畫面
sweet-alert-component.ts
import { Component, Input, OnInit } from '@angular/core';
import { SweetAlertConfig } from 'backstage-base/app/interfaces/ISweetAlertService';
import { SweetAlertService } from 'backstage-base/app/services/sweet-alert.service';

@Component({
	selector: 'app-sweet-alert',
	templateUrl: './sweet-alert.component.html',
	styleUrls: ['./sweet-alert.component.scss'],
})
export class SweetAlertComponent implements OnInit {

	/** 彈窗 Icon
	 * success: 成功
	 * warning: 警告
	 * error: 失敗
	 */
	@Input() icon: string;

	/** 彈窗訊息 */
	@Input() message: string;

  // 判斷彈窗是否打開
	public isOpen: boolean;

	/** 取得 Icon */
	get iconType() {
		switch (this.icon) {
			case 'success':
				return 'pi-check-circle';
			case 'warning':
				return 'pi-info-circle';
			case 'error':
				return 'pi-times-circle';
		}
	}

	constructor(public sweetAlertService: SweetAlertService) {
		this.setDefaultValue();
	}

	ngOnInit(): void {
    // 訂閱 sweetSub$
		this.sweetAlertService.sweetSub$.subscribe({
			next: (data: SweetAlertConfig) => {
				console.log(data);
				this.isOpen = data.type;
			},
			error: () => {},
			complete: () => {},
		});
	}

	closeAlert() {
		this.sweetAlertService.close();
	}

	/** 設定預設值 */
	private setDefaultValue() {
		this.icon = 'success';
		this.message = '成功';
		this.isOpen = false;
	}
}
sweet-alert-service.ts:
export class SweetAlertService implements ISweetAlertService {

  // 建立一個 Subject 變數
	public sweetSub$: Subject<SweetAlertConfig>;

	constructor() {
		this.setDefaultValue();
	}

	public open(title?: string, html?: string, icon?: SweetAlertIcon) {
		const data: SweetAlertConfig = {
			type: true,
			title,
			html,
			icon,
		};
		this.sweetSub$.next(data);
	}

	public close() {
		const data: SweetAlertConfig = {
			type: false,
		};
		this.sweetSub$.next(data);
	}

  // 預設值
	private setDefaultValue() {
		this.sweetSub$ = new Subject<SweetAlertConfig>();
	}
ISweetAlertService.ts:
可以建立一個 interface(非必要)來實踐 sweet-alert-service。
import { Subject } from 'rxjs';

export type SweetAlertIcon =
	| 'success'
	| 'error'
	| 'warning'
	| 'info'
	| 'question';

export type SweetAlertConfig = {
	type: boolean;
	title?: string;
	html?: string;
	icon?: SweetAlertIcon;
};

export interface ISweetAlertService {
	sweetSub$: Subject<SweetAlertConfig>;

	open(title?: string, html?: string, icon?: SweetAlertIcon);

	close();
}
之後在需要使用到該組件的地方加入標籤並觸發開啟彈窗(此例子以來Button觸發)。
test.html
<app-sweet-alert></app-sweet-alert>
<button (click)="showAlert()">Show Alert</button>
test.ts
import { SweetAlertService } from 'backstage-base/app/services/sweet-alert.service';

@Component({
	selector: 'app-test',
	templateUrl: './test.component.html',
	styleUrls: ['./test.component.scss'],
})
export class TestComponent implements OnInit {

	constructor(private sweetAlertService: SweetAlertService) {}

	ngOnInit(): void {}

	showAlert() {
		this.sweetAlertService.open();
	}

}
透過按鈕觸發 showAlert 後,呼叫到 service 裡的 open() 事件後,透過 sweetSub$ 將資料(data)推播給訂閱的地方(sweet-alert-component.ts),使彈窗打開。
下圖為呼叫 open()事件後,sweet-alert-component.ts 接收到的 data。
![]()

相關文章