利用Fido2NetLib,完成WebAuthn登入,實現無密碼登入讓帳號變得更安全
在使用Fido2NetLib之前必須要先了解WebAuthn架構,
才能快速理解如何使用Fido2NetLib套件建立指紋辨識系統並應用在專案當中。
一. WebAuthn 簡易說明:
WebAuthn是利用瀏覽器內建的API進行驗證,所以有部分瀏覽器是不支援WebAuthn功能,
需要注意到哪些瀏覽器與版本以上支援,並且注意一點是使用瀏覽器進行驗證,手機方面必須使用瀏覽器進行驗證,
而非依靠應用程式呼叫系統內部使用的指紋辨識功能,如APP要使用不可以使用WebView來進行驗證動作(目前尚未開放使用驗證),
必須導向到Chrome 或 Safari才能進行驗證,WebAuthn 不單單只有指紋驗證功能還有USB金鑰驗證等等功能,在電腦上可以使用Windows Hello進行驗證。
下列講解都是使用Vue使用的內容
- WebAuthn執行流程大略如下:
1.建立註冊金鑰選項(帳號,網域等等設定參數)
2.使用指令呼叫瀏覽器內建API觸發WebAuthn功能,註冊完成回傳已加密金鑰內容(本地端會另外儲存一個金鑰內容)
3.將註冊金鑰內容存入資料庫之中(WebAuth 其中有一個功能是不再次驗證功能,此時不需再存入資料庫完全信任前端驗證結果)
4.建立登入驗證金鑰選項(帳號,網域等等設定參數)
5.使用指令呼叫瀏覽器內建API觸發WebAuthn功能,進行驗證動作,驗證成功回傳本地端金鑰內容
6.將驗證成功金鑰回傳API 進行解密比對資料是否符合。
- 註冊金鑰:
利用瀏覽器內建金鑰API來產生專屬於這帳號的密碼公鑰,並產生ID(Credential ID),rawId(byte陣列的ID),將帳號,ID,公鑰存入資料庫中(儲存用介面)。
1. 註冊金鑰的選項內容 (publicKeyCredentialCreationOptions) 物件
//設定指紋金鑰組態
const publicKeyCredentialCreationOptions = {
//產生隨機亂碼的Uint8Array
challenge,
rp: {
name: "test", //網域名稱
id: "localhost", //網域網址(API會比對是否相同網域才會觸發)
},
user: {
name: me.username, //帳戶名稱
displayName: me.userdisplayname, //使用者名稱
id //產生隨機亂碼的Uint8Array,不重要的值,認證上沒影響
},
//可接受產生公鑰型態
pubKeyCredParams: [{
"type": "public-key",
"alg": -7
},
{
"type": "public-key",
"alg": -8
},
{
"type": "public-key",
"alg": -36
},
{
"type": "public-key",
"alg": -37
},
{
"type": "public-key",
"alg": -38
},
{
"type": "public-key",
"alg": -39
},
{
"type": "public-key",
"alg": -257
},
{
"type": "public-key",
"alg": -258
},
{
"type": "public-key",
"alg": -259
}],
authenticatorSelection: {
authenticatorAttachment: "platform", //認證方式 platform 使用內建認證,cross-platform 使用外部認證
},
//API過多久沒回應就顯示失敗
timeout: 60000,
//none 使用自驗方式認證(客戶端認證過久可以),direct 可以使用簽名與公鑰認證
attestation: "direct"
};
2.使用API產生公鑰語法
//產生金鑰並存在裝置中
const credential = await navigator.credentials.create({
publicKey: publicKeyCredentialCreationOptions
});
3.credential 內容 (retrun 結果)
credential {
//Credential Id,登入時要傳入認證金鑰選項中
id: 'ADSUllKQmbqdGtpu4sjseh4cg2TxSvrbcHDTBsv4NSSX9...',
//byte Array 格式的Credential Id,轉base64後與上面相同最後面多=,不影響
rawId: ArrayBuffer(59),
response: AuthenticatorAttestationResponse {
//轉UTF8後可以取得選項的challenge碼,網域,產生方式,做基本驗證
clientDataJSON: ArrayBuffer(121),
//重要物件公鑰儲存在裡面,需要CBOR解碼兩次才能拿到公鑰內容
attestationObject: ArrayBuffer(306),
},
type: 'public-key'
}
- 登入認證金鑰:
使用者輸入帳號,資料庫提取ID,將ID帶入金鑰選項中,呼叫金鑰API觸發認證動作,進行使用者認證,認證通過產生加密的簽名與未加密的資料,傳入後端使用資料庫公鑰將簽名解密與未加密資料比對,相同回傳認證成功。
1. 認證金鑰的選項內容 (publicKeyCredentialRequestOptions) 物件
//設定登入金鑰內容
const publicKeyCredentialRequestOptions = {
//產生隨機亂碼的Uint8Array
challenge: challenge,
//可接收認證方式,如果沒輸入ID,視窗會需要自行選取ID
allowCredentials: [{
//credentialId 轉 Uint8Array 帶入,就會指定帳戶登入
id: me.credentialId,
type: 'public-key',
//認證方式 usb 金鑰,藍芽,NFC,內建認證器
transports: ['usb', 'ble', 'nfc', 'internal'],
}],
//API過多久沒回應就顯示失敗
timeout: 60000,
}
2. 使用API產生認證金鑰語法
//取得登入金鑰物件
const assertion = await navigator.credentials.get({
publicKey: publicKeyCredentialRequestOptions
});
3.Assertion內容 (retrun 結果)
PublicKeyCredential {
//credentialId 數值都會一樣
id: 'ADSUllKQmbqdGtpu4sjseh4cg2TxSvrbcHDTBsv4NSSX9...',
rawId: ArrayBuffer(59),
response: AuthenticatorAssertionResponse {
//未加密認證資料為 authenticatorData (byte Array) + HASH256(clientDataJSON) (byte Array)
authenticatorData: ArrayBuffer(191),
clientDataJSON: ArrayBuffer(118),
//signature公鑰解密後會跟未加密認證資料相同
signature: ArrayBuffer(70),
//用於在裝置和認證器之間建立一個唯一的識別
userHandle: ArrayBuffer(10),
},
type: 'public-key'
}
如果想要更詳細內容下列連結來專研
- 架構參考資料:
https://webauthn.io/ (基本入門)
https://blog.csdn.net/qiwoo_weekly/article/details/120192032 (建議先閱讀)
二.Fido2NetLib 完成WebAuth動作
本次範例將使用Vue 作為前端,.Net Core API 跟 MSSQL 為後端,
使用Fido2NetLib分別為4個動作,產生註冊金鑰的選項,註冊金鑰內容,產生認證金鑰選項,認證金鑰內容,
以上四個動作都是依靠後端來出裡,前端主要進行將金鑰產生以及提供已註冊金鑰認證通過後提供給後端驗證是否符合資料庫的金鑰。
由於WebAuthn可以適用於多平台使用,金鑰加解密方式也不相同,大致分為三類 android safeity , apple 與 packed 金鑰認證,
使用Fido2NetLib 可以簡單驗證 android safeity , apple 與 packed 金鑰等等認證,不用處理太多複雜加解密動作套件裡面都已經幫我們解決了。
- 註冊金鑰流程圖

- 登入金鑰流程圖

- 環境準備
1.MSSQL資料表產生指令碼
USE [Fido2]
GO
/****** Object: Table [dbo].[DataBaseCredential] Script Date: 2022/9/21 上午 09:44:45 ******/
SET ANSI_NULLS ON
GO
SET QUOTED_IDENTIFIER ON
GO
CREATE TABLE [dbo].[DataBaseCredential](
[UserId] [nvarchar](50) NOT NULL,
[CredentialId] [varbinary](200) NOT NULL,
[PublicKey] [varbinary](300) NOT NULL,
[UserHandle] [varbinary](200) NOT NULL,
[SignatureCounter] [int] NOT NULL,
[CredType] [nvarchar](50) NOT NULL,
[RegDate] [datetime2](7) NOT NULL,
[AaGuid] [nvarchar](100) NOT NULL,
CONSTRAINT [PK_DataBaseCredential] PRIMARY KEY CLUSTERED
(
[UserId] ASC,
[CredentialId] ASC,
[AaGuid] ASC
)WITH (PAD_INDEX = OFF, STATISTICS_NORECOMPUTE = OFF, IGNORE_DUP_KEY = OFF, ALLOW_ROW_LOCKS = ON, ALLOW_PAGE_LOCKS = ON, OPTIMIZE_FOR_SEQUENTIAL_KEY = OFF) ON [PRIMARY]
) ON [PRIMARY]
GO
/****** Object: Table [dbo].[UserToken] Script Date: 2022/9/21 上午 09:44:45 ******/
SET ANSI_NULLS ON
GO
SET QUOTED_IDENTIFIER ON
GO
CREATE TABLE [dbo].[UserToken](
[UserId] [nvarchar](50) NOT NULL,
[Token] [nvarchar](200) NOT NULL,
[Token2] [nvarchar](200) NOT NULL,
CONSTRAINT [PK_UserToken] PRIMARY KEY CLUSTERED
(
[UserId] ASC
)WITH (PAD_INDEX = OFF, STATISTICS_NORECOMPUTE = OFF, IGNORE_DUP_KEY = OFF, ALLOW_ROW_LOCKS = ON, ALLOW_PAGE_LOCKS = ON, OPTIMIZE_FOR_SEQUENTIAL_KEY = OFF) ON [PRIMARY]
) ON [PRIMARY]
GO
2.下列為.Net Core API 專案 Fido2NetLib套件需要的元件如下:

3.Controller using 變數:
using Microsoft.AspNetCore.Mvc;
using Microsoft.EntityFrameworkCore;
using Fido2NetLib;
using Fido2NetLib.Development;
using Fido2NetLib.Objects;
using System.Text;
using Microsoft.Extensions.Caching.Distributed;
using Microsoft.AspNetCore.Cors;
using WebAuthn.DBContext; //專案名稱為WebAuthn
using WebAuthn.Models;
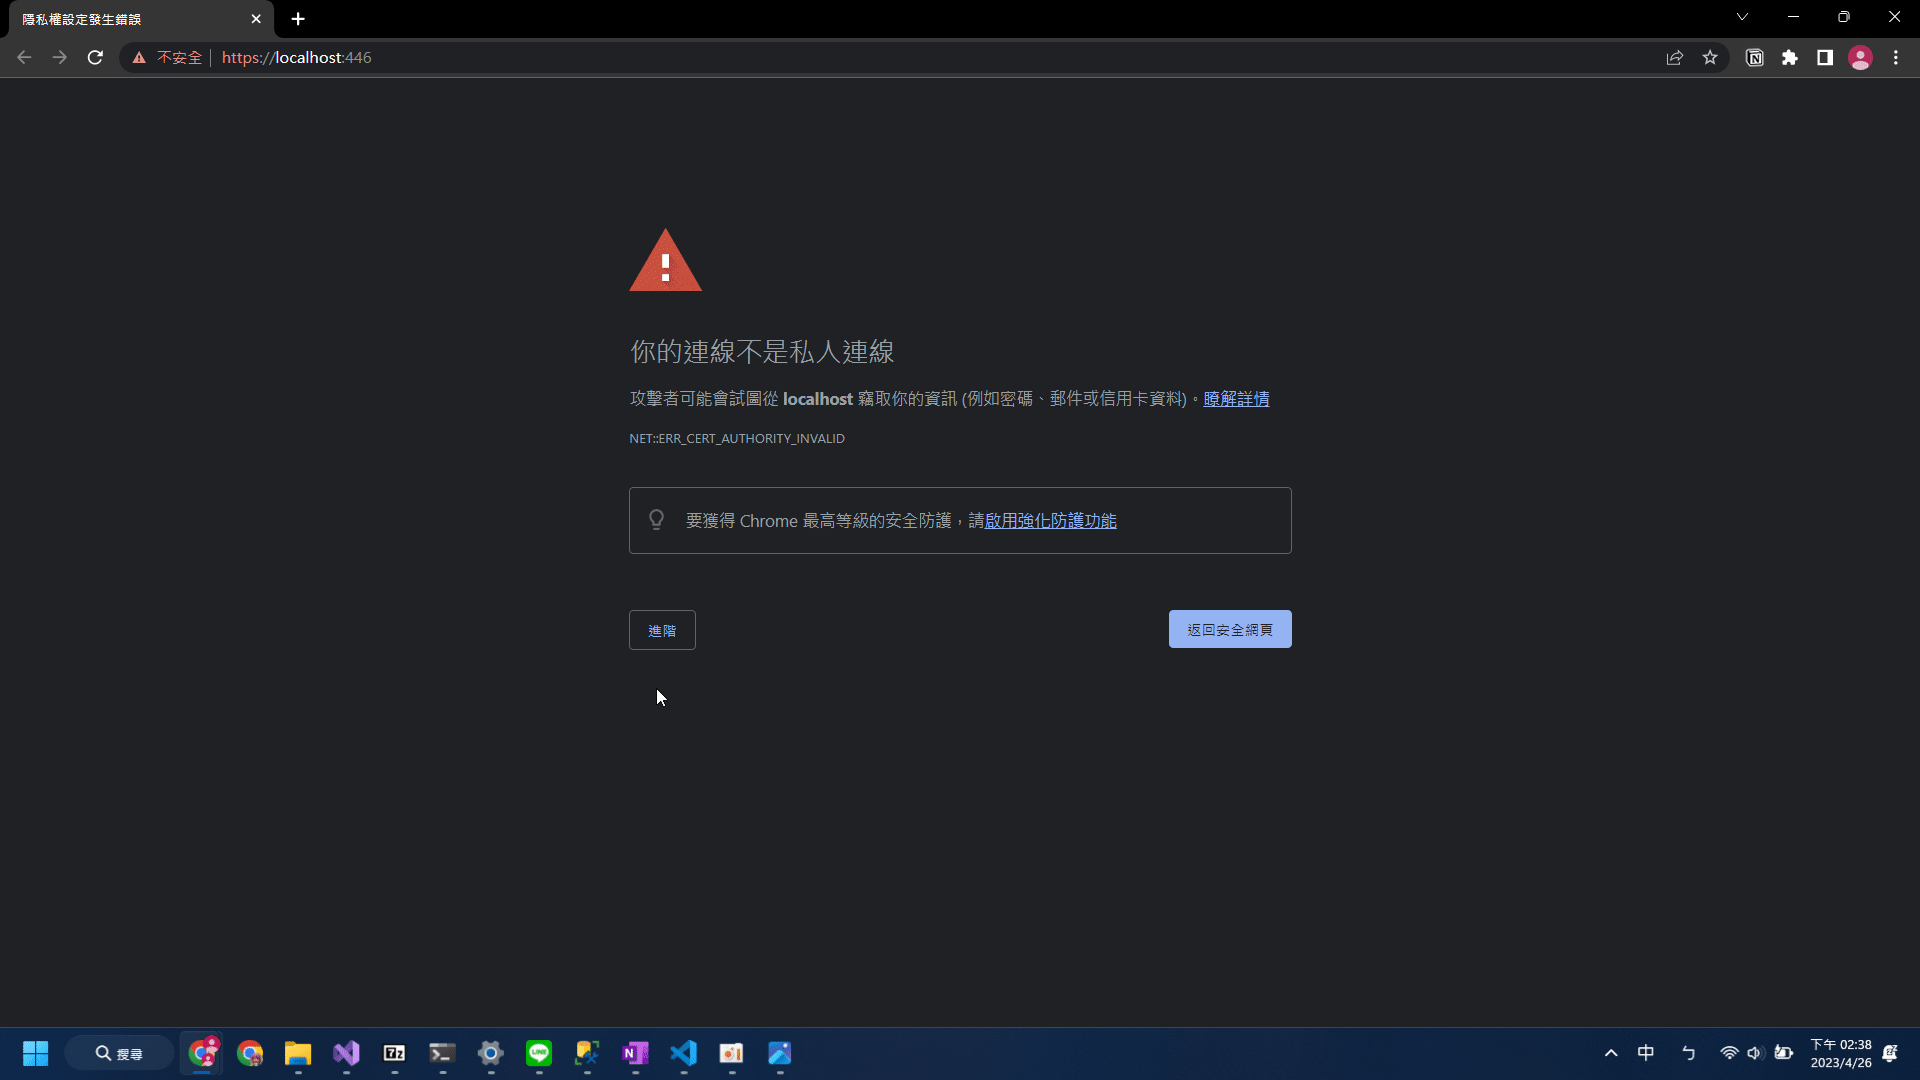
4.appsettings.json(重要)
{
"fido2": {
//設定網站名稱
"serverDomain": "localhost",
//設定要使用WebAuthn網域,與網站網域相同
"origins": [ "https://localhost:446/" ], //非localhost網域後面不能加: port號
"timestampDriftTolerance": 300000
},
"Logging": {
"LogLevel": {
"Default": "Information",
"Microsoft.AspNetCore": "Warning"
}
},
"AllowedHosts": "*"
}
- 註冊金鑰程式碼
1.產生註冊金鑰選項
1-1.Vue 前端
MakeCredentialOptions(){
let me = this;
//輸入帳號
let username = me.username;
//輸入顯示名稱
let displayName = me.displayName;
// none 自驗式(瀏覽器驗證),direct 直接驗證,indirect 間接式驗證
// possible values: none, direct, indirect
let attestation_type = "direct";
// platform : 單一平台,cross-platform 跨平台驗證
// possible values: <empty>, platform, cross-platform
let authenticator_attachment = "";
//用於指定在認證過程中要求的用戶驗證方式。它可以有三個值(預設preferred)
//"required":以指紋識別,PIN 碼,U2F key或其他方式驗證。
//"preferred":以指紋識別或 PIN 碼進行驗證。
//"discouraged":以YubiKey Bio或指紋辨識進行驗證。
// possible values: preferred, required, discouraged
let user_verification = "preferred";
// possible values: true,false
let require_resident_key = false;
//傳輸資料到後端產生選項
const data = {
username: username,
displayName: displayName,
attType: attestation_type,
authType: authenticator_attachment,
userVerification: user_verification,
requireResidentKey: require_resident_key
};
me.loading = true;
axios.post('https://localhost/api/Fido2/MakeCredentialOptions',data).then((response) => {
if(response.status == 200){
if (response.data.status == "error"){
alert(response.data.errorMessage);
me.loading = false;
}else{
//取得選項製造認證金鑰
me.MakeFido2Credential(response.data);
}
}
});
}
1-2.Controller 後端
//產生認證選項
[HttpPost]
[Route("makeCredentialOptions")]
public async Task<string> MakeCredentialOptions(MakeCredentialOptionsRequest req)
{
try
{
//檢查用戶名稱是否空白
if (string.IsNullOrEmpty(req.Username))
{
req.Username = $"{req.DisplayName} (Usernameless user created at {DateTime.UtcNow})";
}
//建立Fido2User模型
// 1. Get user from DB by req.Username (in our example, auto create missing users)
var user = new Fido2User
{
DisplayName = req.DisplayName,
Name = req.Username,
Id = Encoding.UTF8.GetBytes(req.Username) // byte representation of userID is required
};
//取得user多個Key
// 2. Get user existing keys by req.Username
var existingKeys = new List<PublicKeyCredentialDescriptor>();
//使用內部認證器
var Transports = new AuthenticatorTransport[] { AuthenticatorTransport.Internal };
//取得已存在的帳號認證
var credentialDatas = await _dbContext.DataBaseCredentials
.Where(x => x.UserId == req.Username)
.AsNoTracking()
.ToListAsync();
if (credentialDatas.Count > 0)
credentialDatas.ForEach(delegate (DataBaseCredential credentialData) {
//產生已存在的憑證
var existingCredential = new PublicKeyCredentialDescriptor();
existingCredential.Id = credentialData.CredentialId;
existingCredential.Transports = Transports;
existingKeys.Add(existingCredential);
});
//建立選項
// 3. Create options
var authenticatorSelection = new AuthenticatorSelection
{
RequireResidentKey = req.RequireResidentKey,
//是否讓認證器選擇使用者 預設Preferred
UserVerification = UserVerificationRequirement.Preferred
};
//檢查是否有設定認證類型
if (!string.IsNullOrEmpty(req.AuthType))
authenticatorSelection.AuthenticatorAttachment = req.AuthType.ToEnum<AuthenticatorAttachment>();
//設定額外選項
var exts = new AuthenticationExtensionsClientInputs()
{
Extensions = true,
UserVerificationMethod = true
};
//取得新的憑證選項
var options = _fido2.RequestNewCredential(user, existingKeys, authenticatorSelection, req.AttType.ToEnum<AttestationConveyancePreference>(), exts);
//回傳選項到前端
return options.ToJson();
}
catch (Exception e)
{
return new CredentialCreateOptions { Status = "error", ErrorMessage = e.Message }.ToJson();
}
}
2.產生註冊金鑰
2-1.Vue 前端
async MakeFido2Credential(publicKeyCredentialCreationOptions){
let me = this;
//將challenge碼與id 轉成 Uint8Array
publicKeyCredentialCreationOptions.challenge = me._base64ToArrayBuffer(publicKeyCredentialCreationOptions.challenge);
publicKeyCredentialCreationOptions.user.id = me._base64ToArrayBuffer(publicKeyCredentialCreationOptions.user.id);
publicKeyCredentialCreationOptions.excludeCredentials.forEach(element =>{
element.id = me._base64ToArrayBuffer(element.id);
})
var newCredential = null
try{
//取得認證金鑰並存在電腦中
newCredential = await navigator.credentials.create({
publicKey: publicKeyCredentialCreationOptions
});
}
catch{
me.loading = false;
alert("認證失敗");
return;
}
publicKeyCredentialCreationOptions.challenge = me._arrayBufferToBase64(publicKeyCredentialCreationOptions.challenge);
publicKeyCredentialCreationOptions.user.id = me._arrayBufferToBase64(publicKeyCredentialCreationOptions.user.id );
publicKeyCredentialCreationOptions.excludeCredentials.forEach(element =>{
element.id = me._arrayBufferToBase64(element.id);
});
//回傳金鑰內容到資料庫
//attestationObject 金鑰認證內容
let attestationObject = new Uint8Array(newCredential.response.attestationObject);
//認證客戶端內容
let clientDataJSON = new Uint8Array(newCredential.response.clientDataJSON);
//認證ID
let rawId = new Uint8Array(newCredential.rawId);
const data = {
jsonOptions:JSON.stringify(publicKeyCredentialCreationOptions),
username:me.username,
request:{
id: newCredential.id,
rawId: me._arrayBufferToBase64(rawId),
type: newCredential.type,
extensions: newCredential.getClientExtensionResults(),
response: {
AttestationObject: me._arrayBufferToBase64(attestationObject),
clientDataJson: me._arrayBufferToBase64(clientDataJSON)
}
}
};
//回傳到資料庫儲存
axios.post('https://localhost/api/Fido2/makeCredential',data).then((response) => {
me.loading = false;
if(response.data){
alert("註冊成功");
let reurl = "";
if(me.$route.query.reurl !== undefined){
reurl = "?reurl=" + me.$route.query.reurl;
}
this.$router.push('/login' + reurl);
}
else{
alert("註冊失敗");
}
}).catch(me.loading = false);
}
2-2.Controller 後端
- Model:
DataBaseCredential :
[Table("DataBaseCredential")]
public partial class DataBaseCredential
{
[Key]
[StringLength(50)]
public string UserId { get; set; } = null!;
public byte[] CredentialId { get; set; } = null!;
public byte[] PublicKey { get; set; } = null!;
public byte[] UserHandle { get; set; } = null!;
public int SignatureCounter { get; set; }
[StringLength(50)]
public string CredType { get; set; } = null!;
public DateTime RegDate { get; set; }
[StringLength(50)]
public string AaGuid { get; set; } = null!;
}
MakeCredentialRequest :
public class MakeCredentialRequest
{
[Required]
public string jsonOptions { get; set; } = null!;
[Required]
public string username { get; set; } = null!;
public AuthenticatorAttestationRawResponse request { get; set; }
}
- 程式:
//產生認證
[HttpPost]
[Route("makeCredential")]
public async Task<bool> MakeCredential(MakeCredentialRequest req, CancellationToken cancellationToken)
{
try
{
var jsonOptions = req.jsonOptions;
var username = req.username;
var attestationResponse = req.request;
//取得憑證選項
// 1. get the options we sent the client
var options = CredentialCreateOptions.FromJson(jsonOptions);
// 2. Create callback so that lib can verify credential id is unique to this user
IsCredentialIdUniqueToUserAsyncDelegate callback = async (args, cancellationToken) =>
{
var userData = await _dbContext.DataBaseCredentials
.Where(x => x.CredentialId == args.CredentialId)
.AsNoTracking()
.ToListAsync();
if (userData.Count > 0)
return false;
return true;
};
//認證並產生憑證
// 2. Verify and make the credentials
var success = await _fido2.MakeNewCredentialAsync(attestationResponse, options, callback, cancellationToken: cancellationToken);
var data = success.Result;
if (data == null)
return false;
//將資料存到伺服器
// 3. Store the credentials in db
var credentialData = new DataBaseCredential()
{
AaGuid = data.Aaguid.ToString(),
CredType = data.CredType,
SignatureCounter = Convert.ToInt32(data.Counter),
CredentialId = data.CredentialId,
RegDate = DateTime.Now,
PublicKey = data.PublicKey,
UserHandle = data.User.Id,
UserId = username
};
_dbContext.DataBaseCredentials.Add(credentialData);
await _dbContext.SaveChangesAsync();
// 4. return "ok" to the client
return true;
}
catch (Exception e)
{
return false;
}
}
- 登入金鑰程式碼
1.產生登入金鑰選項
1-1.Vue 前端
GetFido2CredentialId()
{
let me = this;
//取得帳號的認證ID與產生認證金鑰內容
me.loading = true;
axios.get('https://localhost/api/Fido2/GetCredentialId/'+ me.username).then((response) => {
console.log(response);
if(response.status == 200){
if (response.data.status == "error"){
alert(response.data.errorMessage);
me.loading = false;
}else{
me.MakeFido2Assertion(response.data);
}
}
});
}
1-2.Controller 後端
//取得認證選項
[HttpGet]
[Route("GetCredentialId/{username}")]
public async Task<string> GetCredentialId(string username)
{
var userVerification = string.Empty;
var credentialDatas = await _dbContext.DataBaseCredentials
.Where(x => x.UserId == username)
.AsNoTracking()
.ToListAsync();
if (credentialDatas == null)
return string.Empty;
try
{
//設定認證方式
var existingCredentials = new List<PublicKeyCredentialDescriptor>();
//使用內部認證器
var Transports = new AuthenticatorTransport[] {AuthenticatorTransport.Internal };
//產生已存在的憑證
var existingCredential = new PublicKeyCredentialDescriptor();
credentialDatas.ForEach(delegate (DataBaseCredential credentialData) {
//產生已存在的憑證
var existingCredential = new PublicKeyCredentialDescriptor();
existingCredential.Id = credentialData.CredentialId;
existingCredential.Transports = Transports;
existingCredentials.Add(existingCredential);
});
var exts = new AuthenticationExtensionsClientInputs()
{
UserVerificationMethod = true
};
//產生認證選項
// 3. Create options
var uv = UserVerificationRequirement.Preferred;
var options = _fido2.GetAssertionOptions(
existingCredentials,
uv,
exts
);
//選項回傳到前端
// 5. Return options to client
return options.ToJson();
}
catch (Exception e)
{
return new AssertionOptions { Status = "error", ErrorMessage = e.Message }.ToJson();
}
}
.認證登入金鑰是否正確
2-1.Vue 前端
async MakeFido2Assertion(credentialId)
{
let me = this;
//將challenge碼與id 轉成 Uint8Array
var challengeBytes = me._base64ToArrayBuffer(credentialId.challenge);
credentialId.allowCredentials.forEach(element =>{
element.id = me._base64ToArrayBuffer(element.id);
});
credentialId.challenge = challengeBytes;
//取得登入金鑰物件
var assertion = null
try{
assertion = await navigator.credentials.get({
publicKey: credentialId
});
}
catch{
me.loading = false;
alert("認證失敗");
return
}
//回傳金鑰選項內容
credentialId.challenge = me._arrayBufferToBase64(credentialId.challenge);
credentialId.allowCredentials[0].id = me._arrayBufferToBase64(credentialId.allowCredentials[0].id);
// Move data into Arrays incase it is super long
//認證資料
let authData = new Uint8Array(assertion.response.authenticatorData);
//客戶端認證金鑰
let clientDataJSON = new Uint8Array(assertion.response.clientDataJSON);
//認證ID
let rawId = new Uint8Array(assertion.rawId);
//加密後的簽名
let sig = new Uint8Array(assertion.response.signature);
const data = {
jsonOptions: JSON.stringify(credentialId),
request:{
id: assertion.id,
rawId: me._arrayBufferToBase64(rawId),
type: assertion.type,
extensions: assertion.getClientExtensionResults(),
response: {
authenticatorData: me._arrayBufferToBase64(authData),
clientDataJson: me._arrayBufferToBase64(clientDataJSON),
signature: me._arrayBufferToBase64(sig)
}
}
};
//回傳到後端認證
axios.post('https://localhost/api/Fido2/makeAssertion',data).then((response) => {
me.loading = false;
if(response.status == 200){
if(response.data != null){
if (me.$route.query.reurl == undefined)
this.$router.push('/loginfinsh');
else{
var test = window.open(this.$route.query.reurl);
window.opener=null;
test.close();
window.close();
}
}
else
alert("登入失敗");
}
}).catch(me.loading = false);
}
2-2.Controller 後端
- Model:
MakeAssertionRequest :
public class MakeAssertionRequest
{
[Required]
public string jsonOptions { get; set; } = null!;
[Required]
public AuthenticatorAssertionRawResponse request { get; set; }
}
- 程式:
[HttpPost]
[Route("makeAssertion")]
public async Task<string> MakeAssertion(MakeAssertionRequest req, CancellationToken cancellationToken)
{
try
{
// 1. Get the assertion options we sent the client
//取得認證選項
var jsonOptions = req.jsonOptions;
var Assertionoptions = AssertionOptions.FromJson(jsonOptions);
var clientResponse = req.request;
var credentialId = clientResponse.Id;
var credentialData = await _dbContext.DataBaseCredentials
.Where(x => x.CredentialId == credentialId)
.AsNoTracking()
.SingleOrDefaultAsync();
if (credentialData == null)
return string.Empty;
//取得儲存的憑證內容
var creds = new StoredCredential()
{
AaGuid = Guid.Parse(credentialData.AaGuid),
CredType = credentialData.CredType,
SignatureCounter = Convert.ToUInt32(credentialData.SignatureCounter),
Descriptor = new PublicKeyCredentialDescriptor(credentialData.CredentialId),
RegDate = credentialData.RegDate,
PublicKey = credentialData.PublicKey,
UserHandle = credentialData.UserHandle,
UserId = credentialData.CredentialId
};
//取得憑證使用數
// 3. Get credential counter from database
var storedCounter = creds.SignatureCounter;
// 4. Create callback to check if userhandle owns the credentialId
IsUserHandleOwnerOfCredentialIdAsync callback = async (args, cancellationToken) =>
{
//將資料庫資料拉出相同UserHandle
var credentialDatas = await _dbContext.DataBaseCredentials
.Where(x => x.UserHandle == args.UserHandle)
.AsNoTracking()
.ToListAsync();
//產生StoredCredential List
var storedCreds = new List<StoredCredential>();
//將資料轉成StoredCredential並放入StoredCredential List
credentialDatas.ForEach(delegate (DataBaseCredential credentialData) {
//產生已存在的憑證
var storedCred = new StoredCredential()
{
AaGuid = Guid.Parse(credentialData.AaGuid),
CredType = credentialData.CredType,
SignatureCounter = Convert.ToUInt32(credentialData.SignatureCounter),
Descriptor = new PublicKeyCredentialDescriptor(credentialData.CredentialId),
RegDate = credentialData.RegDate,
PublicKey = credentialData.PublicKey,
UserHandle = credentialData.UserHandle,
UserId = credentialData.CredentialId
};
storedCreds.Add(storedCred);
});
//將相同ClientId 回傳
return storedCreds.Exists(c => c.Descriptor.Id.Equals(args.CredentialId));
};
//驗證登入憑證是否合法
// 5. Make the assertion
var res = await _fido2.MakeAssertionAsync(clientResponse, Assertionoptions, creds.PublicKey, storedCounter, callback, cancellationToken: cancellationToken);
//成功則變更認證次數
// 6. Store the updated counter
credentialData.SignatureCounter = Convert.ToInt32(res.Counter);
var tokenData = await _dbContext.UserTokens
.Where(x => x.UserId == credentialData.UserId)
.AsNoTracking()
.SingleOrDefaultAsync();
if (tokenData == null) {
tokenData = new UserToken
{
UserId = credentialData.UserId,
Token = GenerateNonce(20),
Token2 = string.Empty,
};
_dbContext.UserTokens.Add(tokenData);
}
var token = tokenData.Token;
//將資料更新回資料庫
_dbContext.DataBaseCredentials.Update(credentialData);
await _dbContext.SaveChangesAsync();
// 7. return OK to client
return token;
}
catch (Exception e)
{
//return Json(new AssertionVerificationResult { Status = "error", ErrorMessage = FormatException(e) });
return string.Empty;
}
}
private string GenerateNonce(int len)
{
const string chars = "abcdefghijklmnopqrstuvwxyz123456789";
var random = new Random();
var nonce = new char[len];
for (int i = 0; i < nonce.Length; i++)
{
nonce[i] = chars[random.Next(chars.Length)];
}
return new string(nonce);
}
執行結果:
您好,我是一位初入職場的工程師。因為工作上的需求,我對Fido2NetLib系統進行了一些研究。在閱讀了您的文章後,仍有一些不太明白的地方。不知是否能夠提供相關的Git資源,以供我參考學習呢?非常感謝您的協助。